KHz Photography Blog
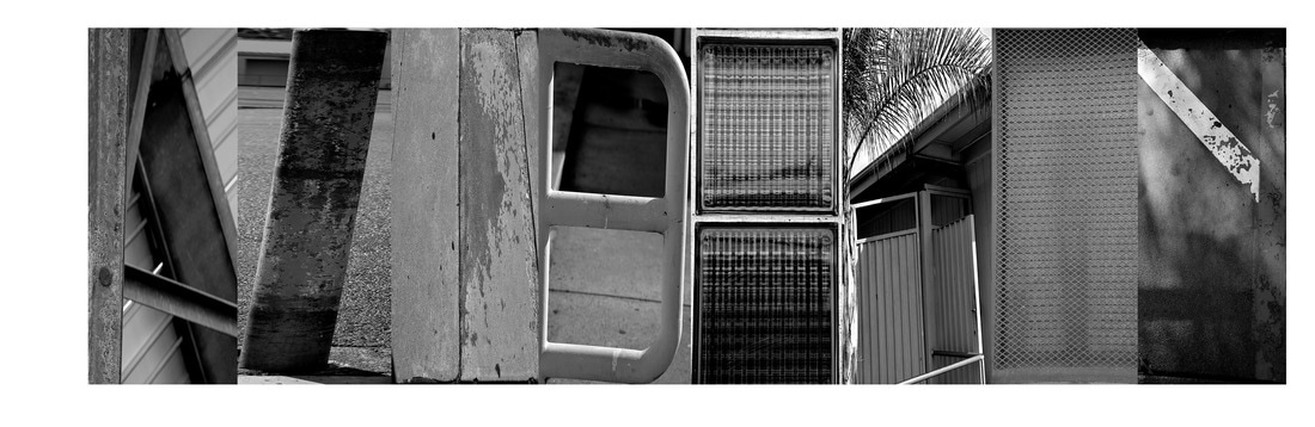
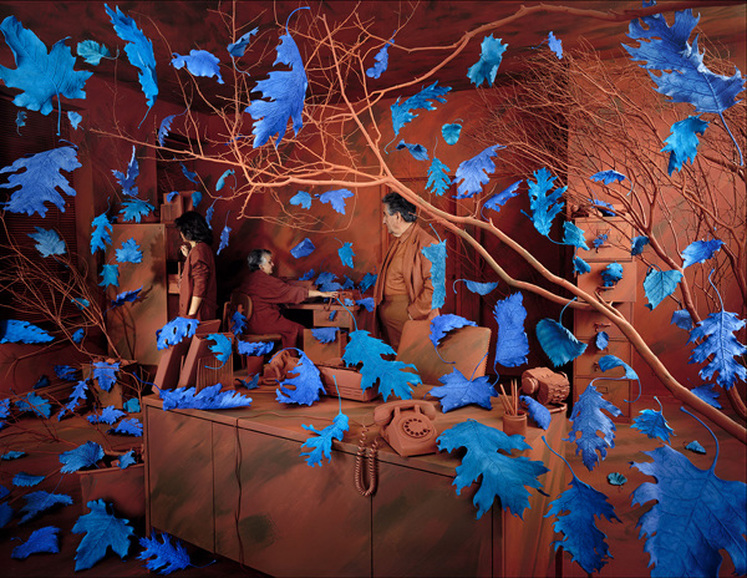
David Hockney Inspired Collage

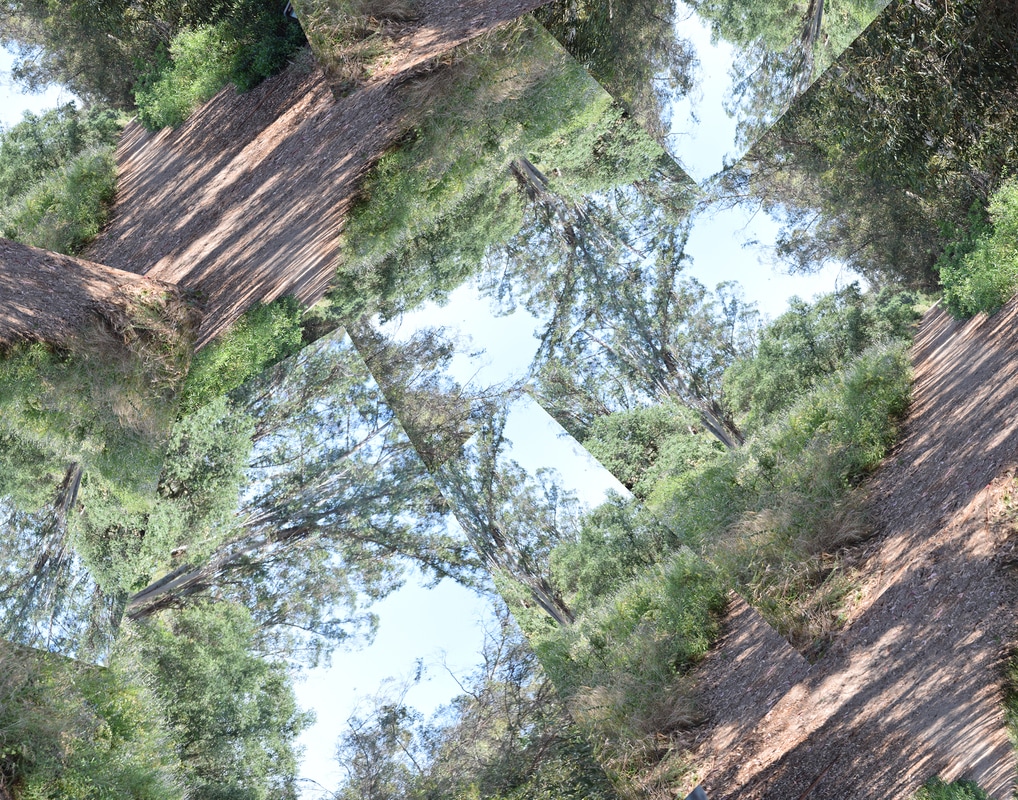
David Hockney is an English painter, printmaker, stage designer and photographer. He was born on July 9, 1937 in Bradford, United Kingdom. Hockney is considered to be one of the most influential British artists of the 20th century. His most recent series of works has been done on an iPad. the artwork that I created emulates his style because he uses a lot of different compositional rules and I did as well in the two images I created, I used leading line and rule of thirds.
What I did to create this artwork was that I first took my picture at the duckpond. I wanted to get a variety of different places at the duckpond so it would be different. After I was happy with the pictures I had taken at the duckpond then I opened up the pictures on Photoshop and just started messing around with the pictures. I would transform the pictures to rotate and flip them , and I just basically just kept doing that until I made a collage that I was happy with.
What I did to create this artwork was that I first took my picture at the duckpond. I wanted to get a variety of different places at the duckpond so it would be different. After I was happy with the pictures I had taken at the duckpond then I opened up the pictures on Photoshop and just started messing around with the pictures. I would transform the pictures to rotate and flip them , and I just basically just kept doing that until I made a collage that I was happy with.
Magazine Cover

I choose the magazine TeenVogue because I thought it would go great with my model.
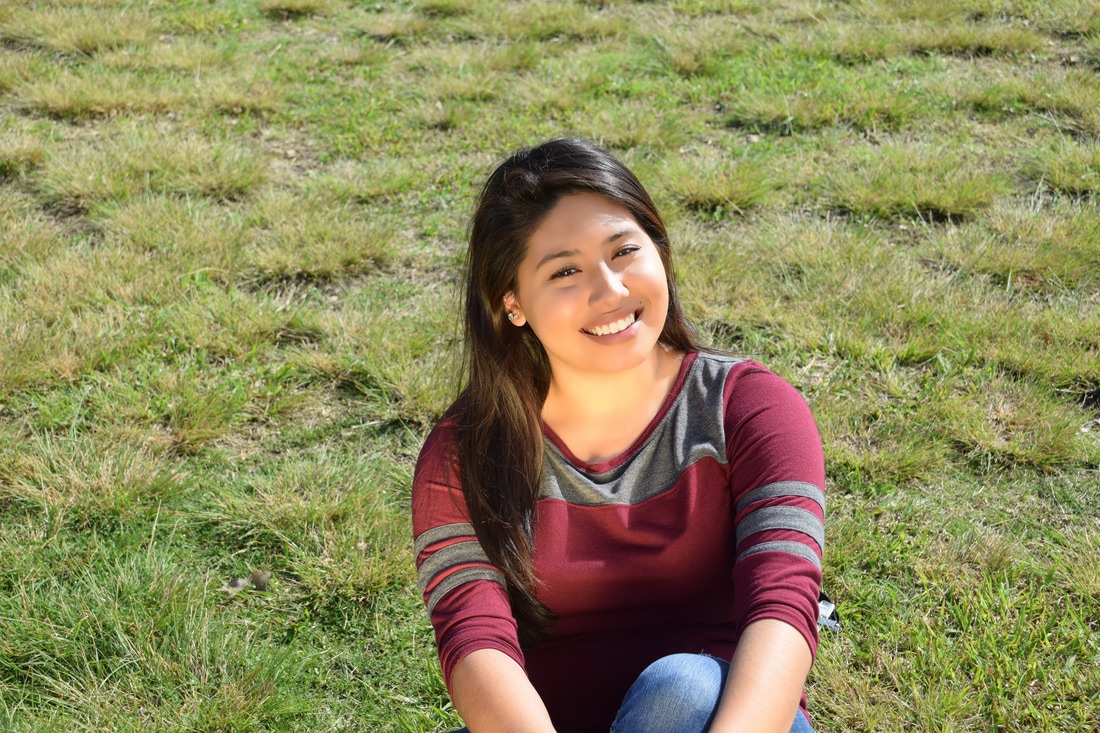
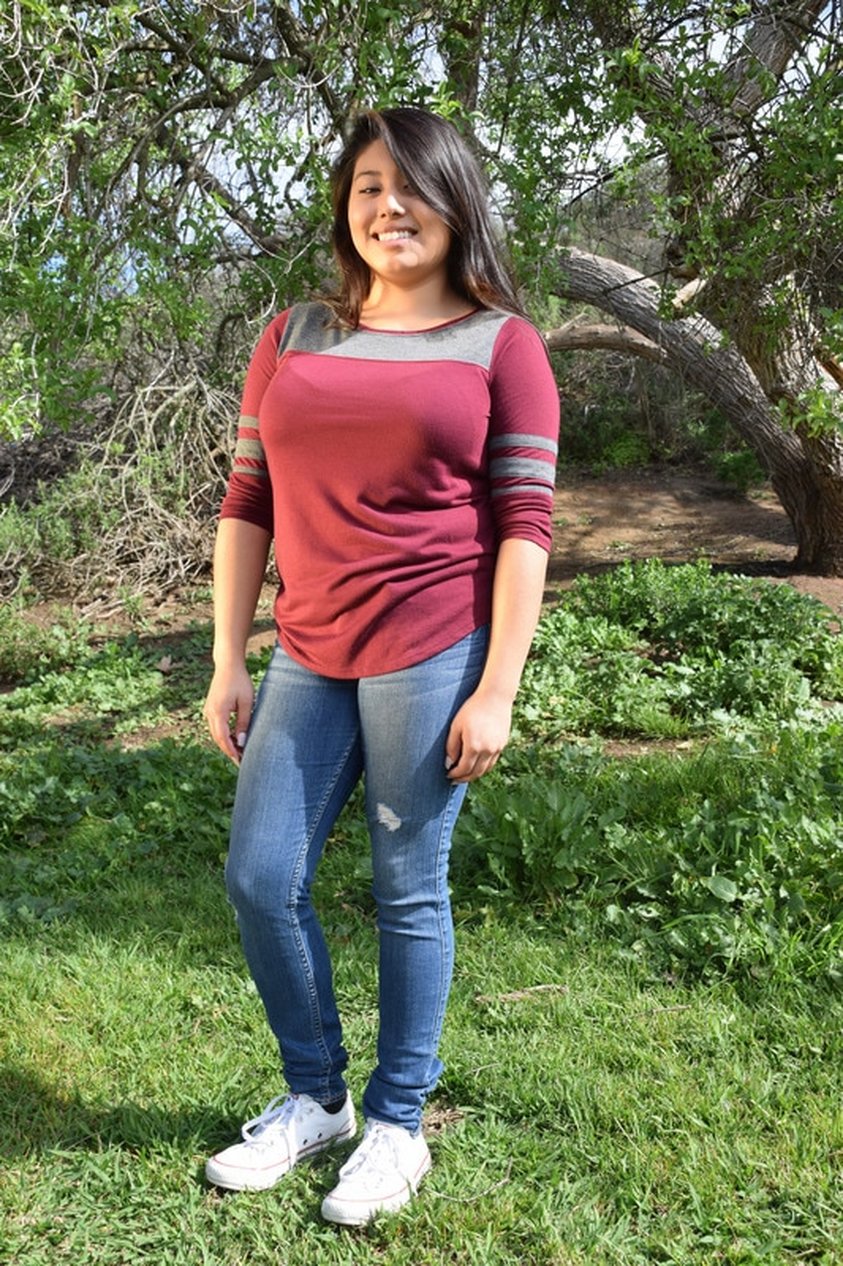
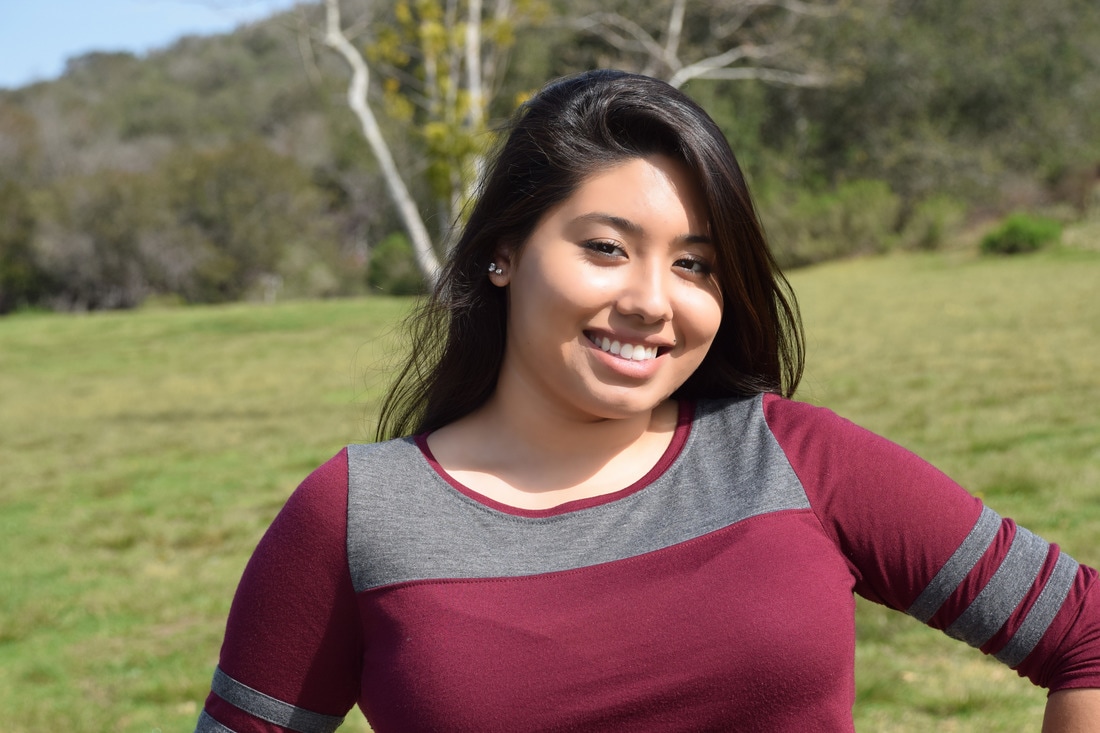
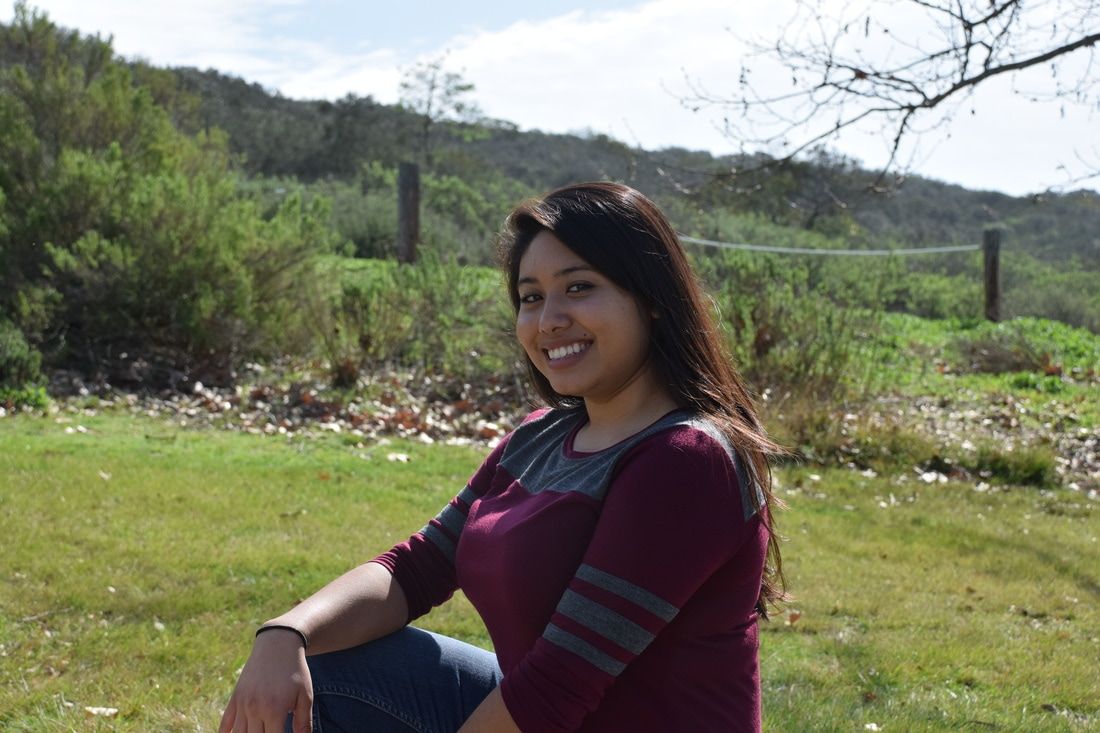
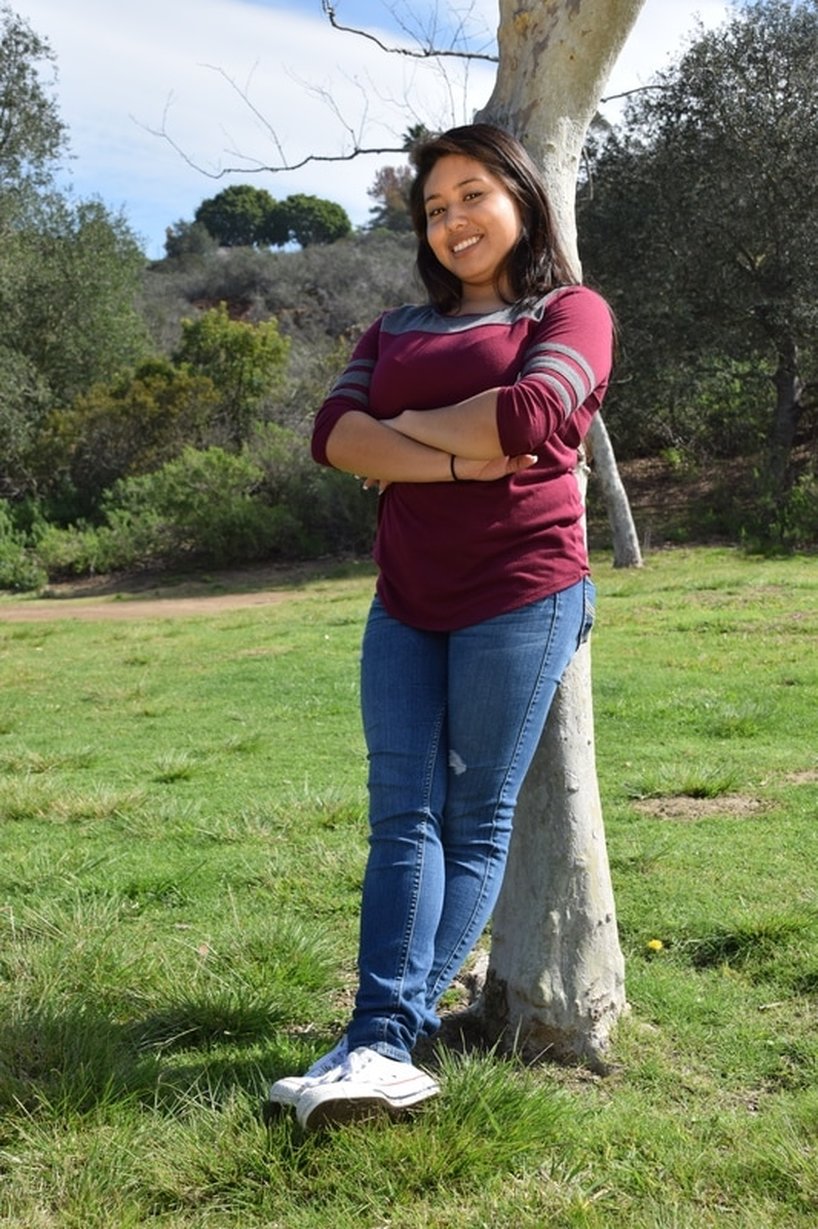
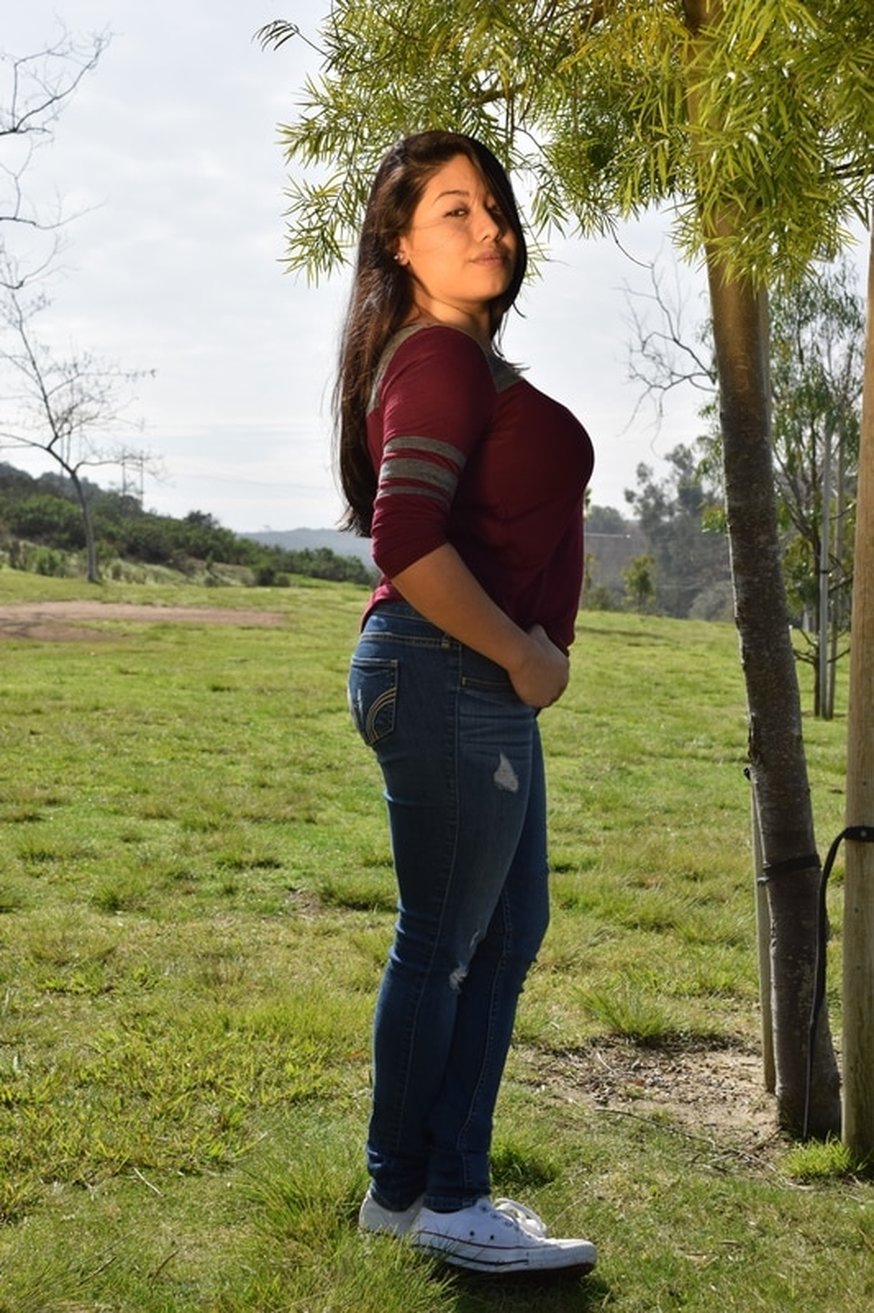
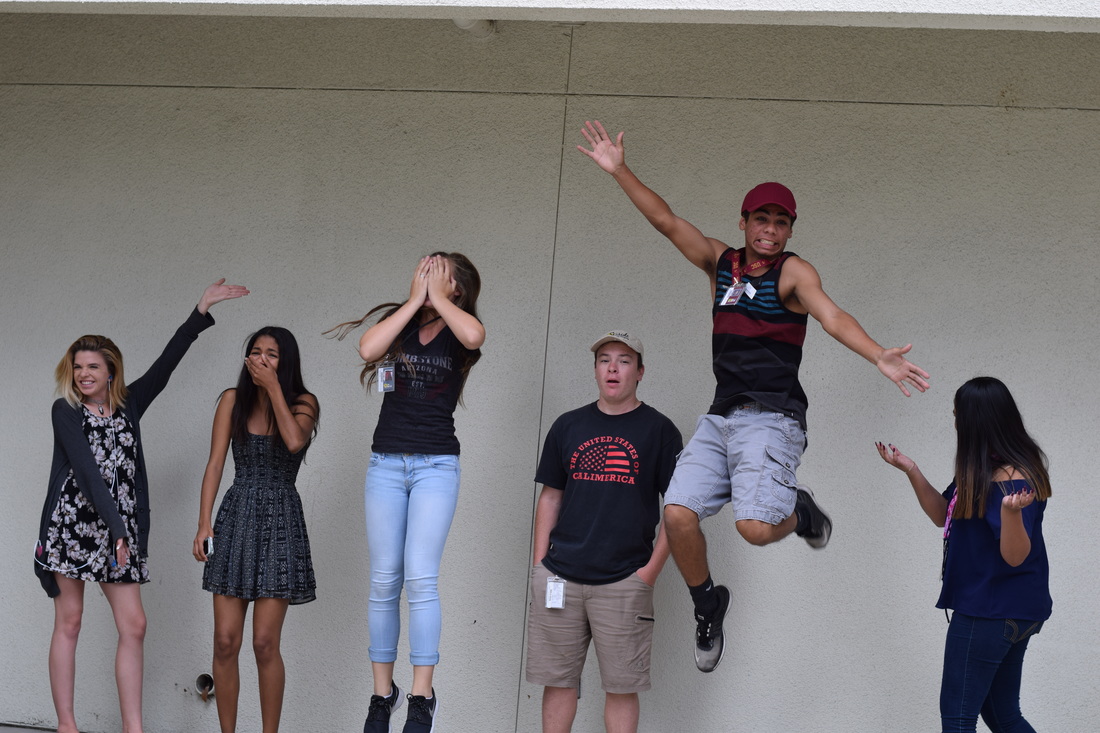
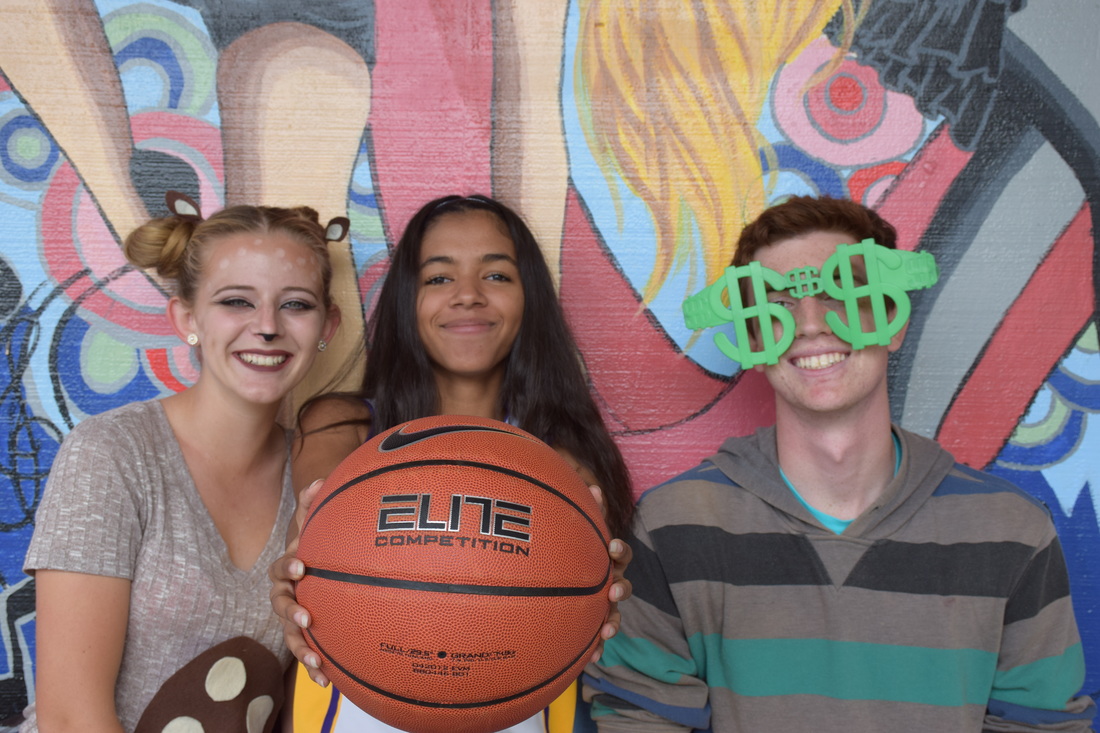
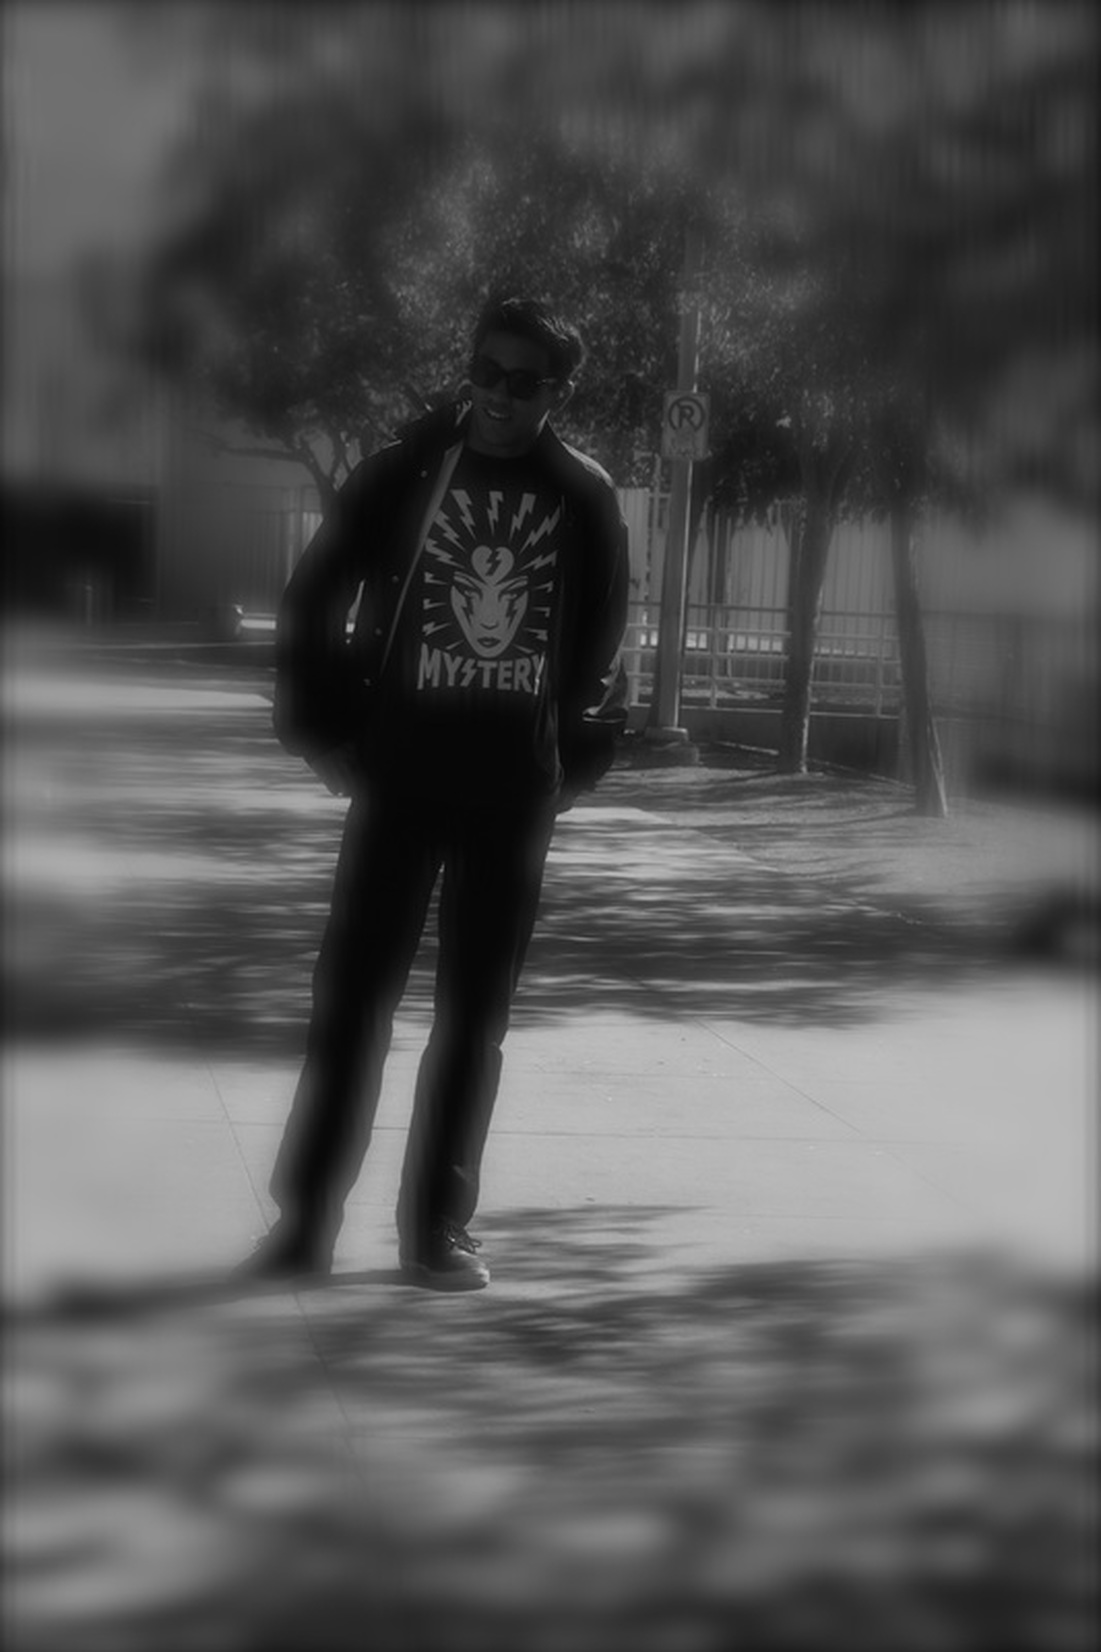
Del Mar Fair
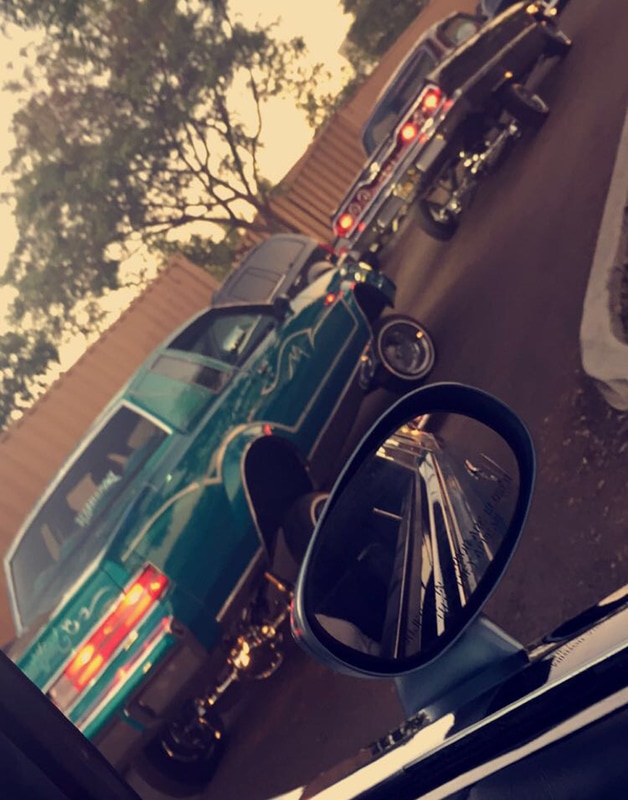
Cruising in the Low Low
This picture was taken in San Diego. The compositional rule for this picture is framing. To take this picture I used my iPhone camera. The thing I did to create this image was very simple I did Photoshop anything I only added a filter from my iPhone camera and that was basically it. I didn’t do too much edited because I didn’t think this picture needed it. My image is in the San Diego County Lifestyle division because it reflects the lifestyle of San Diego.
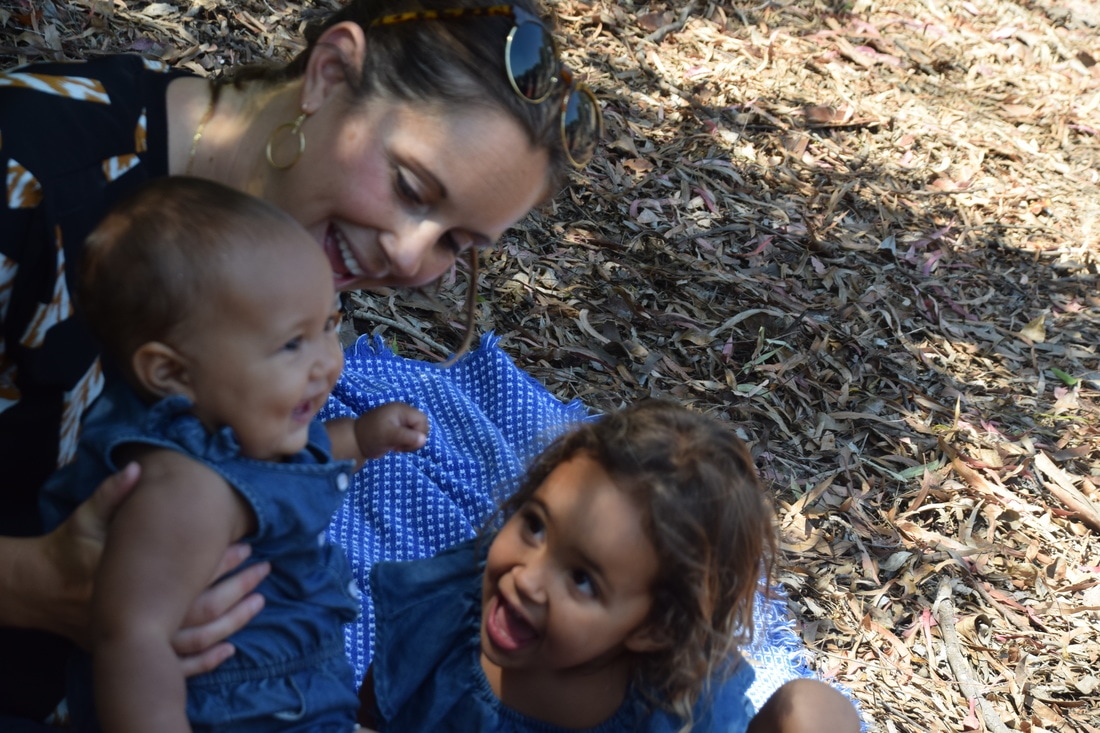
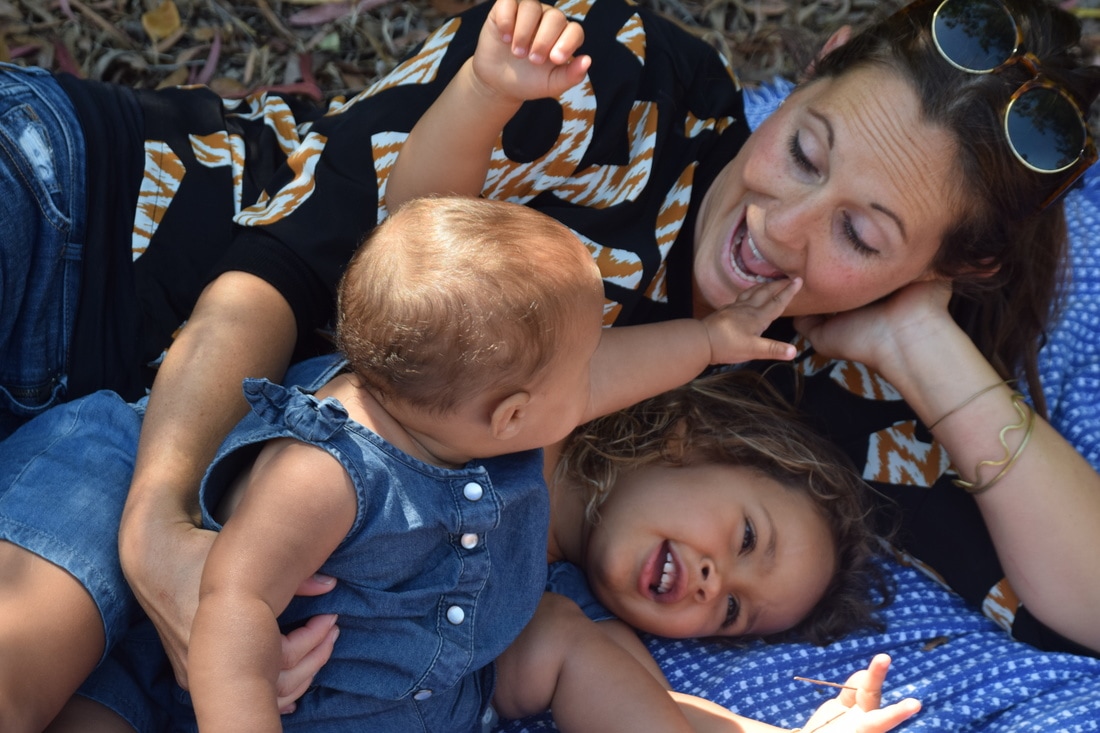
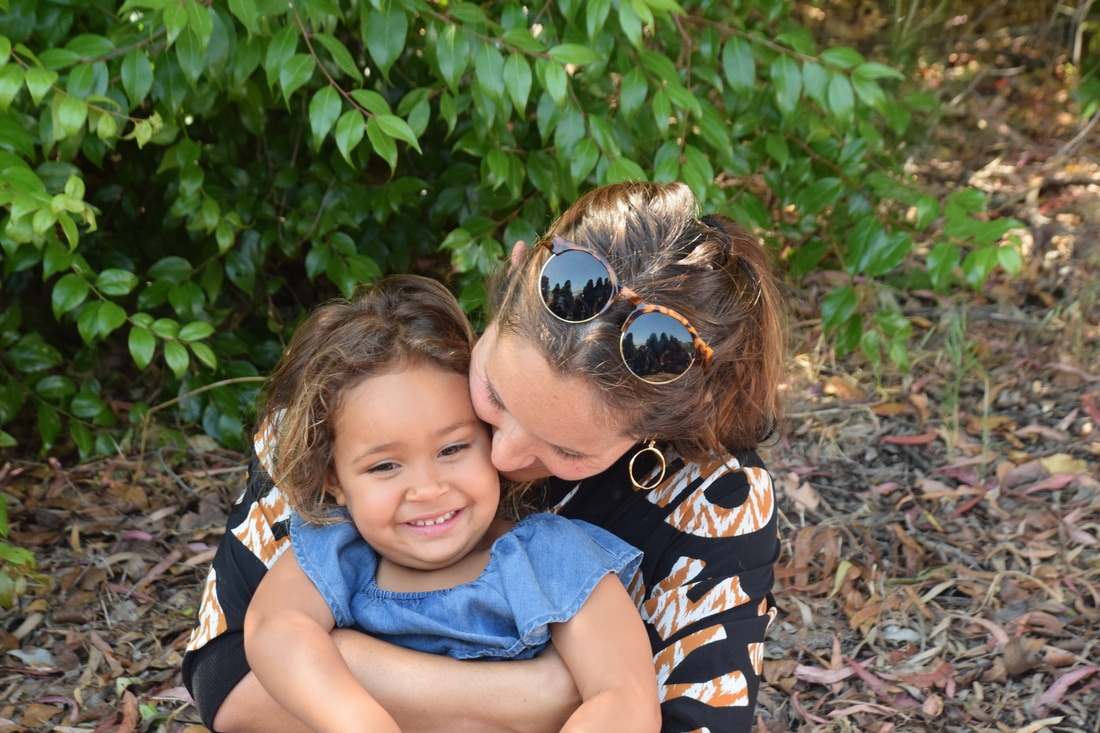
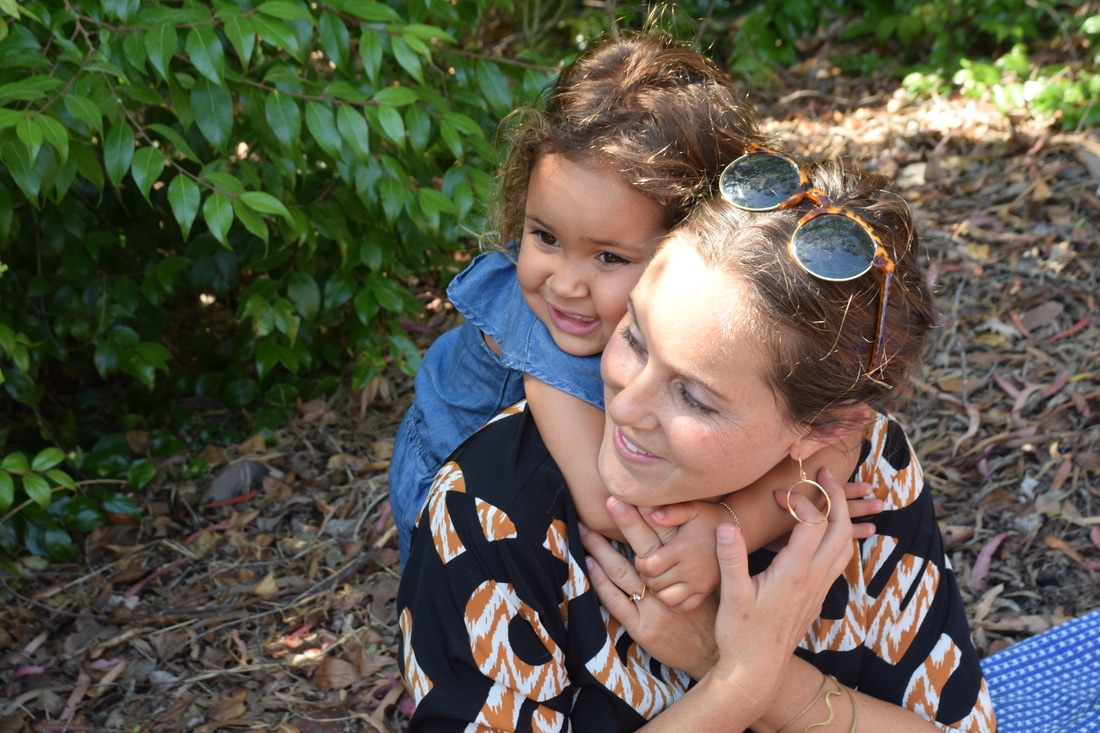
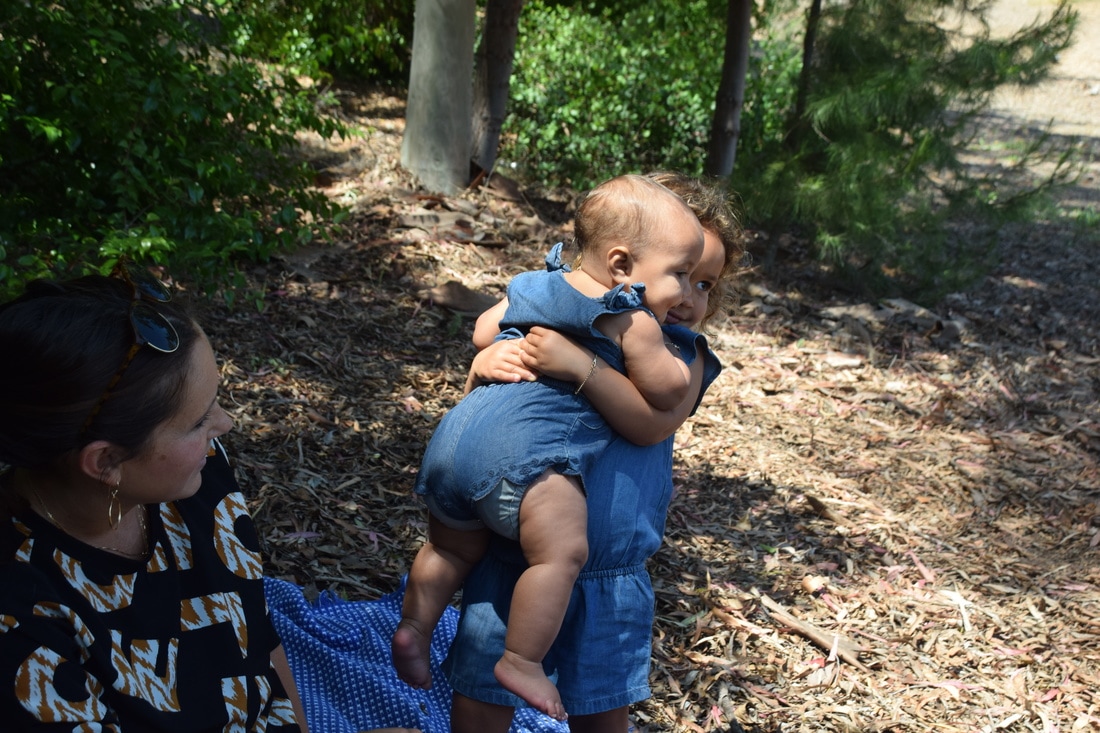
Family

shutter speed:1/60, aperture:f/8, ISO:500
shutter speed:1/80, aperture:f/8, ISO:400
shutter speed:1/125, aperture:f/8, ISO:400
shutter speed:1/100, aperture:f/8, ISO:800
shutter speed:1/90, aperture:f/8, ISO:560
shutter speed:1/250, aperture:f/8, ISO:400
Shutter Speed:1/800, ISO:400, Aperture:f/13
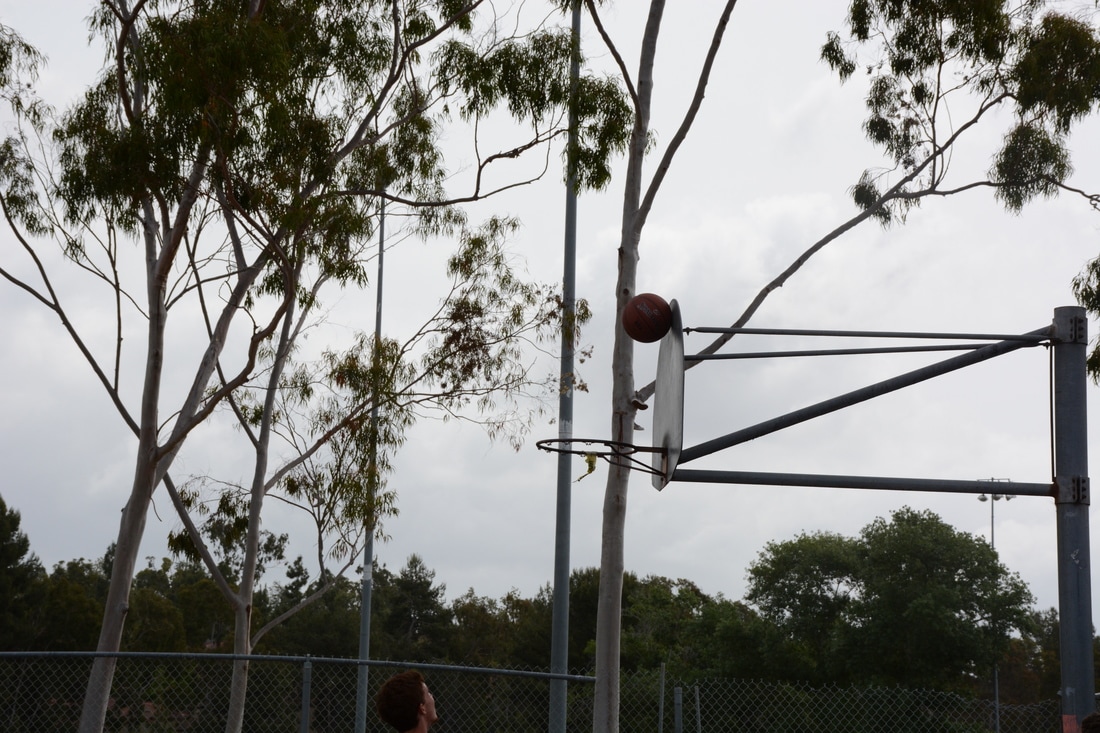
Sports

Shutter Speed:1/800, ISO:400, Aperture:f/6.3
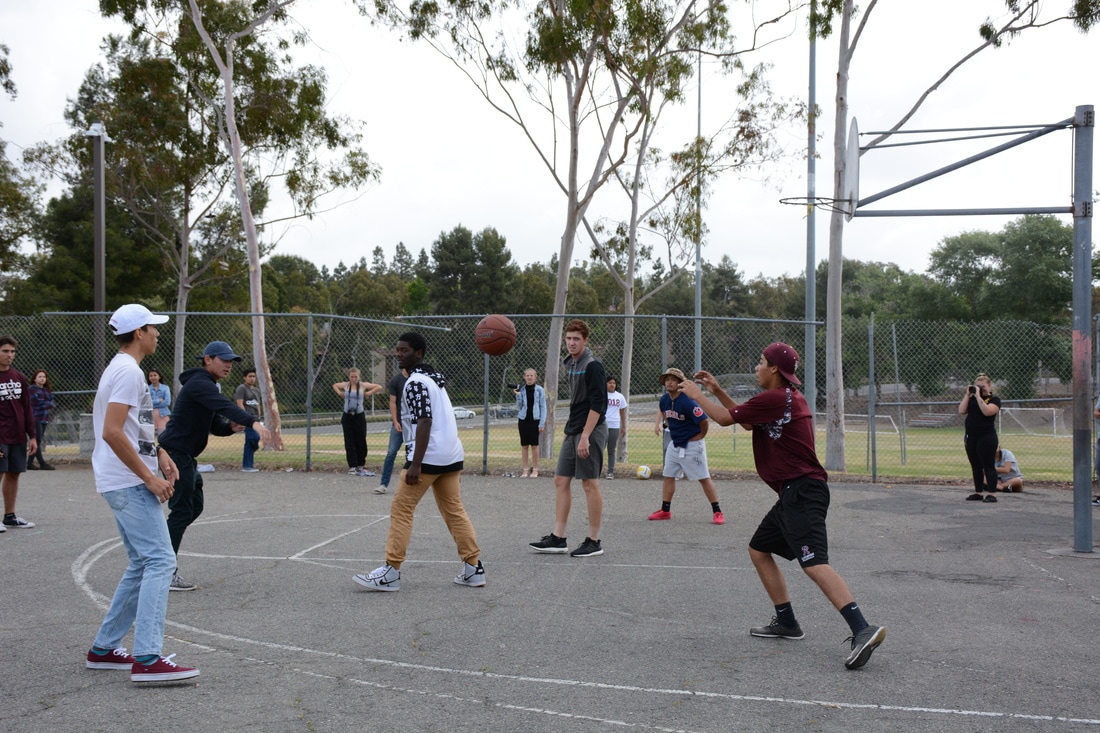
Shutter Speed:1/800, ISO:400, Aperture:f/7.1

Shutter Speed:1/800, ISO:400, Aperture:f/9
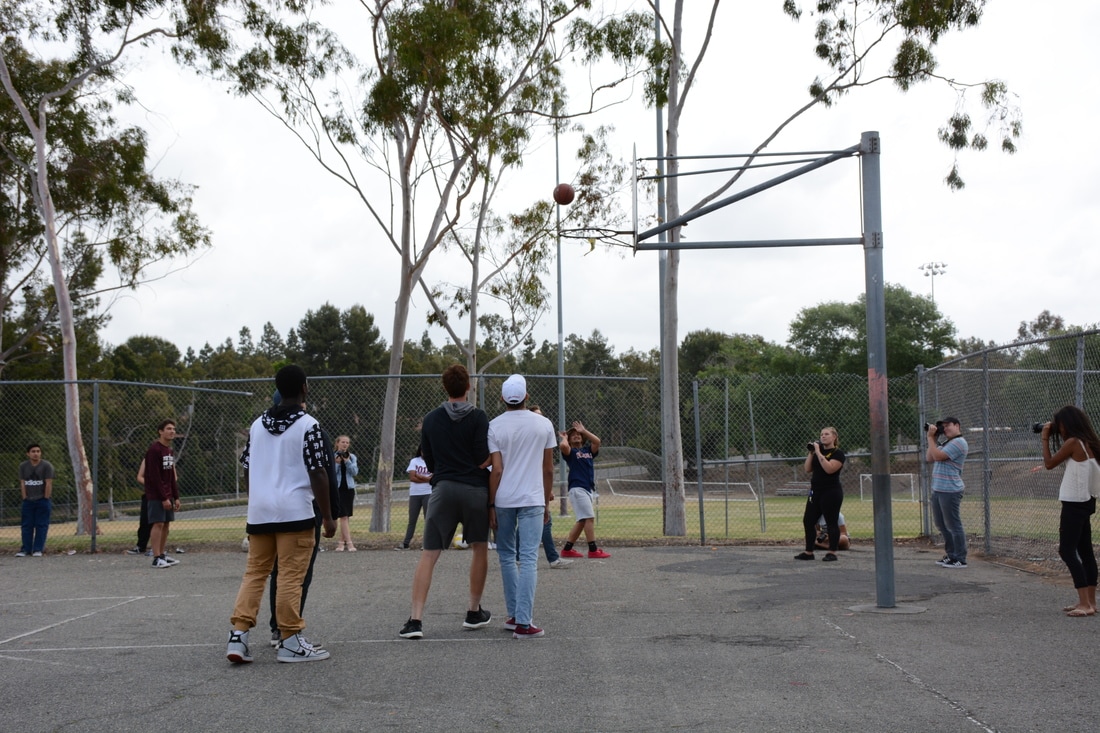
Shutter Speed:1/800, ISO:400, Aperture:f/9
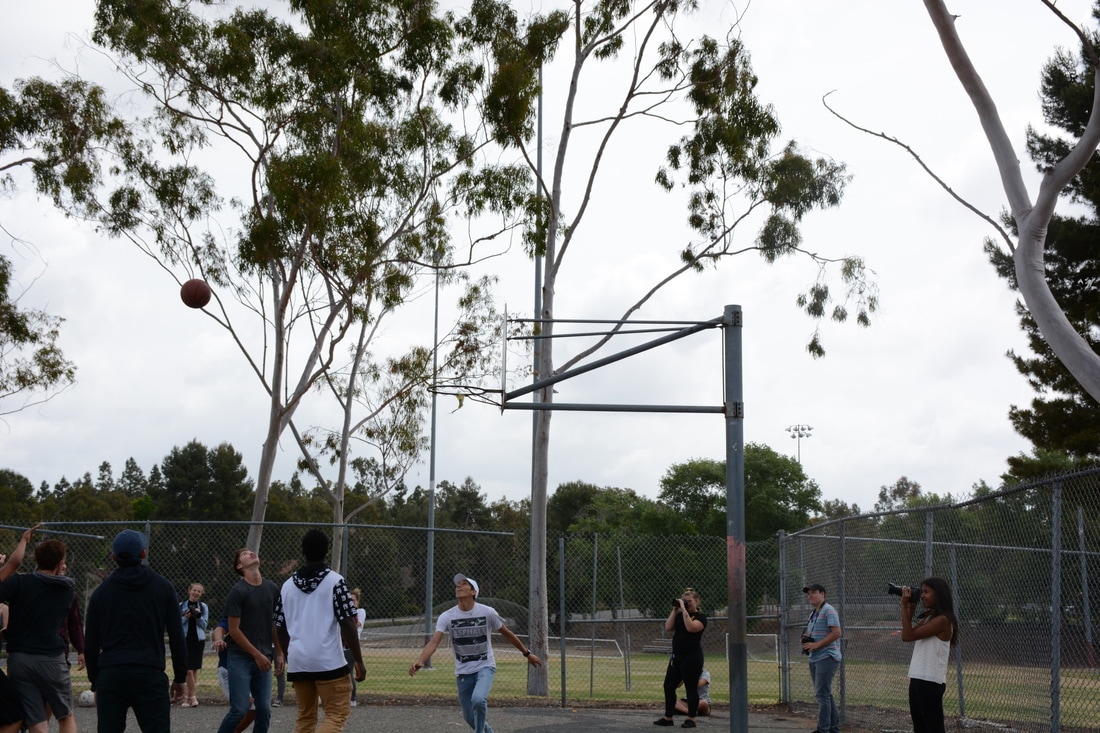
Shutter Speed:1/800, ISO:400, Aperture:f/10
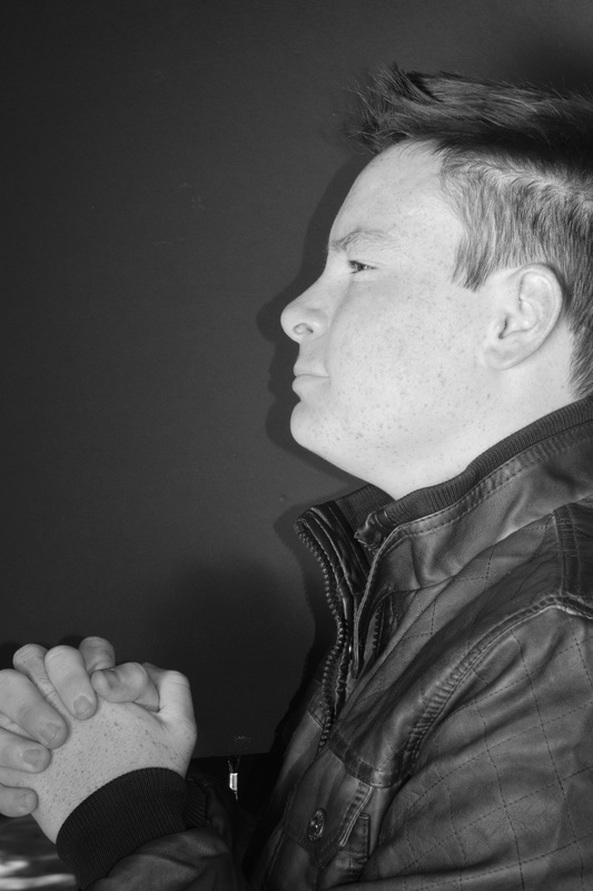
Mood Portraits
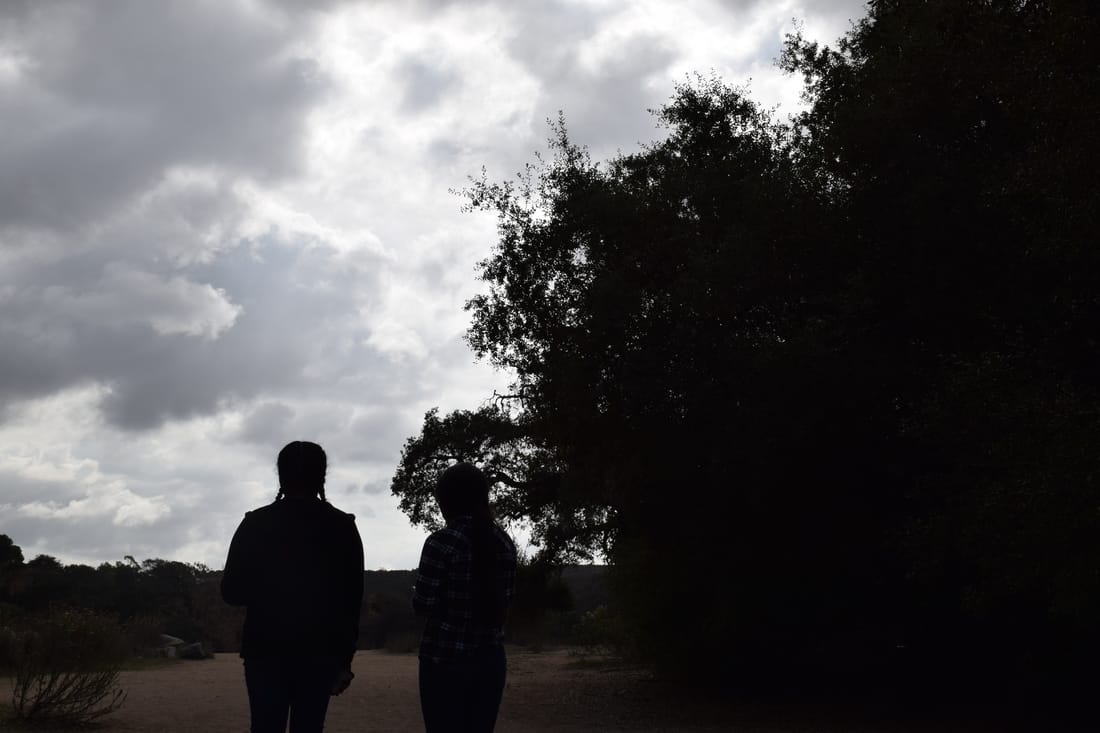
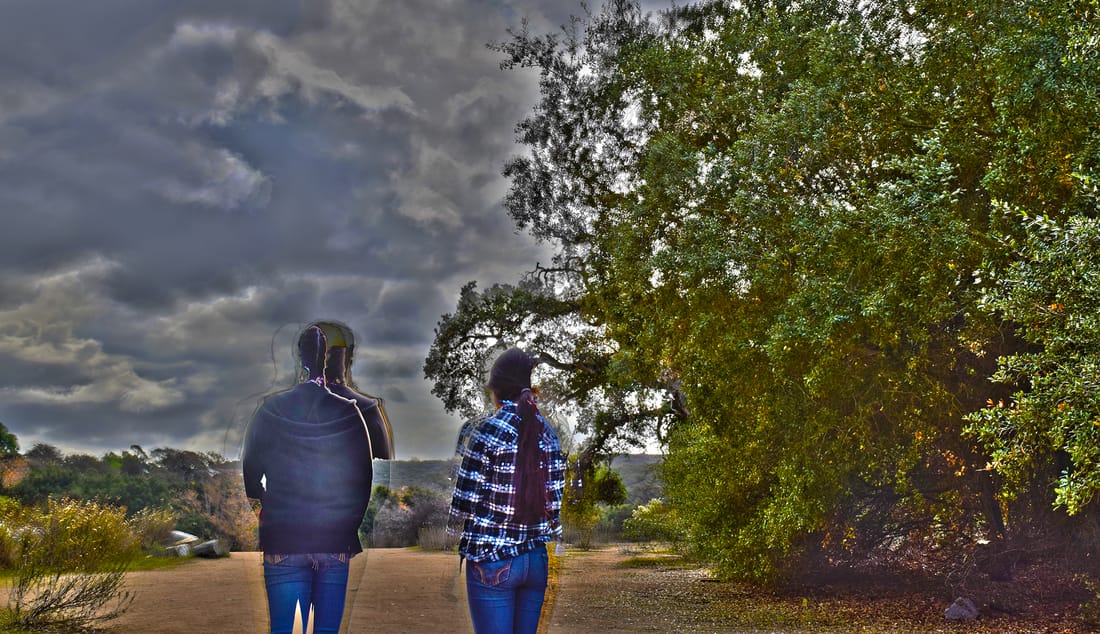
Composite Project
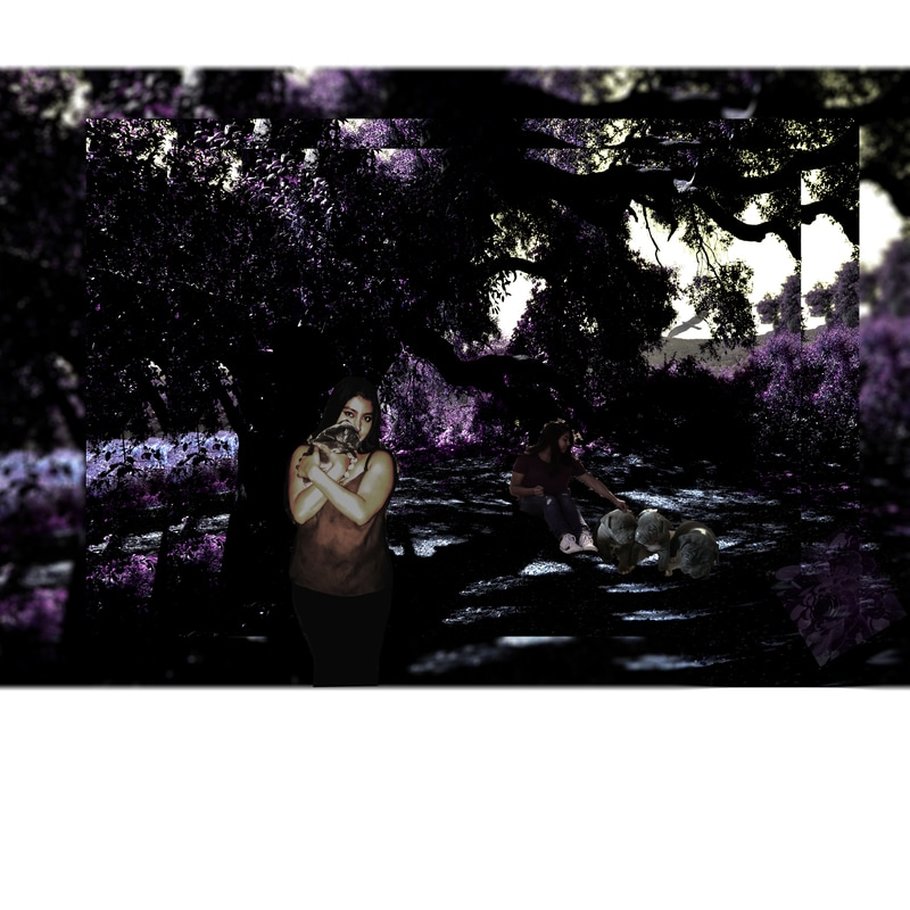
To create this image I changed the color of the background into a sort of purplish color. I also added layer masks to add in the bird, the pictures of my friends, the flower in the corner and the photo of the puppies. I adjusted the colors to all of the pictures I added in. I also blurred the outside layer of my photograph.

Quote
flying
invisible
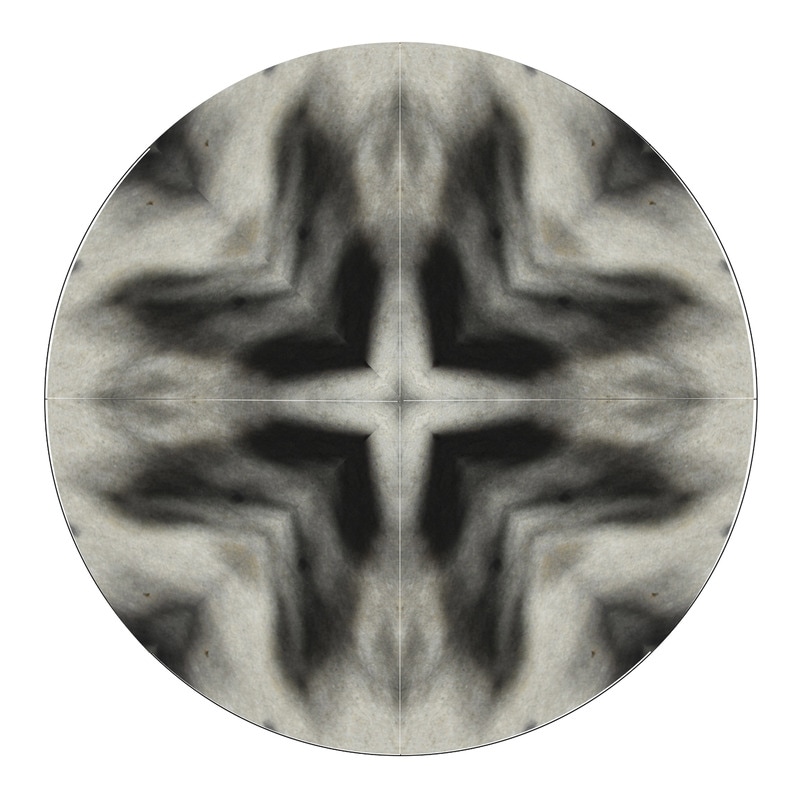
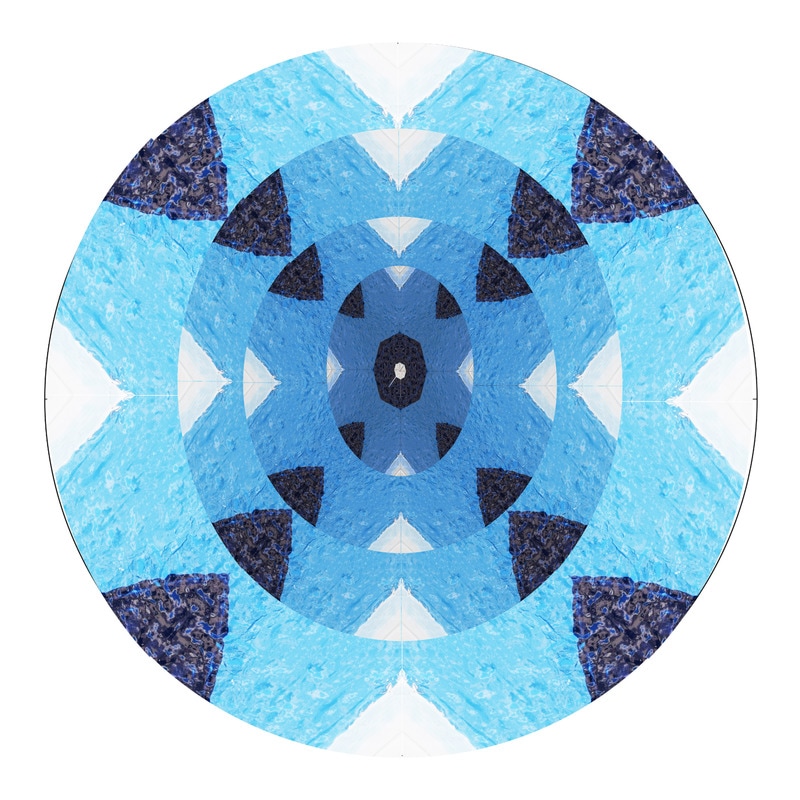
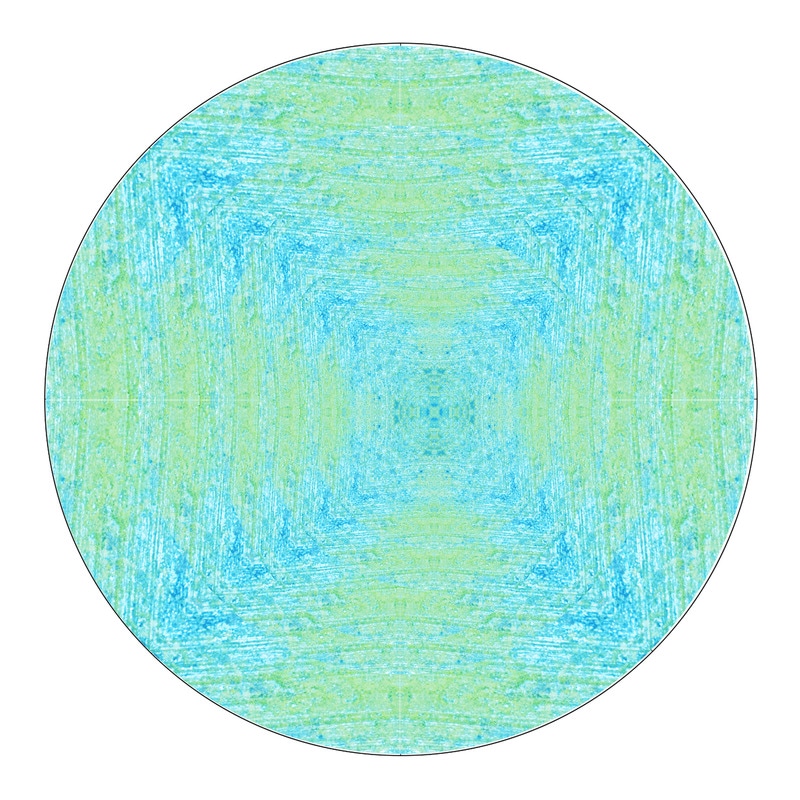
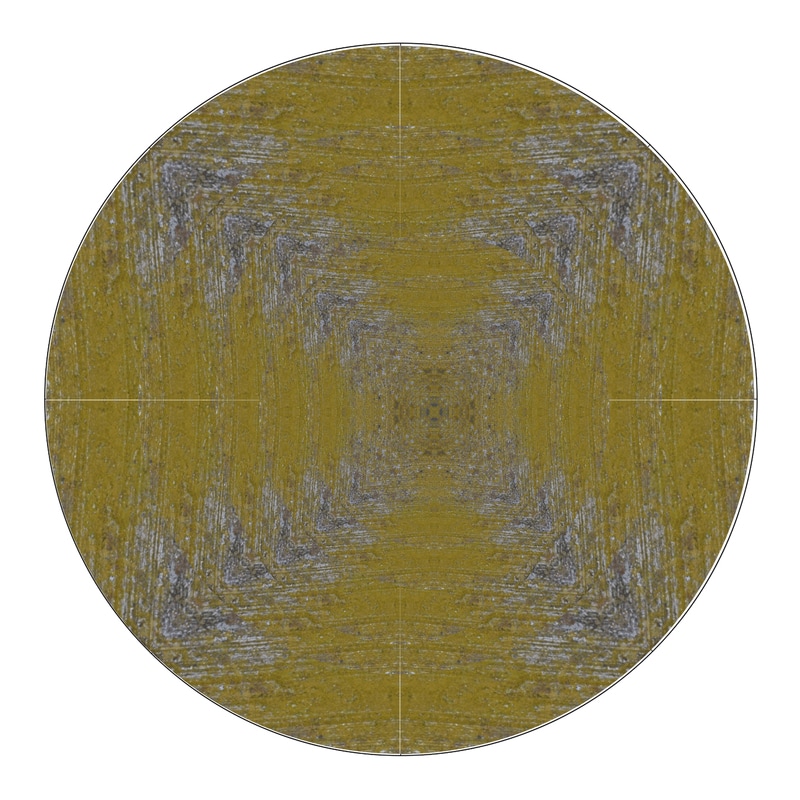
mandalas
Tessellations
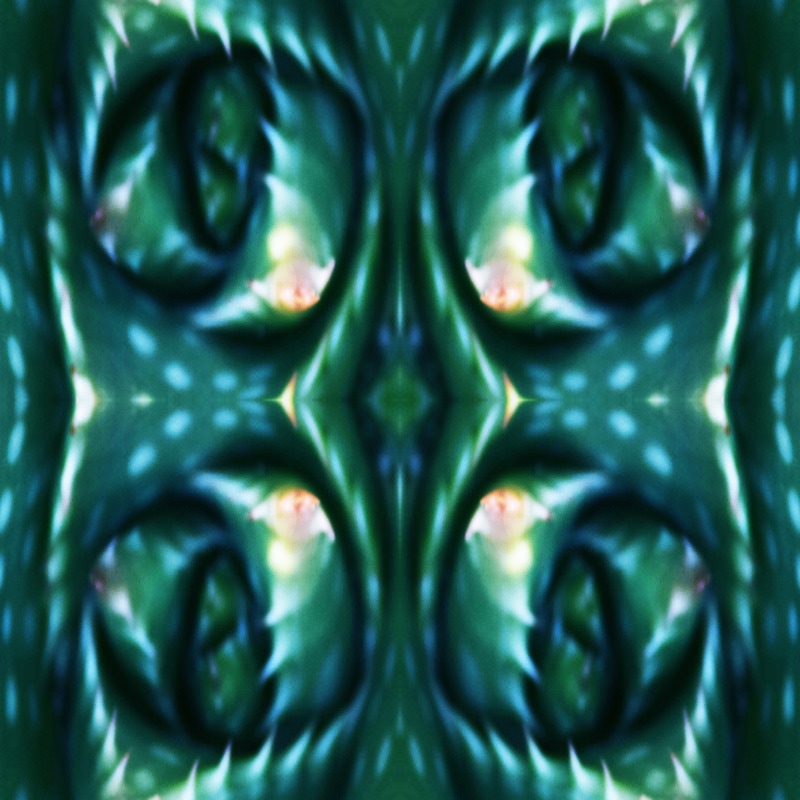
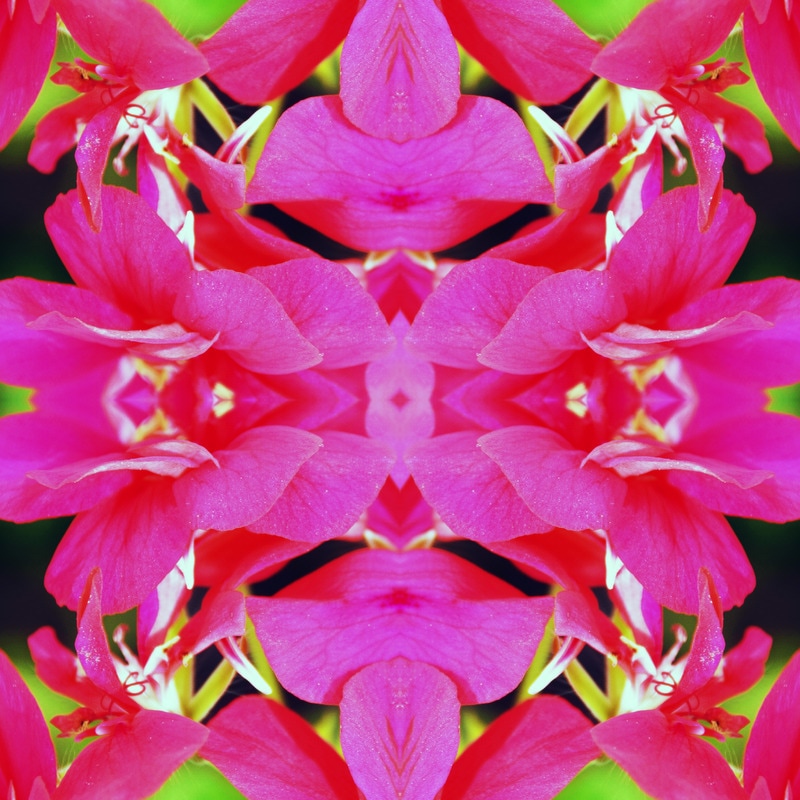
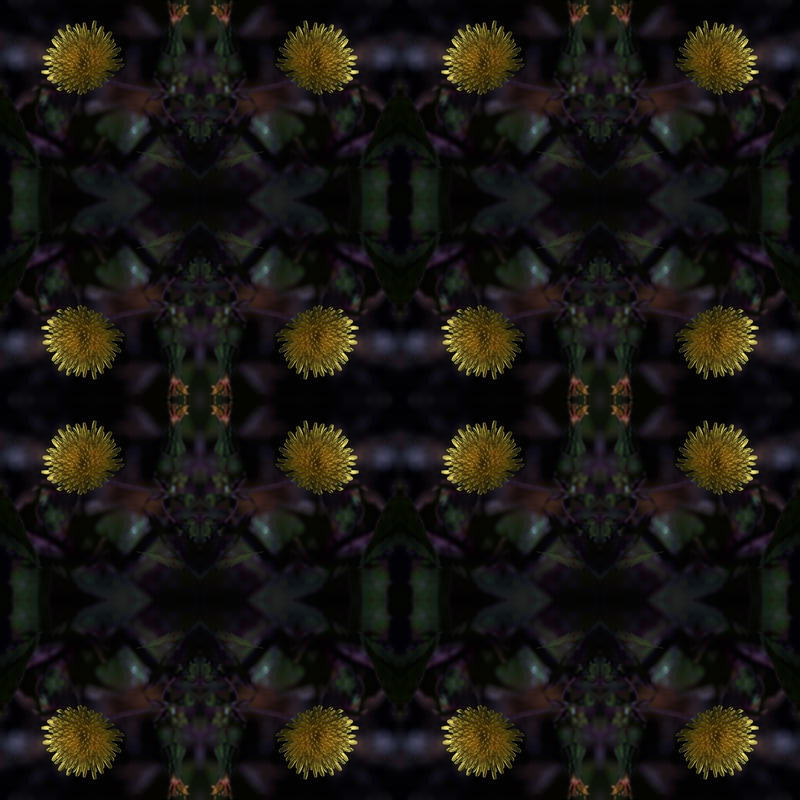
To me Tessellation means when you make one transformed picture from another simple picture to make it look better. To create the tessellation I first chose the photo I wanted then I opened the picture in Photoshop thenlcated the image as many I needed then I transformed the pictured
Portraiture
ISO:400, Aperture:f/8, Shutter Speed:1/750
ISO:400, Aperture:f/8, Shutter Speed:1/350
ISO:400, Aperture:f/8, Shutter Speed:1/750
ISO:400, Aperture:f/8, Shutter Speed:1/1,500
ISO:400, Aperture:f/8, Shutter Speed:1/750
ISO:400, Aperture:f/8, Shutter Speed:1/1,500
The thing that I learned from portraits from going to the duck pond was that it's very important to have very good lighting because it will help to make your pictures come out so much better. I used the reflector to give more lighting when needed and it was very helpful in some pictures because the sun would come in and out of the background, so it was nice to have the reflector available to me. What I did to retouch the 3 images was I just edited the face of those 3 images. When i say edited the face I mean I made the face seem clear and perfect .The salary range for portrait photographers is about $60,000. If you wanted to have your portraits professionally taken it would cost about $50-$100 a session.
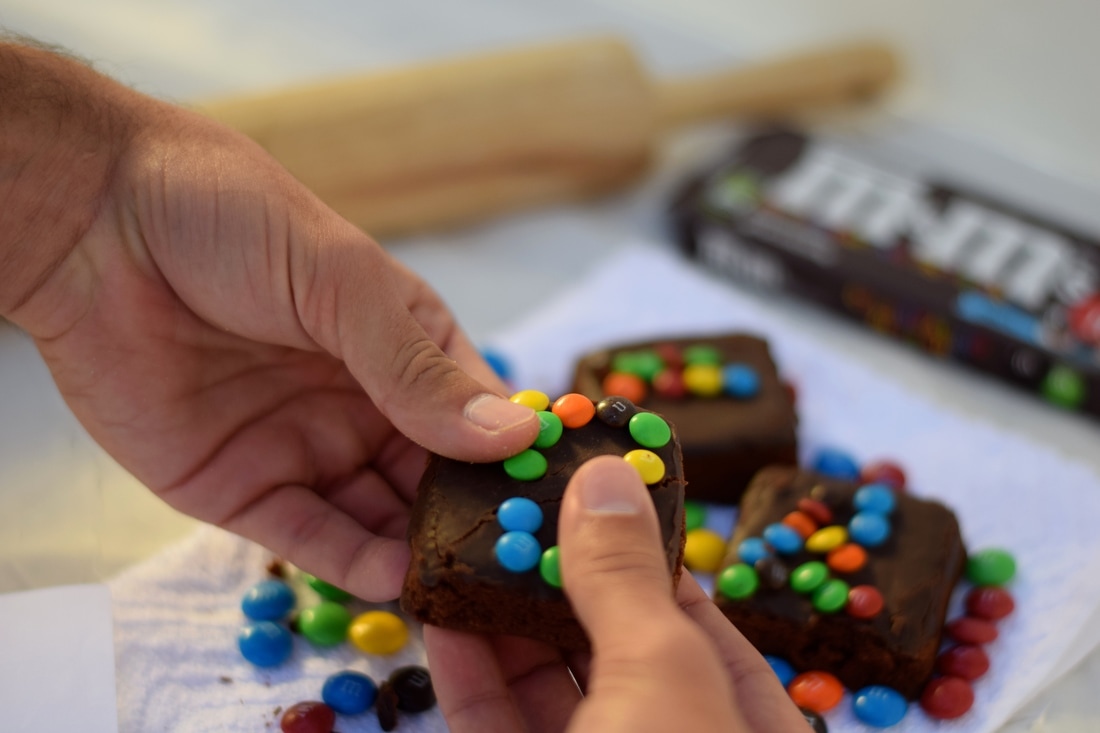
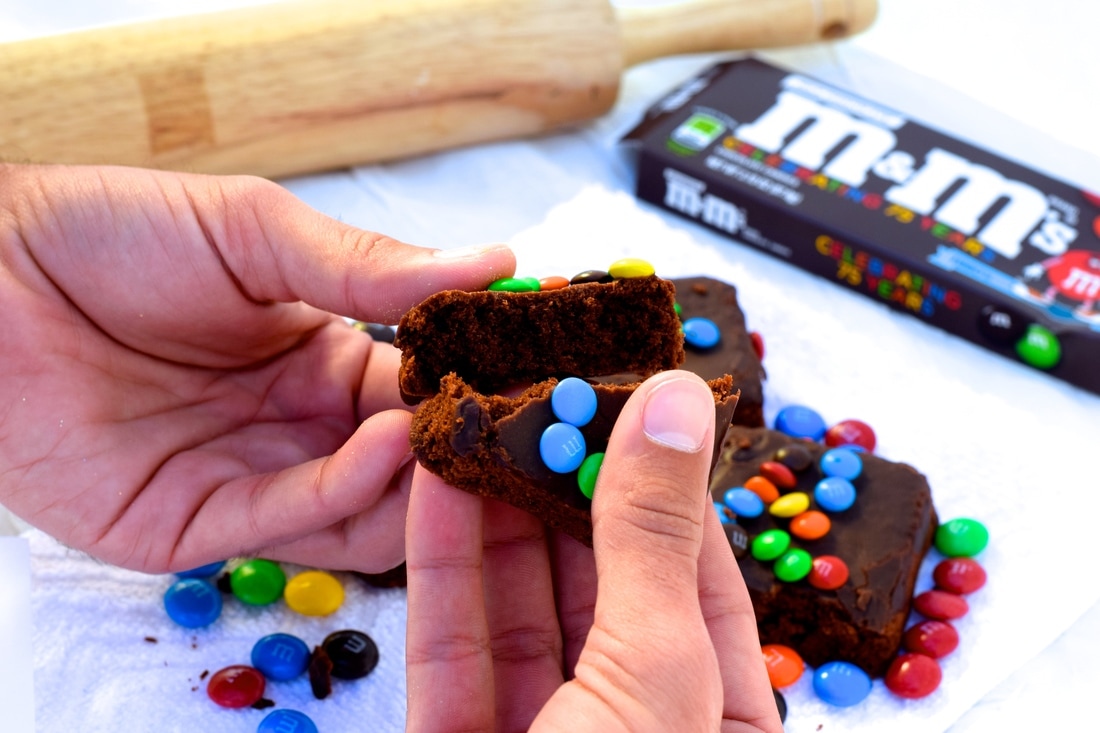
Food Photography
ISO:320, Aperture:f/1.8, Shutter Speed:1/4,000
ISO:320, Aperture:f/8, Shutter Speed:1/90
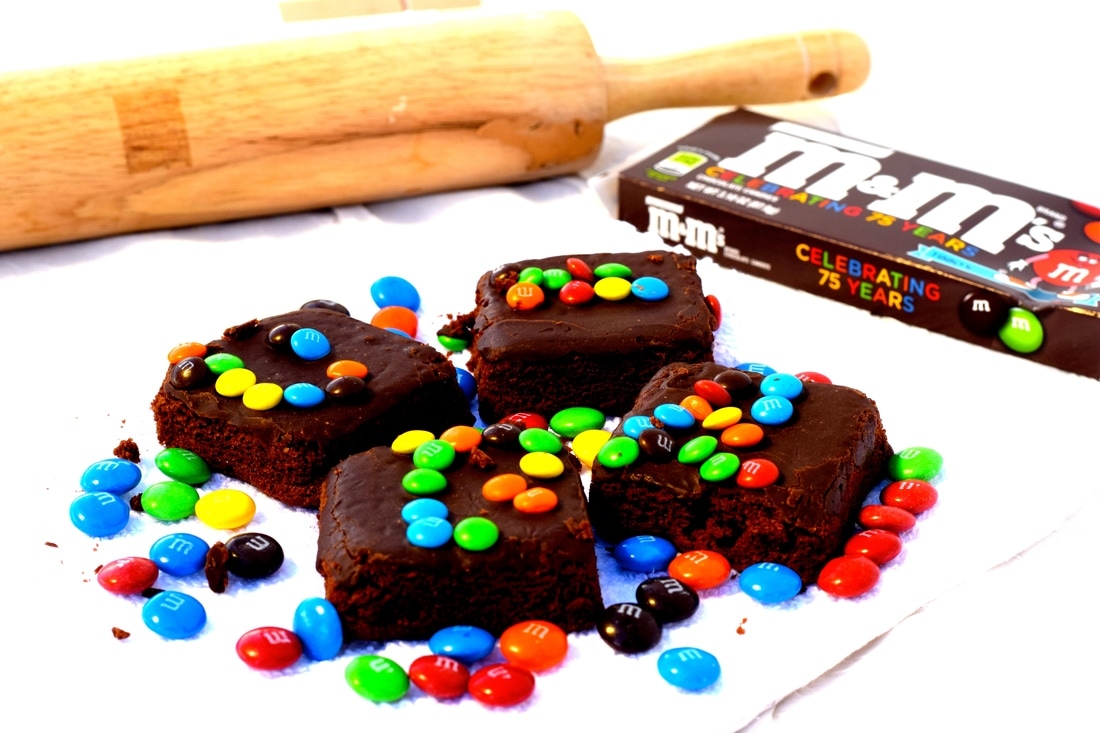
ISO:320, Aperture:f.8, Shutter Speed:1/250
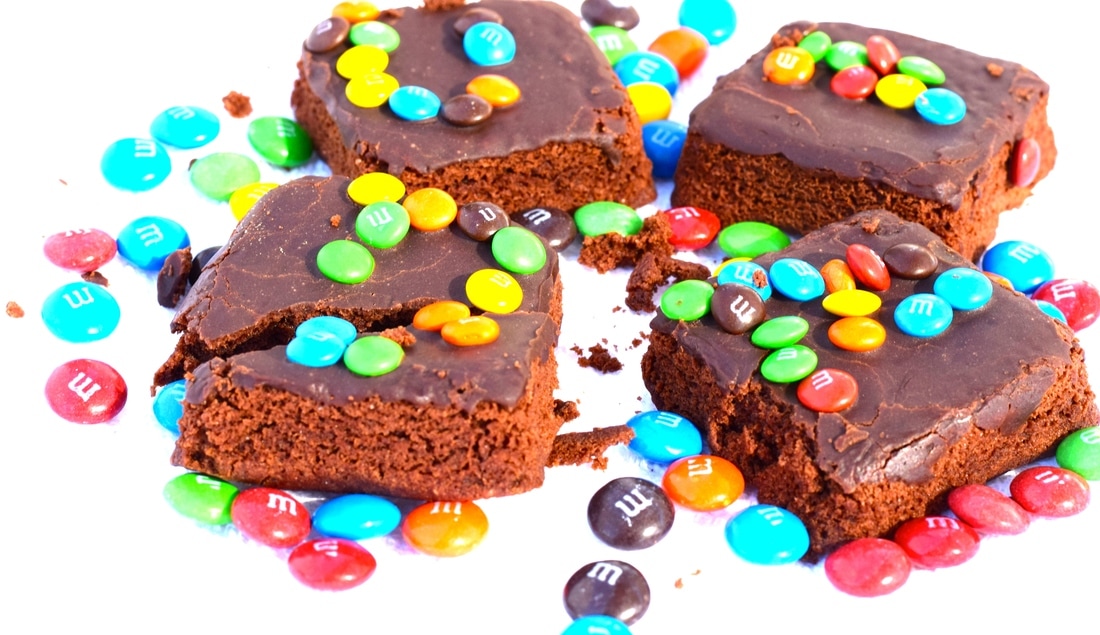
ISO:320, Aperture:f/8, Shutter Speed:1/180
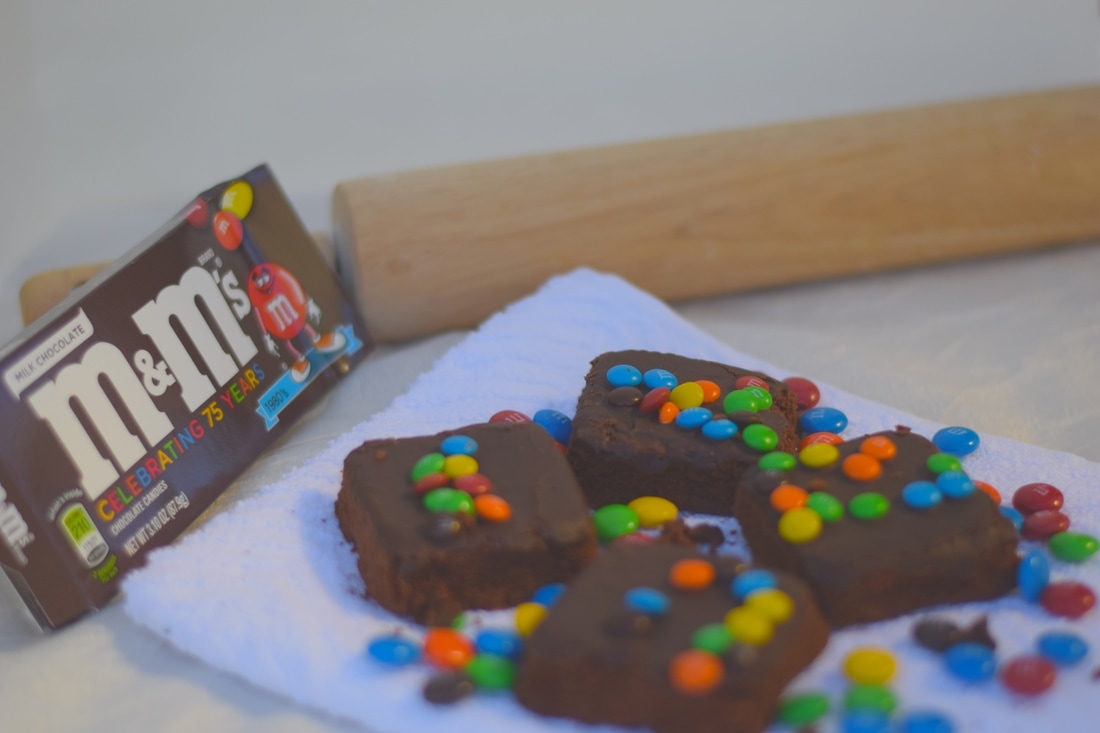
ISO:320, Aperture:f/1.8, Shutter Speed:1/4,000
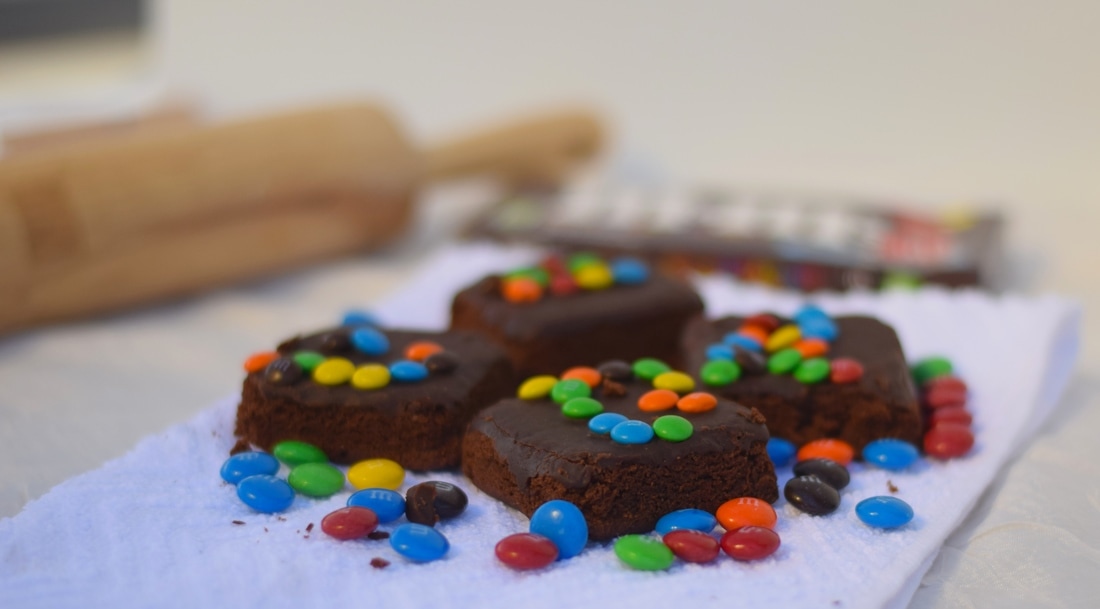
ISO:320, Aperture:f/1.8, Shutter Speed:1/4,000
Name Project
To create this image I first opened up Photoshop and then I picked the template that I needed for my full name. I opened that template to Photoshop as well and then I just moved each letter into the square which it belonged too and I edited them and cropped the letters as I went through it. Then when I was done I finished I saved the final project onto the common drive. When doing this project I was surprised that it was very easy putting it all together. In my opinion Im very proud of the outcome of the this project. I like how all the letters are unique.
Layer Mask


To create these images I first opened up Photoshop and opened this images on there. I then
HDR Compositions
Artist As Mentor
https://docs.google.com/presentation/d/15T6cxYjjnJQzXAGUFdsUpKesHpnrH25YJHrEwKWTV1o/edit?usp=sharing
5 Photos of Artist Recreation and in the style of

Moon Photography
1. Use a tripod! A flat surface will only allow you to shoot straight, and shooting the moon means that you'll be shooting up and constantly re-adjusting the tripod as the moon moves throughout the night.
2. Use a shutter release cord, remote or the camera's self timer if you don't have one, so that you don't move the camera when pressing the shutter release during a long exposure.
3. Use a zoom lens and zoom in as much as you can to the moon. It's okay if it's not a super fancy lens, this was shot using a 15 year old $100 lens. Focus in on the craters and details on the moon.
4. ISO 1250- 1600, so that you can use as fast a shutter speed as you can without losing detail-the longer the shutter speed, the more chances you have the camera will shake even slightly in the wind, resulting in an out of focus photograph.
5. Aperture priority of f/5.6 since you are not worried about capturing any details other then the moon.
6. Bracket your exposure, meaning over expose and underexpose the photograph from what the camera is telling you. Generally the camera will overexpose the moon, so you'll get nothing but a white blob in the sky. Use the exposure compensation button (the +/- button below the shutter release) and change the exposure to -0.5, then -1.0, then -1.5 and so on, until you start seeing detail in the moon. You may go as far as -5.0 exposure compensation to get what you need.
7. Take a fair amount of photos and keep refocusing as the night progresses. The photographs may look focused on the camera's display, but you won't really see if they're completely in focus until you upload them onto your computer screen.
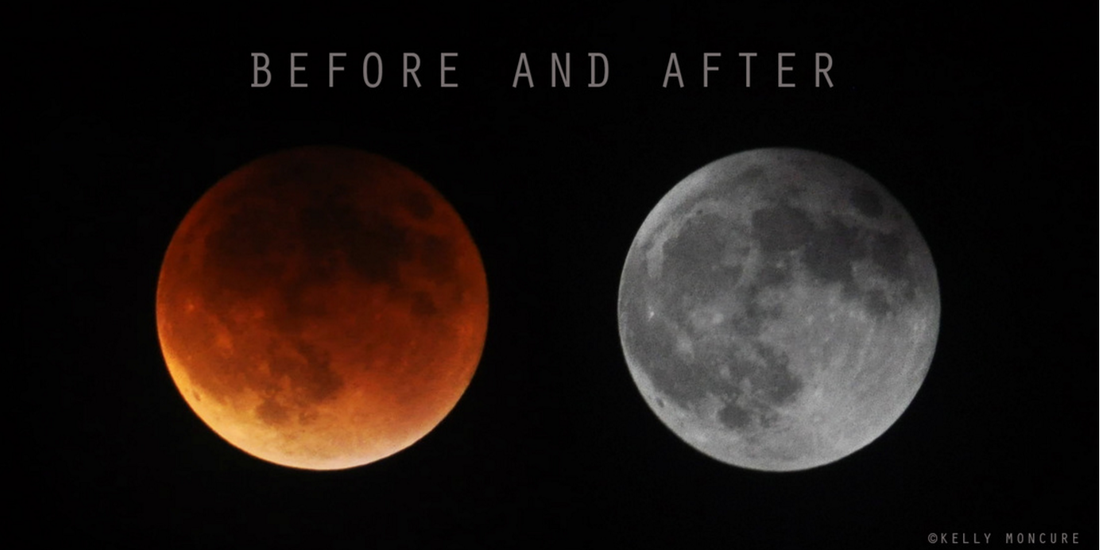
Blood Moon Lunar Eclipse, September 27, 2015. Left image: 70-300mm lens @ 270mm, ISO 1000, aperture f/5.3, shutter speed 1.3 secs. Right image: 70-300mm lens @ 300mm, ISO 800, aperture f/13, shutter speed 1/1250 sec.
Blood Moon Lunar Eclipse, September 27, 2015. Left image: 70-300mm lens @ 270mm, ISO 1000, aperture f/5.3, shutter speed 1.3 secs. Right image: 70-300mm lens @ 300mm, ISO 800, aperture f/13, shutter speed 1/1250 sec.
Halloween
ISO;400, Aperture;f/8, Shutter Speed;1/250
ISO;400, Aperture;f/8, Shutter Speed;1/250
Principles of Art
Balance
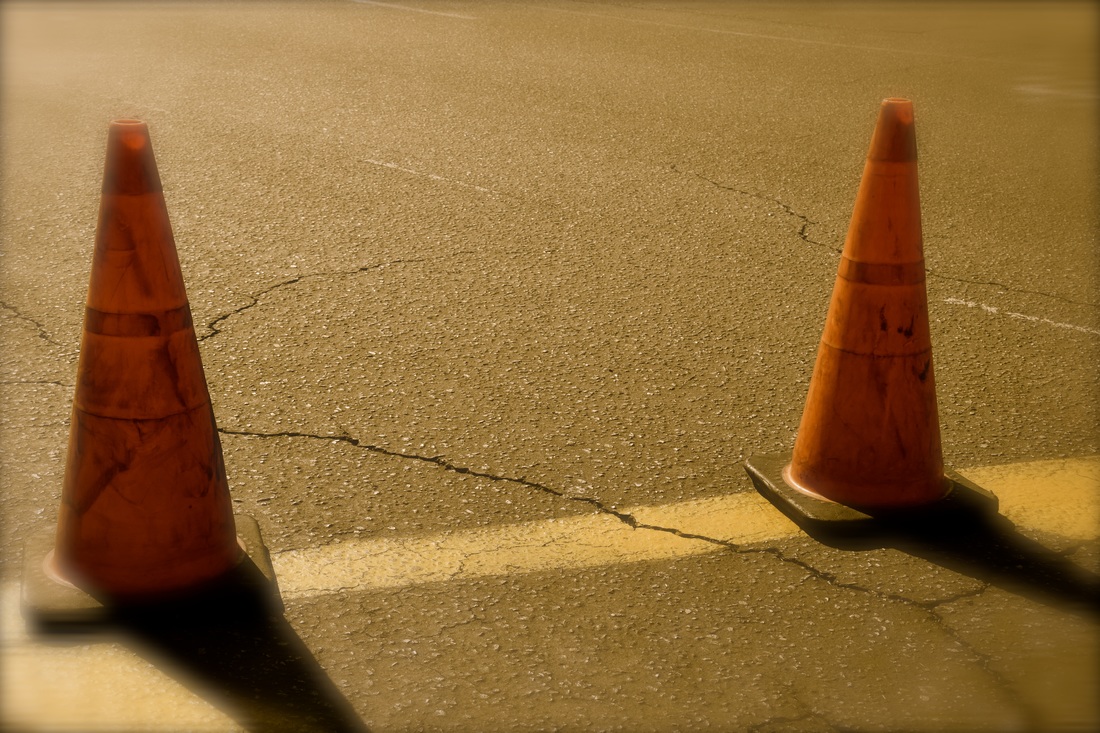
Balance; aperture:f/8, shutter speed:1/1000, ISO:400
This photo is of two orange cones. The balance in this photo is the two cones because they are both the exact the same. This photograph is successful because the cones balance each other out and you could see that within the image.
Unity
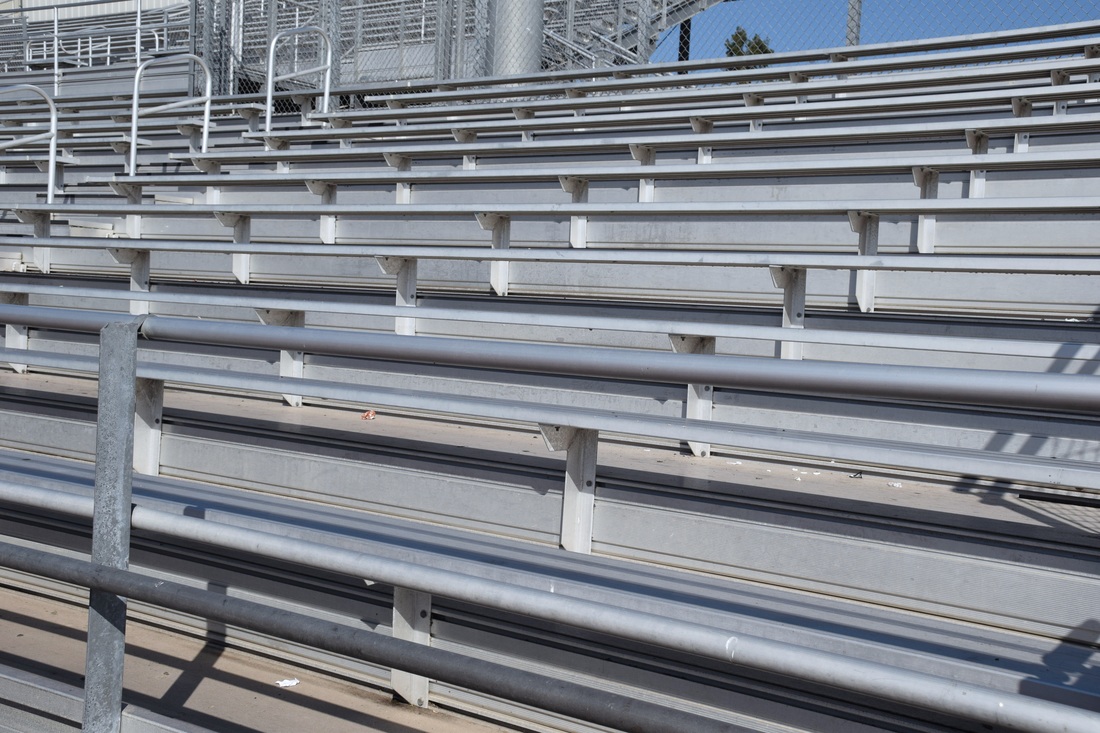
Unity; Aperture:f/8, Shutter Speed:1/1,600, ISO:400
This photo is of the bleachers in the stadium. The unity in this photo is how the bleachers come together and looks like it fits together. This photograph is successful because the shows the element of unity very clearly.
Variety

Variety; Aperture:f/8, Shutter Speed:1/500, ISO:400
This is a picture of a patch of dirt with old tires semi digged in the dirt. Variety is found in this photo because of how it adds interest and individualism to it. This photograph is successful because it has variety within the picture in how everything is placed in the image.
Harmony
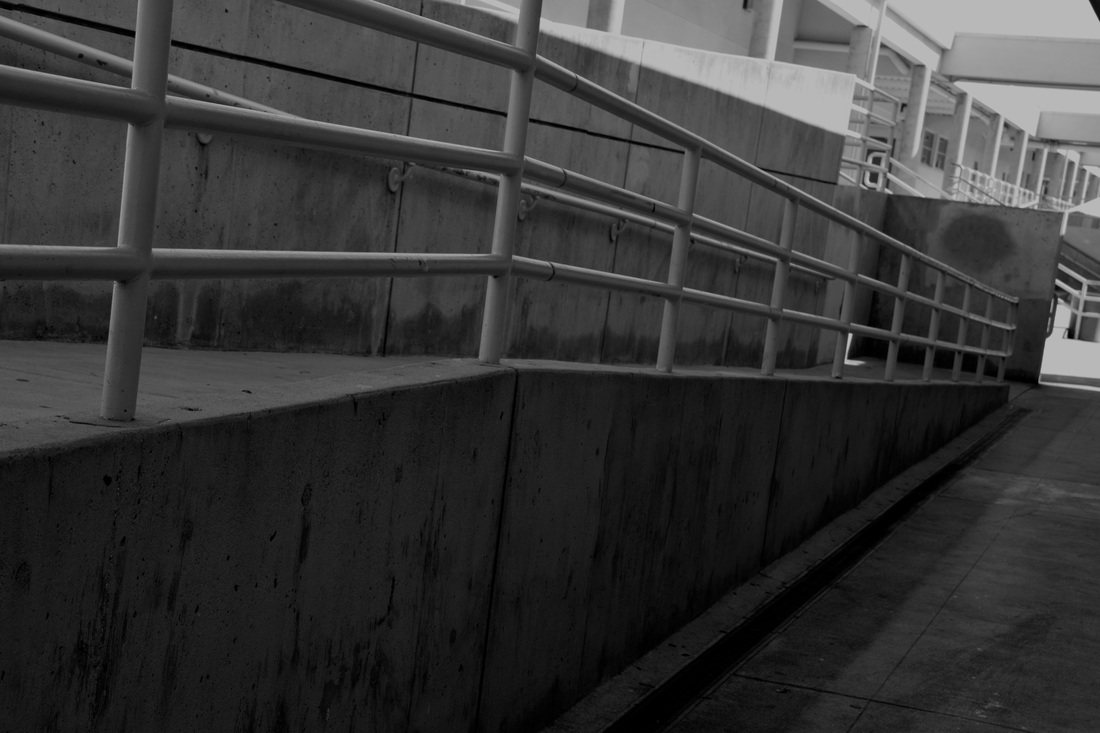
Harmony; Aperture:f/8, Shutter Speed:1/250, ISO:400
This photograph is of the stair railings. Harmony is found in this image because it gives off a pleasing effect. This is successful because it has repetition of the railings which is a way it demonstrates harmony.
Emphasis
Emphasis; Aperture:f/8, Shutter Speed:1/320, ISO:400
This is a picture of Itzel standing in the middle of the hallway. This has emphasis because Itzel is what is being dominated in the photograph .The photograph is successful because it grabs the audience's attention to look at the figure in the middle which is the emphasis part of the image.
Rhythm
Rhtym; Aperture:f/8, Shutter Speed:1/1,250, ISO:400
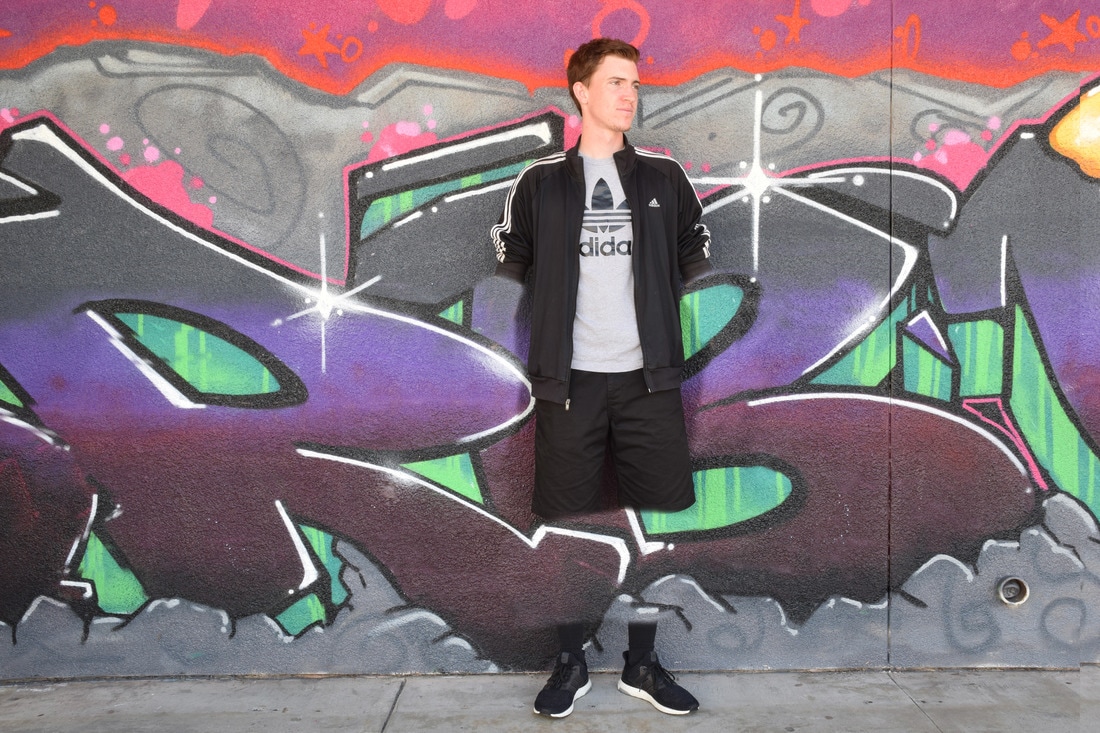
This is a picture of a mural that's by the library. Rhythm is being shown in this picture because it's indicating how the movement of repetition is shown by the use of the element of rhythm. This image is successful in that it makes the mural look as if it is actually being active.
Proportion

Proportion; Aperture:f/8, Shutter Speed:1/800, ISO:400
This is a picture of two palm trees. Proportion is found in this image because it shows different sizes of the two palm trees. This photograph is successful because we can clearly see the relationship between the two objects.
Elements of Art
Line
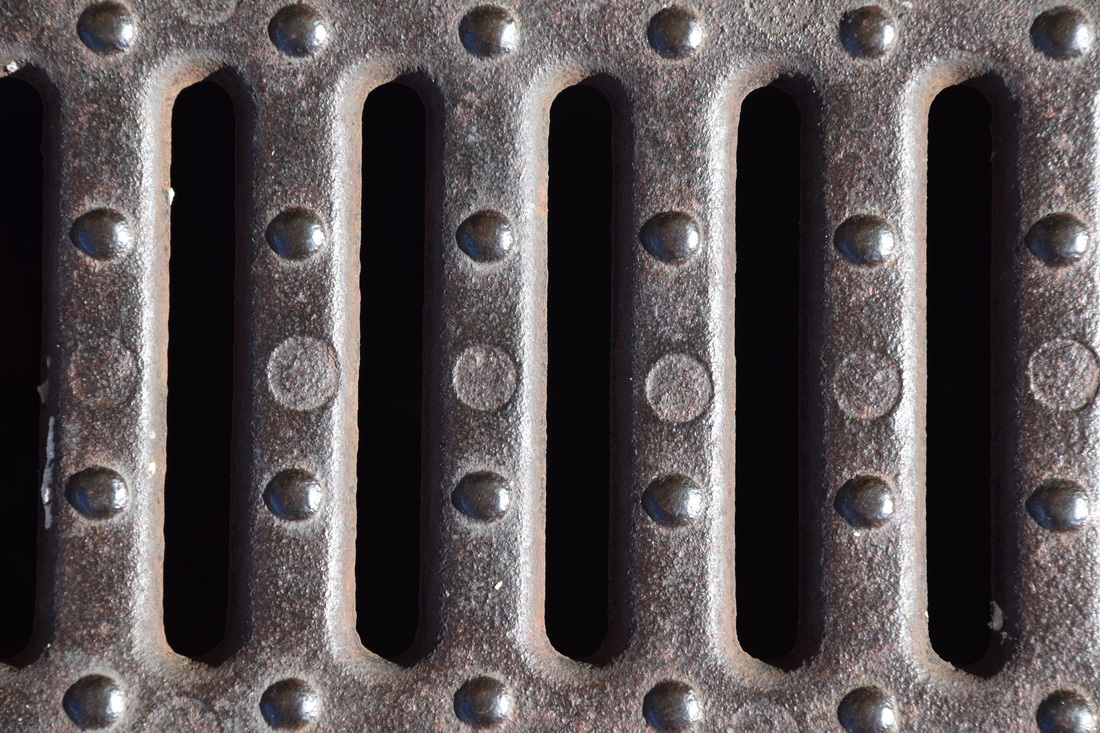
This image is of a sewer drain. The element of line in this photograph is lines of the sewer. This photograph is successful because it clearly shows the element of line.
Color
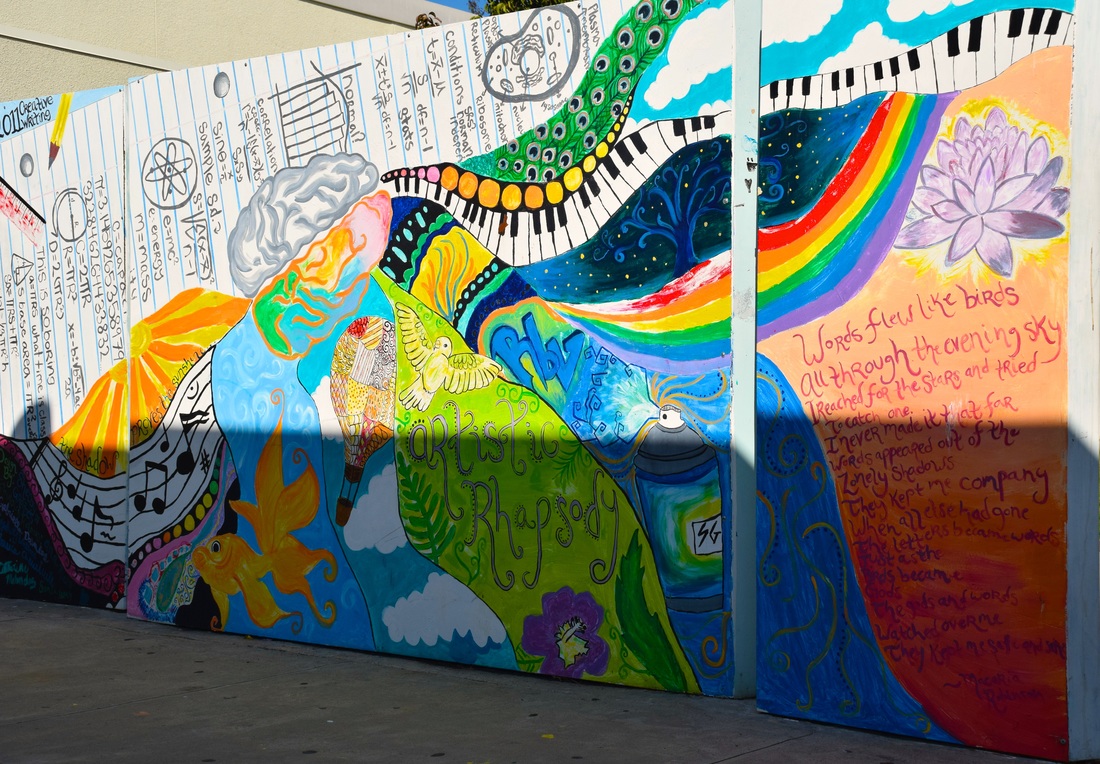
This image is of a mural. The element of color is shown throughout the entire photograph. This photograph is successful because it shows the element of color by using vibrant colors.
Form
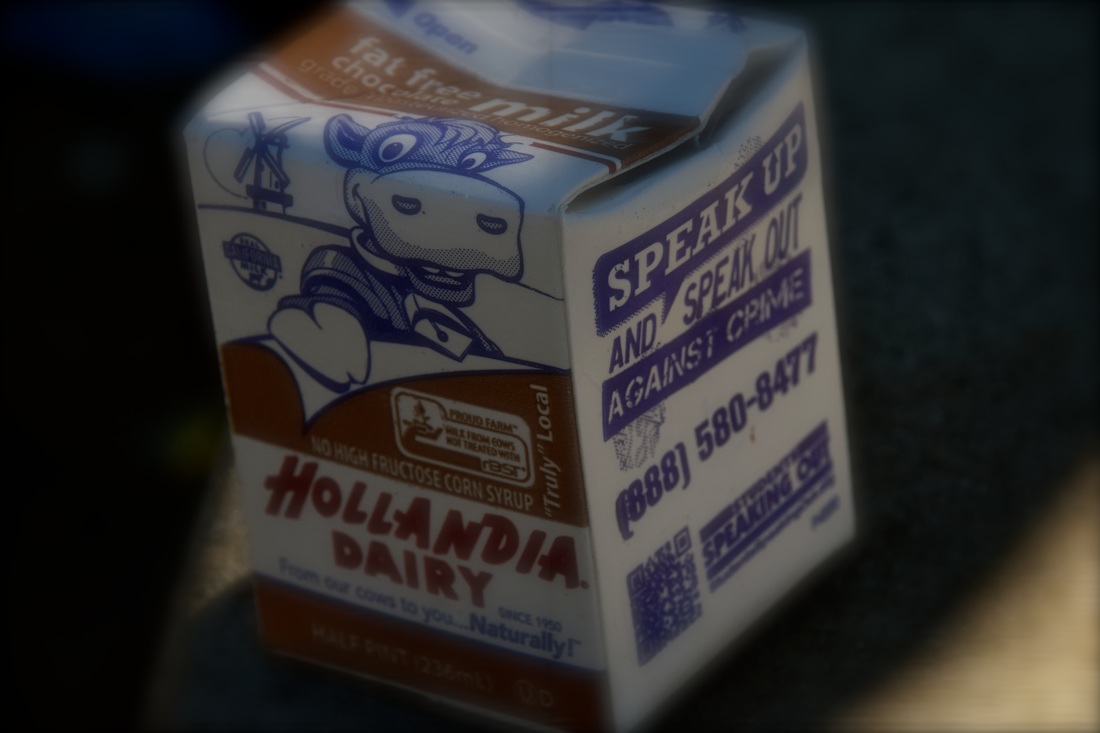
This photograph is of a milk carton. The element of form is shown on the milk carton because it's 3D. This photo is successful because of how clearly form is shown within this photograph.
Texture
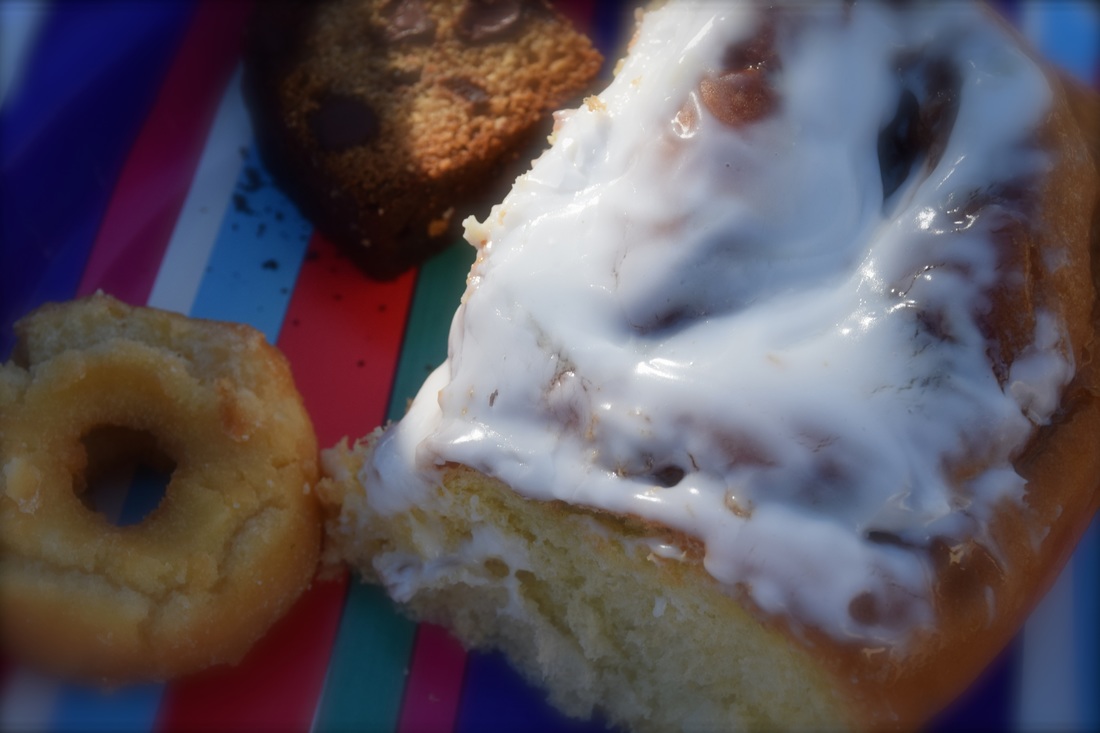
This picture is of different pastries on a plate. The element of texture is shown in the photograph on the pastries. Thus photograph is successful because the different pastries have texture on them, which is clearly seen in the image.
Shape
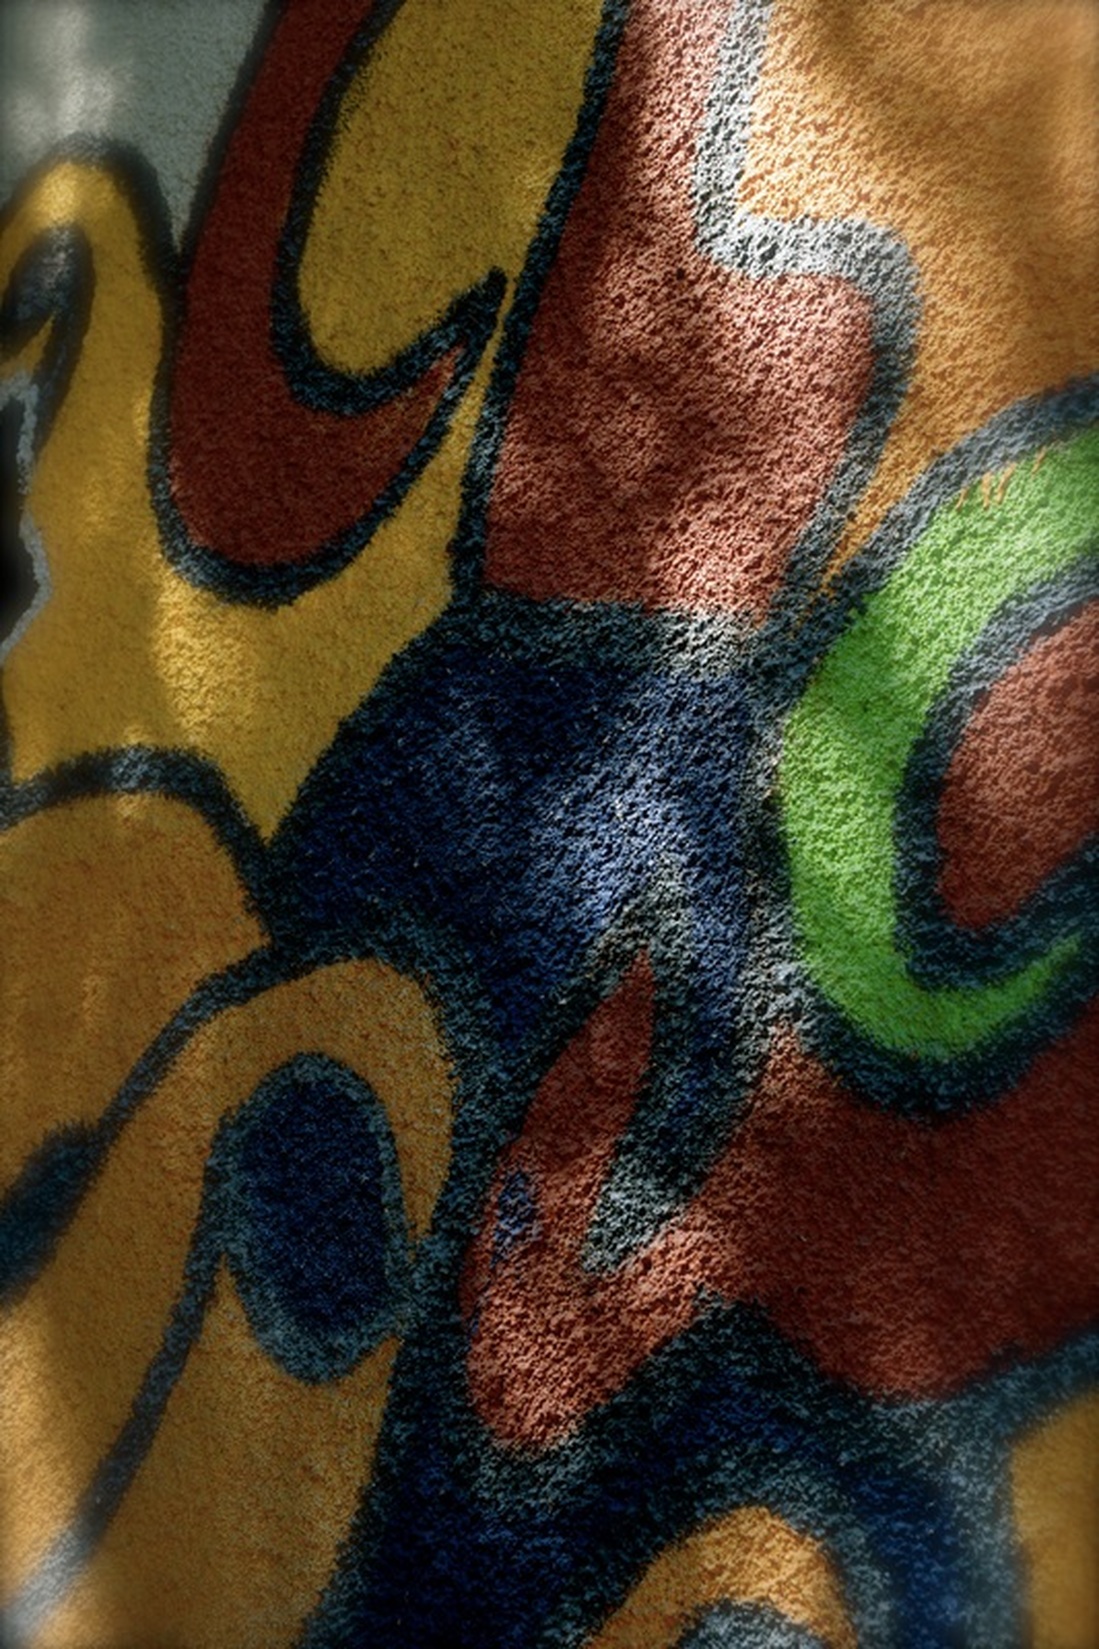
This image is of a colorful mural. The element of shape is shown on the entire image because it has different shapes on the mural. This photograph is successful because of the unique shapes shown on this image, you could clearly see how good the element of shape is being used in this image.
Space
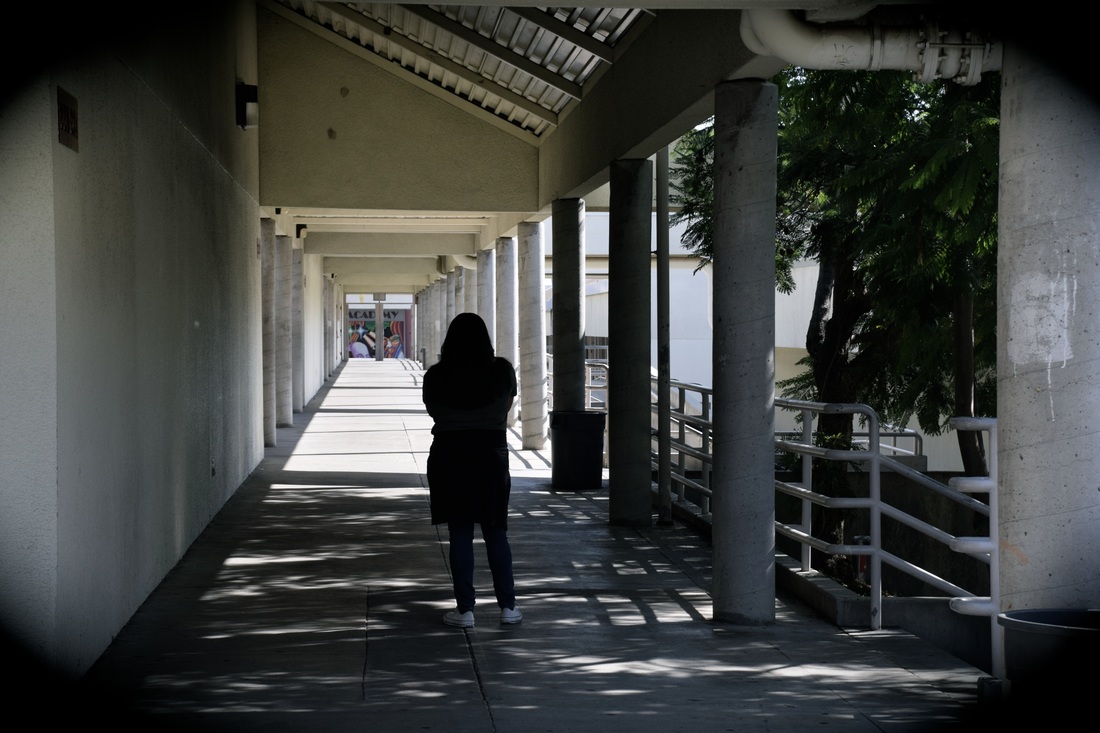
This photograph is of guy standing in the middle with a blurred background. The element of space is shown because the guy represents positive space and the blurred background represents negative space. This photograph is successful because it shows both positive and negative space.
Value
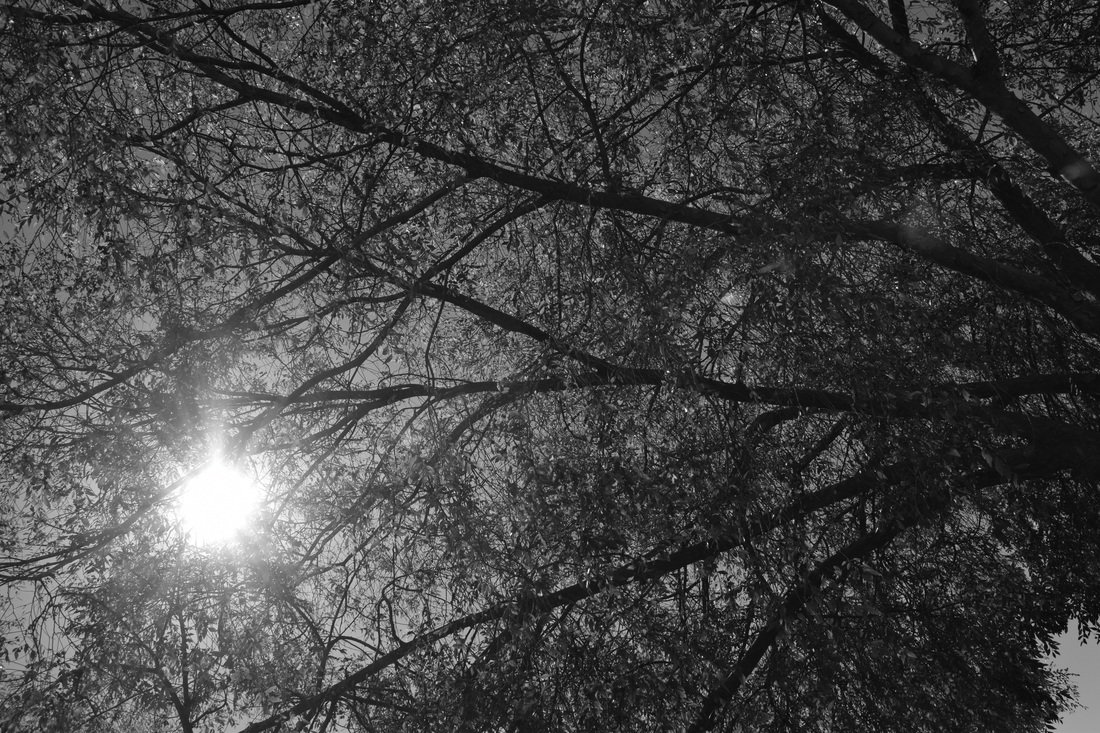
This photo is of a tree with the sky in the background in black and white. The element of value in the photograph is the black and white because it has value to it. The photograph is successful because it demonstrates the shading which has value to it.
Alfred Stieglitz..(line)
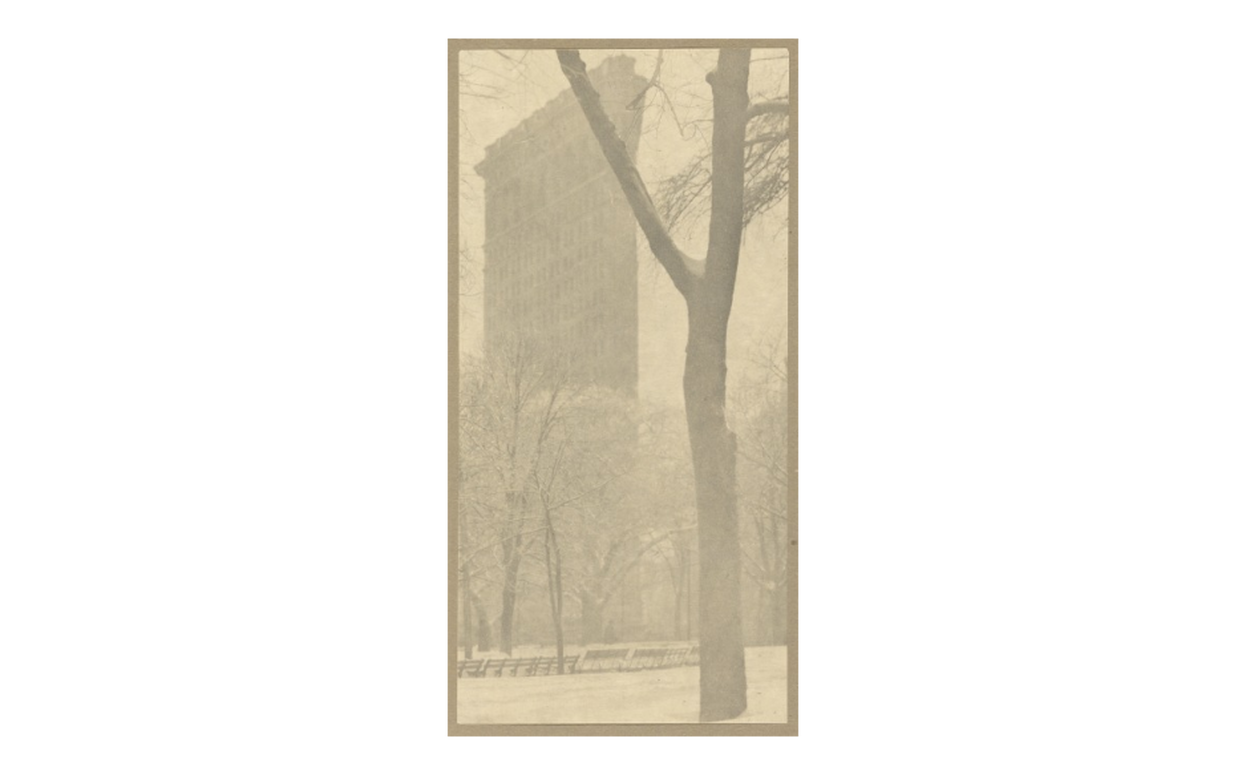
Alfred Stieglitz; The Flatiron Building, (1864-1946)http://www.getty.edu/art
Ben Von Wong..(value)
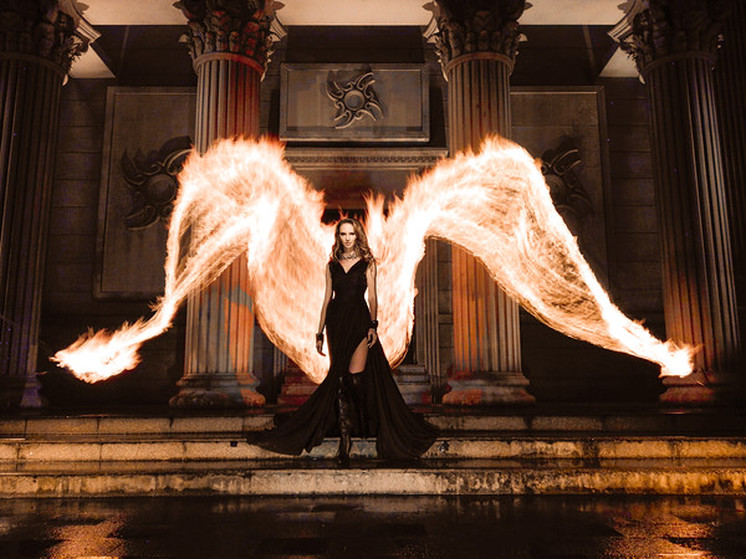 Ben Von Wong; Fire angel http://www.vonwong.com/
Sandy Skoglund..(color)
 Sandy Skoglund; A Breeze at Work; 1987 http://www.rulegallery.com/SANDY-SKOGLUND
Laszlo Maholy- Nagy..(shape)
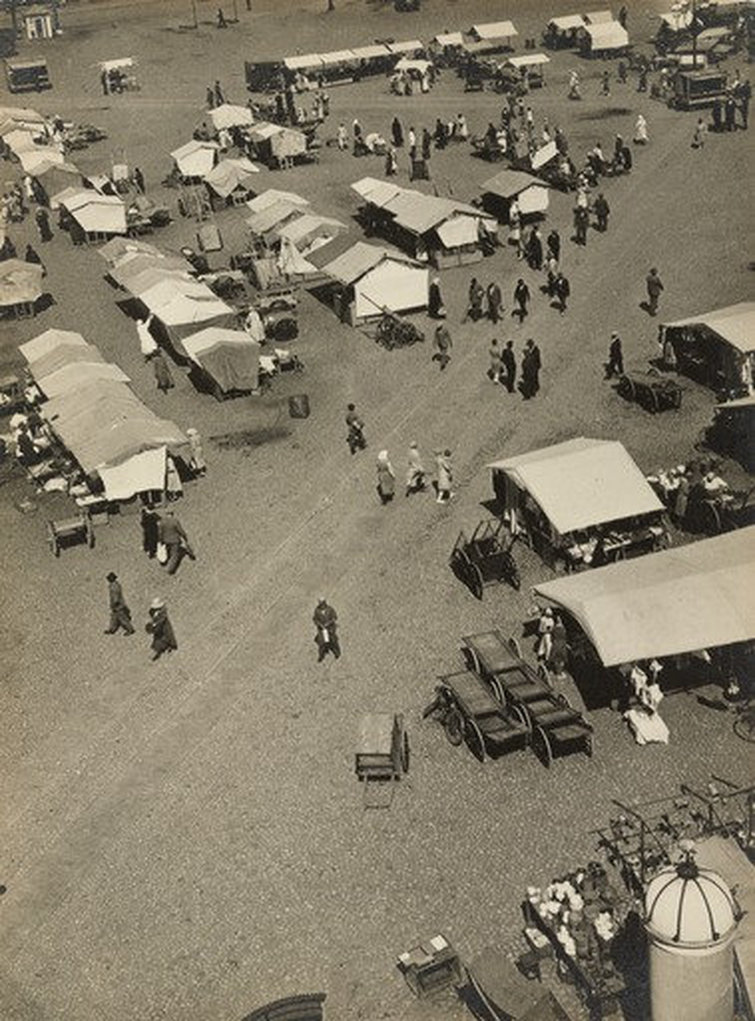 laszlo Maholy- Nagy; Market from Above; 1930; http://www.moma.org/artists/4048
Ansel Adams..(form)
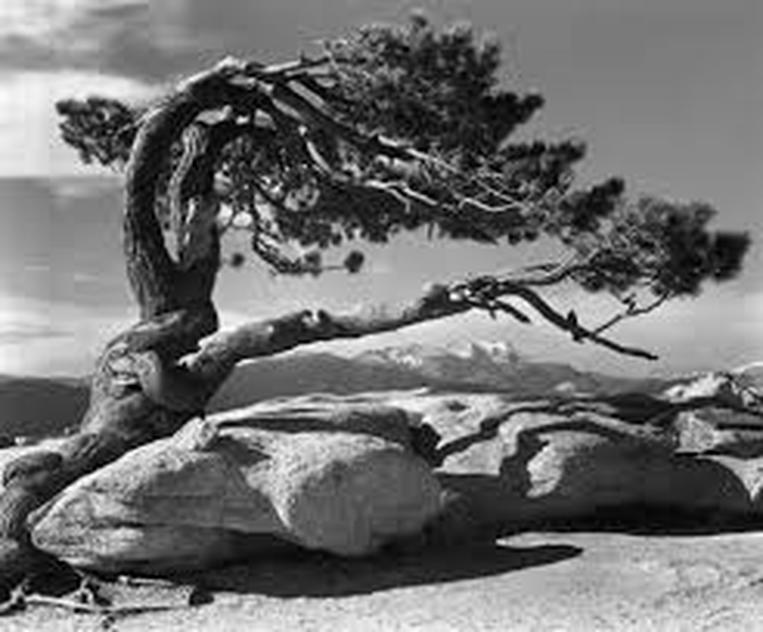 Ansel Adams; Jeffery Pine: 1940; http://www.creativephotography.org/images/8491156
Kelly Moncure..(texture)
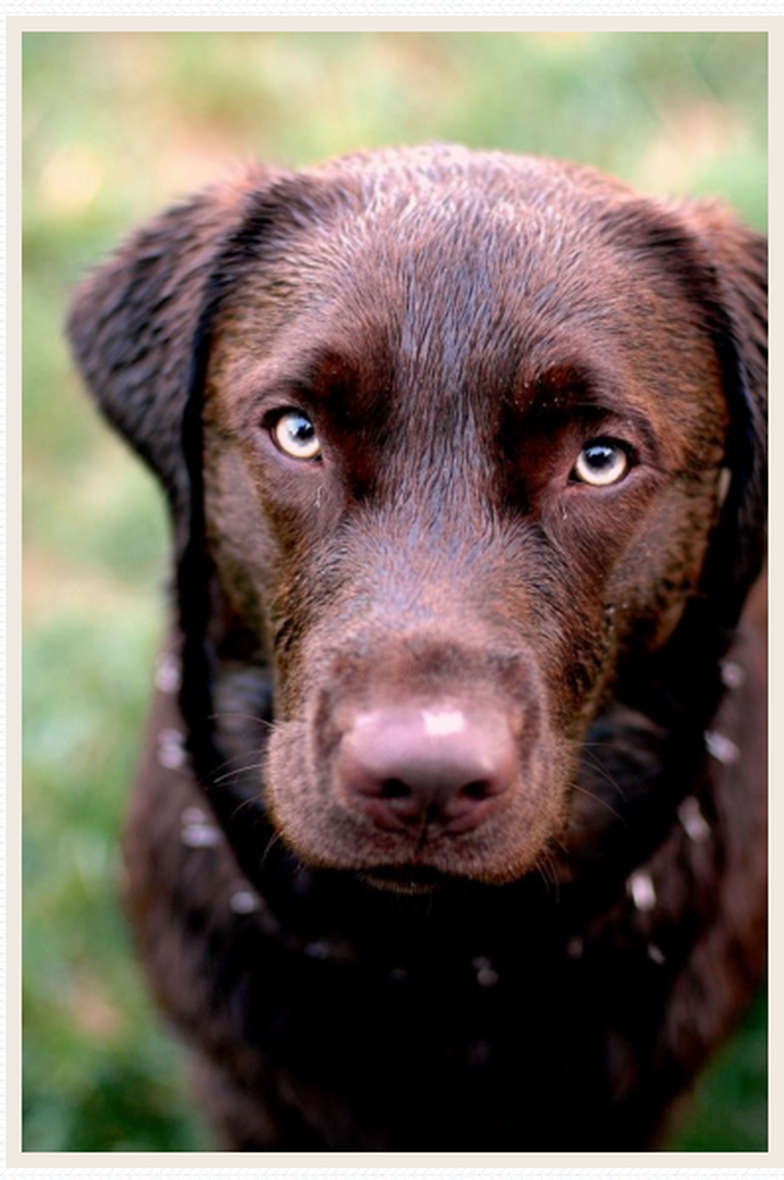 Kelly Moncure; Sad doggie; 2007;http://www.kellymoncure.com/#!/page/391510/pets
Josef Koudelka..(space)
 Josef Koudelka; Invasion of Warsaw Pact; 1938http://pro.magnumphotos.com
Elements and Principles of Photography Notes
Elements of Art
The “building” block of design
Shape
The “building” block of design
- All good design will have one or more of these elements; line, color, shape, form, texture, space, and value.
- A line is one- dimensional and can vary in width, direction, and length. Lines also can define the edges of a form. Lines can be horizontal, vertical, or diagonal,straight, or curved, thick or thin. Lines lead your eye around the composition
- Color has 3 main characteristics; hue(red, yellow and green), value(how light or dark it is), and intensity(how bright or dull it is). Colors can also be described as warm(red yellow), or cool(blue,green).
- Monochromatic- one color plus its tints(adding white) and shades(adding black).
- Complementary colors-
Shape
- Shape is 2 dimensional, width a height and width
- Organic shape: a shape made by nature. Not completely define
- Inorganic shape: manmade- such as triangles and rectangles
- For is a three dimensional, has a height and width and depth.
- Photographers emphasize form by the use of highlights and shadows
- The surface quality of an object that we sense through touch. All objects have a physical texture(think- horsehair, dolphin smooth).
- In a 2 dimensional work, textures gives visual sense of how an object depicted would feel in real life if touched
- Real space is the 3 dimensional. Space in a work of art refers to a feeling of depth or 3 dimensions. It can also refer to an artist’s use of area around the picture plane
- Positive space- the space occupied by the primary object
- Negative space- the space around the primary object
- Value is the lightness of a surface. It is frequently used when talking about standing, but is also important in the study of color
- The principles of art are the rules or guidelines of art
- Used to organize or arrange the structural elements of design
- Principles are balance, proportion, rhythm, emphasis, harmony, variety, and unity
- Balance is the similar to our physical sense of balance. It is how the artist uses opposing that result in a visual stability
- Most successful compositions achieve balance in one of two ways:
- Proportion relates to the relative size and and scale of the various elements in a design. Specially the relationship between the objects
- Rhythm in an artwork indicates movement by the repetition of elements. Rhythm can make an artwork seem active
- Emphasis is to make one part of an artwork dominant over the other parts.
- It attracts the viewer’s eyes to a place of special importance in an artwork
- Harmony is the pleasing quality achieved by different elements of a composition interacting to form a whole
- Harmony is often accomplished through repetition of the same r similar characteristics
- Differences achieved by opposing, contrasting, changing, elaborating or diversifying elements in a composition to add individualism and interest
- Unity is the result of bringing the elements of art into the appropriate ratio between harmony and variety to achieve a sense of oneness.
- It is the sense that everything works together and looks like it fits
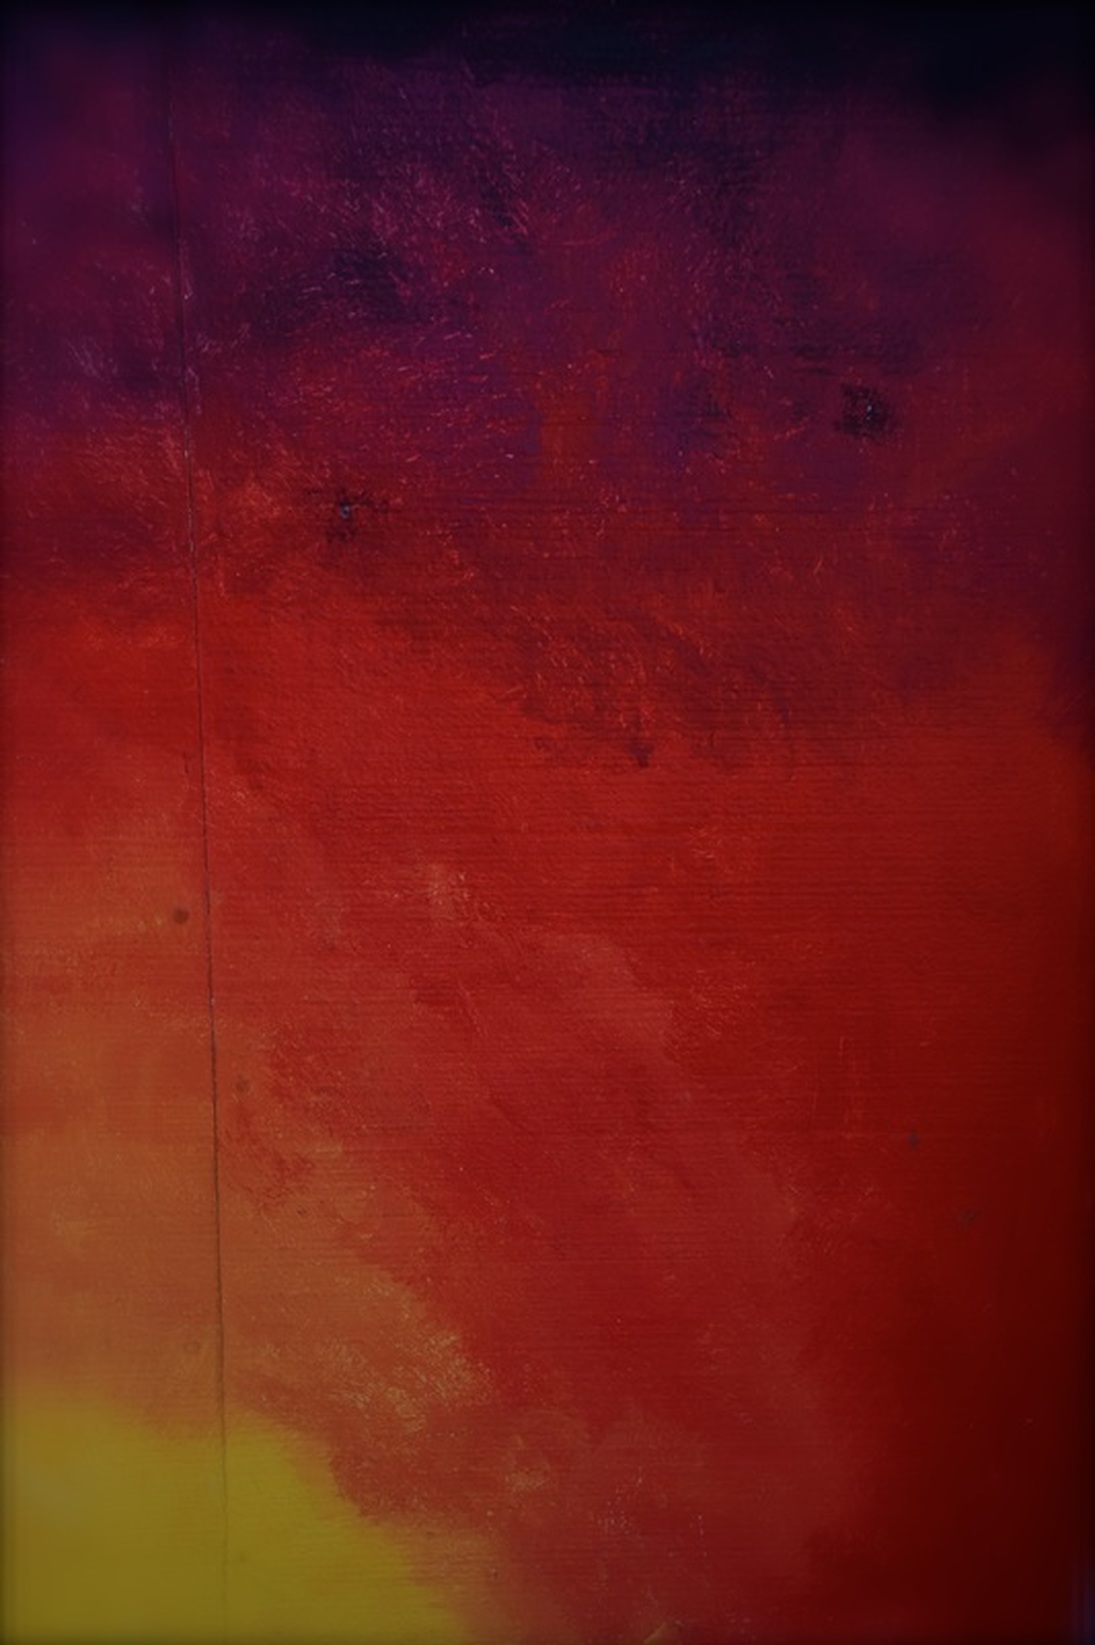
Respect

For the respect project I took a picture of a clock. The message behind the picture I took of the clock was that I wanted to say that time is clicking, so don’t your time on doing drugs. Remember that the time you have on earth is valuable so don’t waste it on something that isn’t worth it, like drugs.
I made the clock black and white and made the background be all red. The red represents the color for red ribbon week, which is also the reason for creating this image the way I did. By adding the red to the photo, it makes it stand out more, which is the perfect effect for this project
I made the clock black and white and made the background be all red. The red represents the color for red ribbon week, which is also the reason for creating this image the way I did. By adding the red to the photo, it makes it stand out more, which is the perfect effect for this project
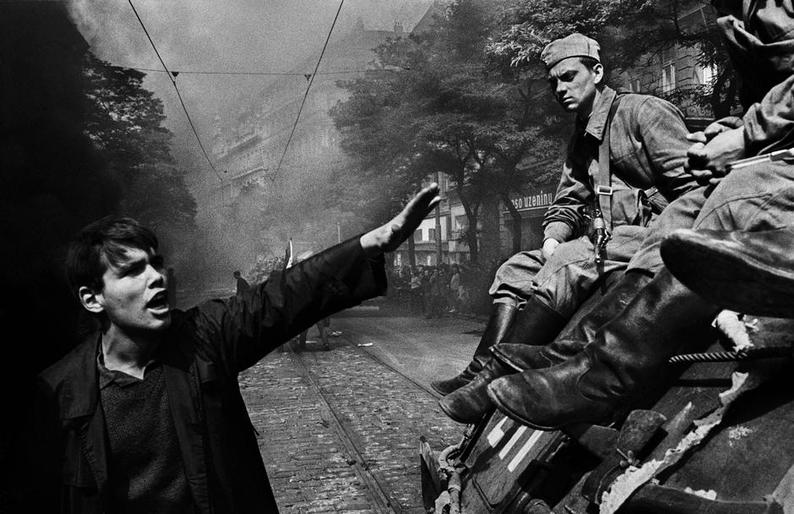
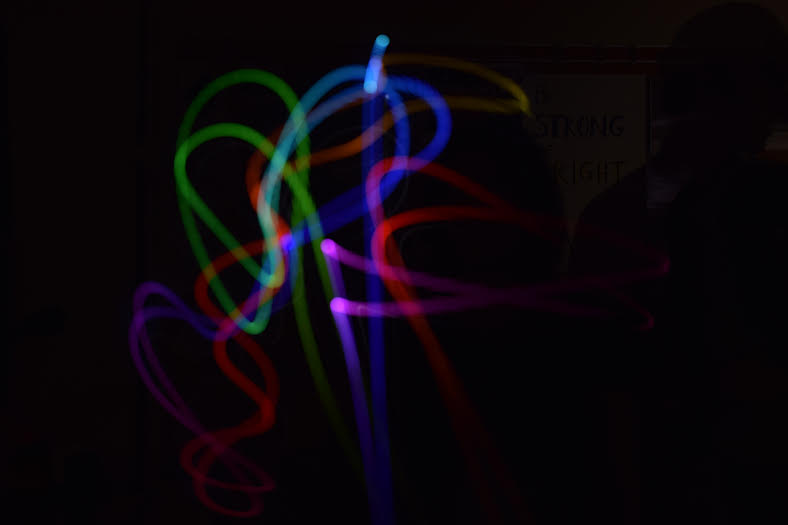
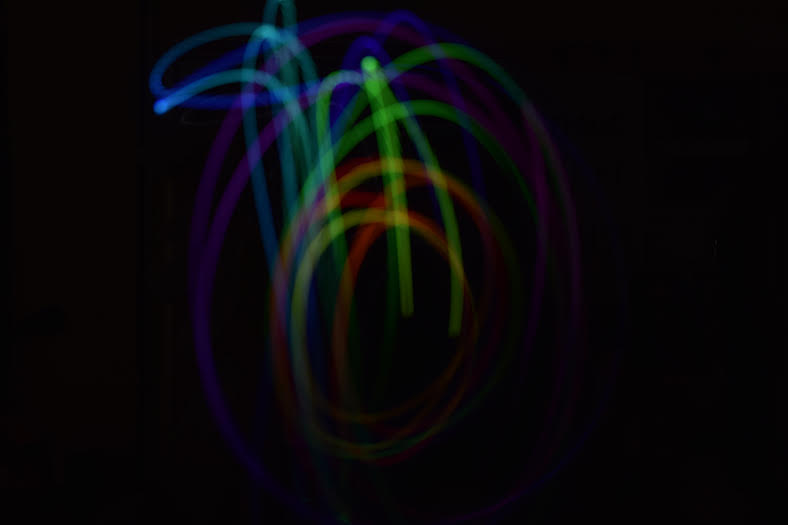
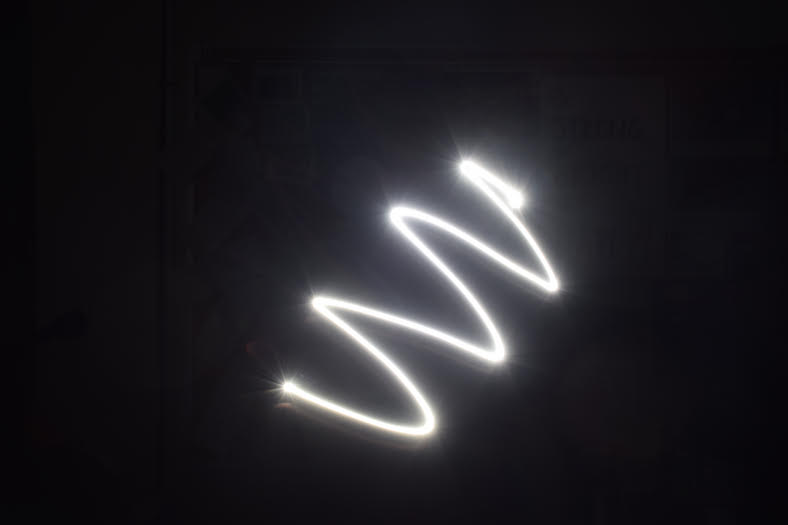
Light Painting
shutterspeed:1/.6, Aperture:f/8, ISO:100
shutterspeed:1/.6, Aperture:f/8, ISO:100

shutterspeed:1/.6, Aperture:f/8, ISO:100
shutterspeed:1/.6, Aperture:f/8, ISO:100

shutterspeed:1/.6, Aperture:f/8, ISO:100

shutterspeed:1/.6, Aperture:f/8, ISO:100
All of these pictures were taken on a tripod in a dark room, in manual mode, and in manual focus. My partner made different objects with his flashlight. I used glows ticks for two for the images and for those two images I used an app called My Light Paint. The only struggle that encountered was trying to come up with different and interesting designs for all my photos. The three most important things that I discovered was before I didn't know I could use my flashlight on my phone to make light paint images, how clear the images could come out in the dark and how the camera can catch those images.
Shutter Speed
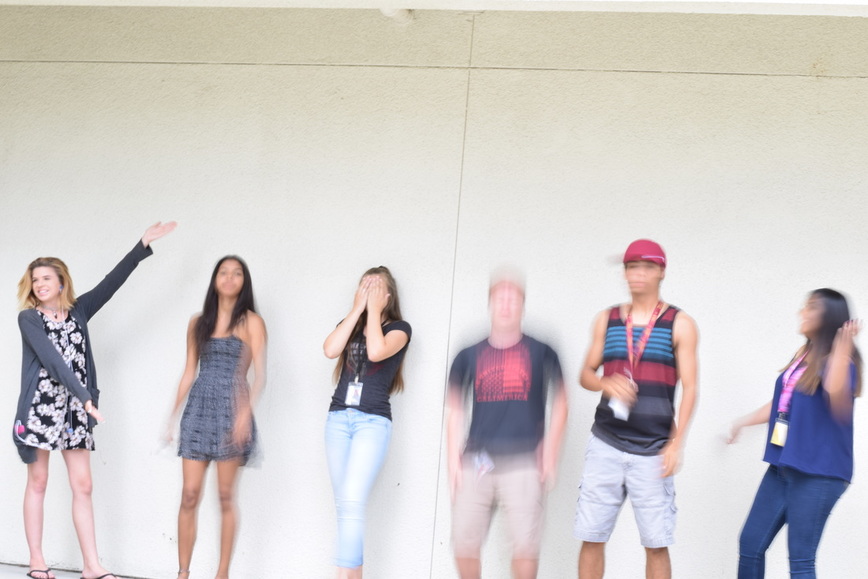
1/3, shutter speed:1/3, ISO:100
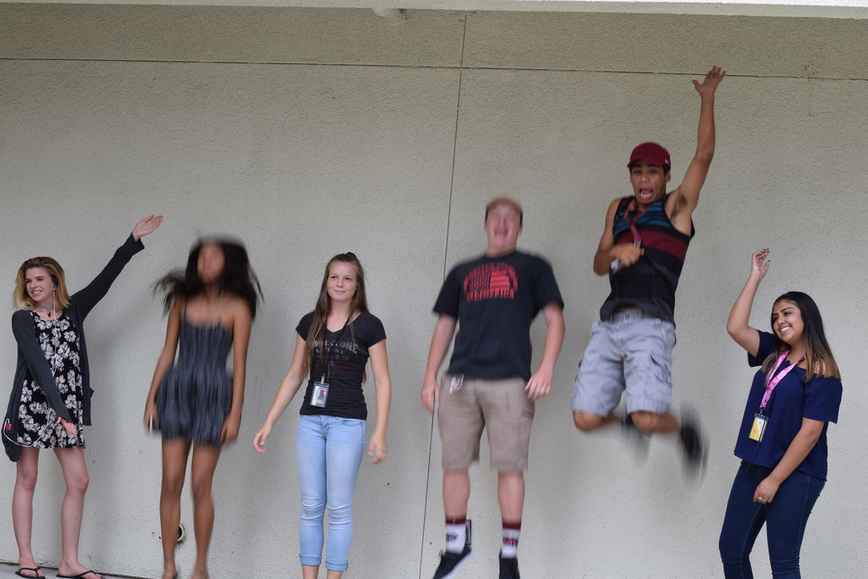
1/30, shutterspeed:1/30, ISO:100
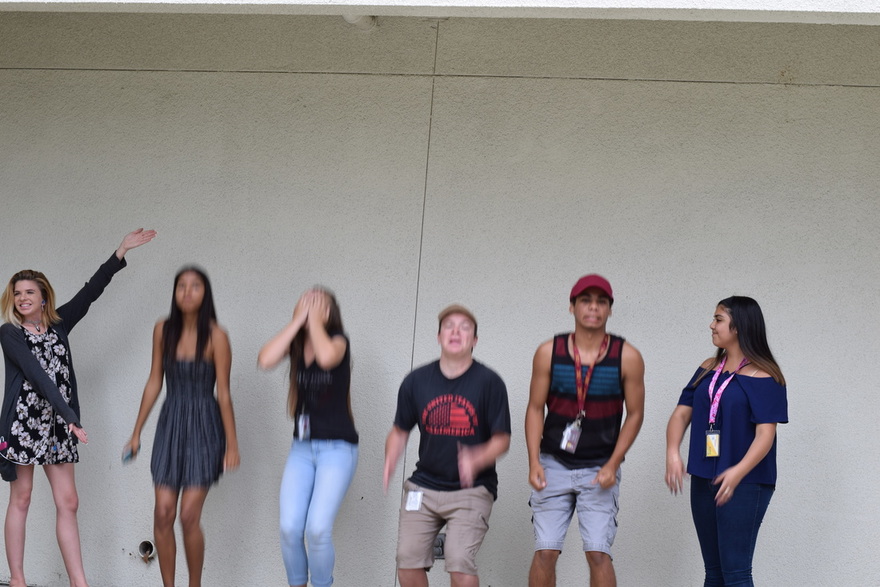
1/60, shutterspeed:6.3, ISO:100

1/250, shutterspeed:1/60, ISO:100
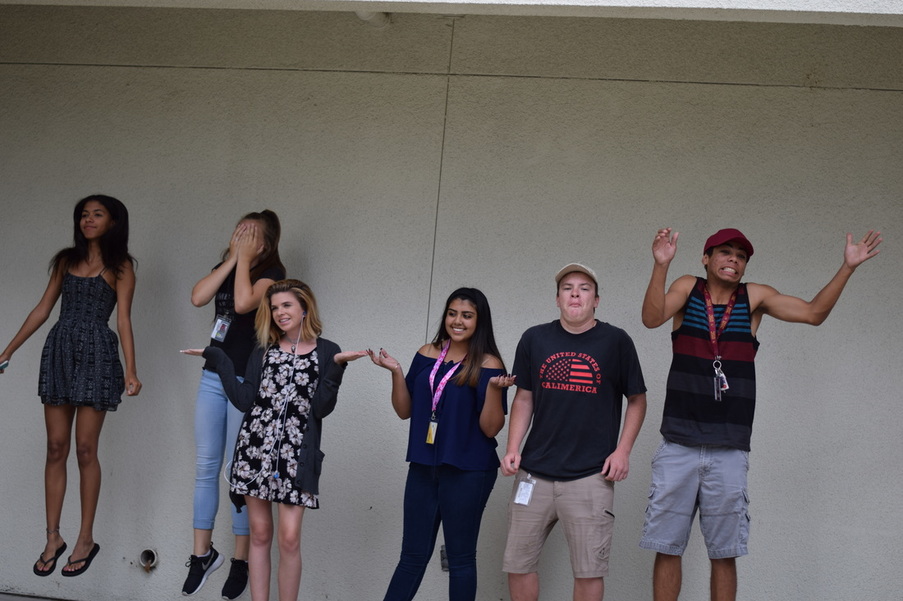
1/1000, shutterspeed:f/1.8, ISO:100
Shutter speeds are both a technical and aesthetic choice a photographer needs to make before releasing the shutter
- The shutter inside your camera controls the duration of time the sensor is exposed to light
- Capturing blur motion in your photograph can emphasize movement and add drama
- A fast shutter speed is often utilized to freeze the movement of a subject
- A Slower speed can be used to show motion and visualize movement
- Shutter speeds are expressed as seconds or fractions of seconds
- As a general rule to prevent unintentional camera shake you should avoid handholding your digital cameras at shutter speeds slower than 1/ 2x focal length
- Using a tripod can help eliminate camera shake when using slower shutter speeds
- The visual blur and suggestion of movement occurs because the subject is moving against a static background
- Layering motion of different subjects moving different directions at different speeds can set up interesting dynamics within a photograph
- Fast shutter speeds can make normal subjects appear to freeze in the air
- When photographing people running relatively close to the camera a shutter speed of 1/ 1000 second or faster should freeze most motion
- The distance the subject is from the camera, the speed of the subject, and the focal length of the lens will affect whether the subject is sharp or blurred
- Slow shutter speeds combined with panning can help isolate the subject from a busy and distracting background
- A tripod combined with a long exposure can capture the fireworks trail-f/ 6.3
- Water movement can be empathized with long exposures
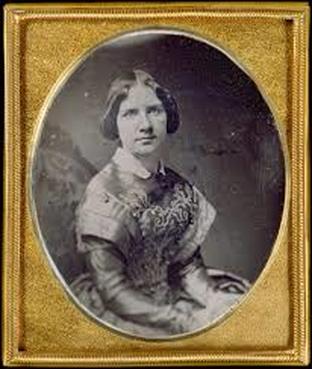
Daguerreotype
The daguerreotype was first discovered in 1839 by Louis Jacques Mande Daguerre. The process to making a daguerreotype required great care. The silver -plated copper plate had first to be cleaned and polished until the surface looked like a mirror. Next, the plate was sensitized in a closed box over iodine until it took on a yellow rose look. The plate was then transferred to the camera. After exposure to light, the plate was developed over hot mercury until an image appeared. To fix the image , the plate was immersed in a solution of sodium thiosulfate or salt and then toned with gold chloride.
Cyanotype
The cyanotype process was first introduced by John Herschel(1792- 1871) in 1842. the mixing chemicals that go into the making of cyanotype is potassium ferricyanide and Ferric ammonium citrate (green) are mixed with water separately. The two solutions are then blended together in equal parts.
The first thing I did to create my cyanotype was come up with my design. I kept arranging different objects, until I found one design that I liked. Which was the moon and two leaves around it. We put the design on a hard cardboard surface and then we put a glass cover on top.( We mix ammonium ferric citrate and potassium ferricyanide in water to get the solution and that's where we put the print into).
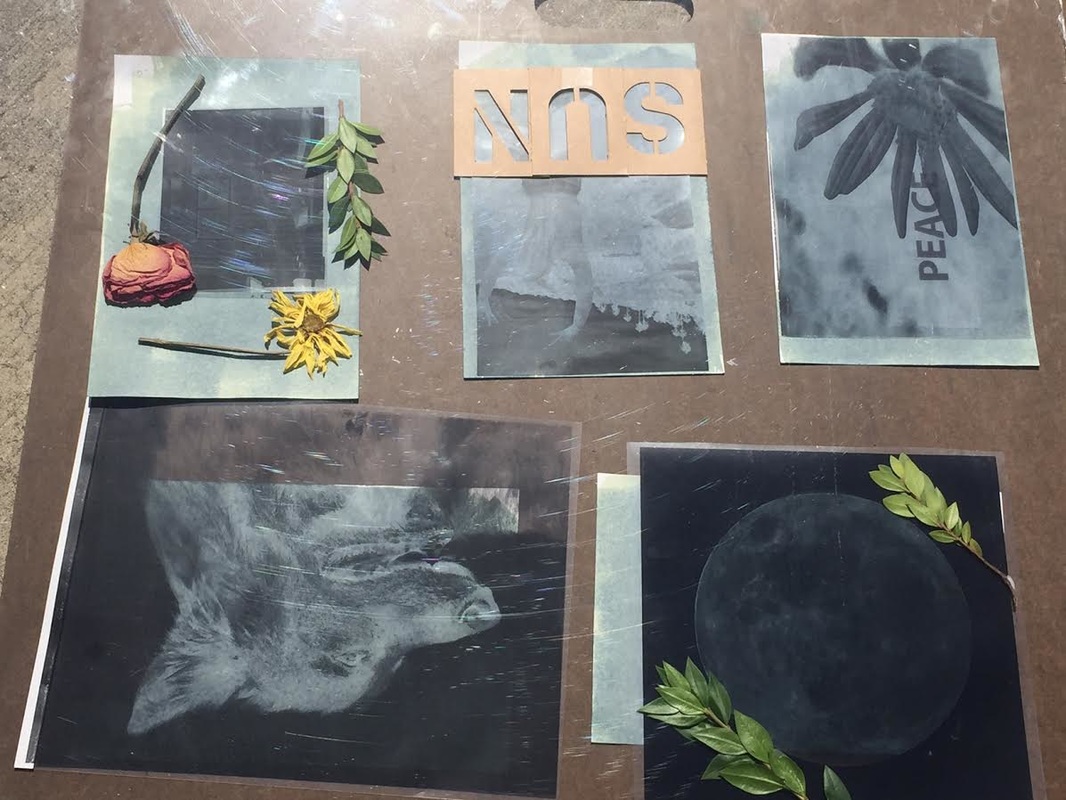
We then took the prints outside and put it down on the ground and let just sit there for about 5 minutes.
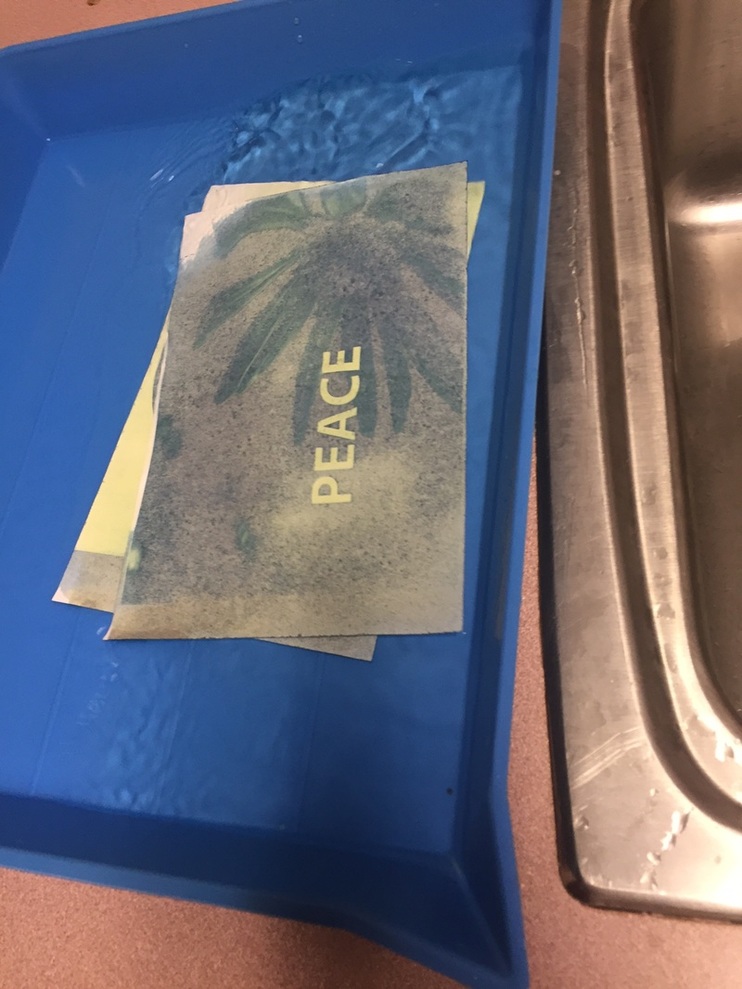
After the 5 minutes were up, it turned out to have a blueish/green color to it. We took the images back inside and out then put them in cold water.
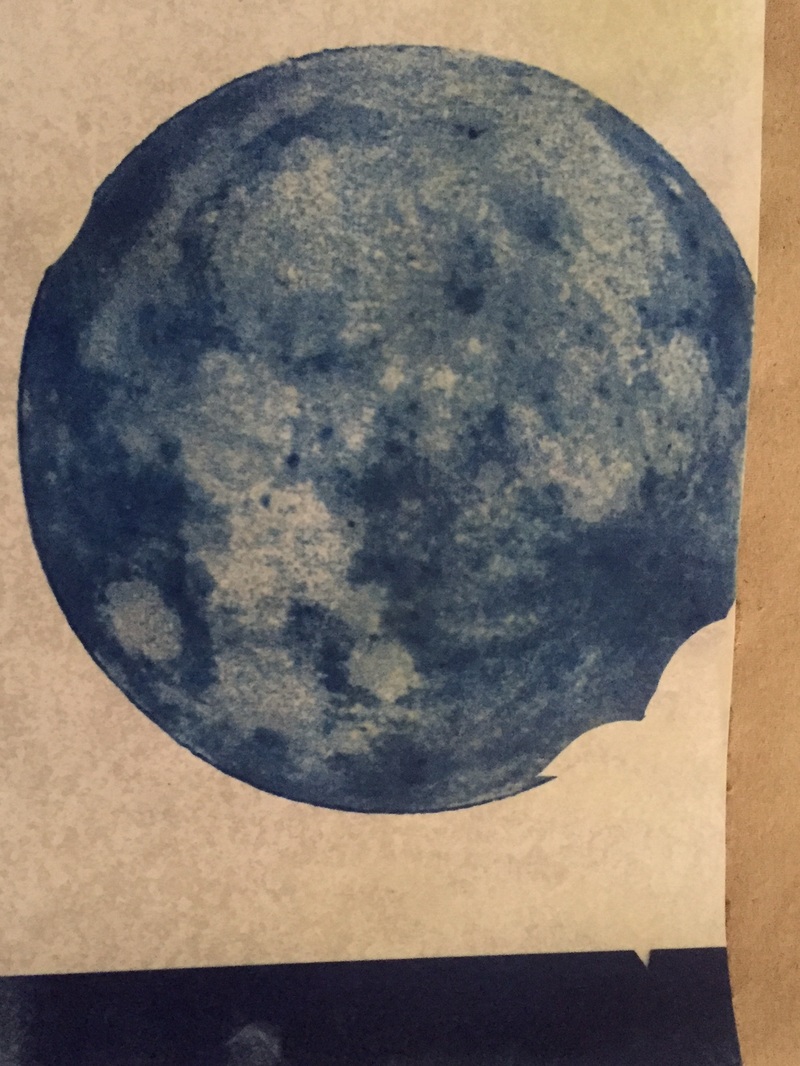
After we took the print out of the water we let it dry. The water removes any other exposed chemicals. The end product is a blue color, you then could hang it up or do what you like with it.
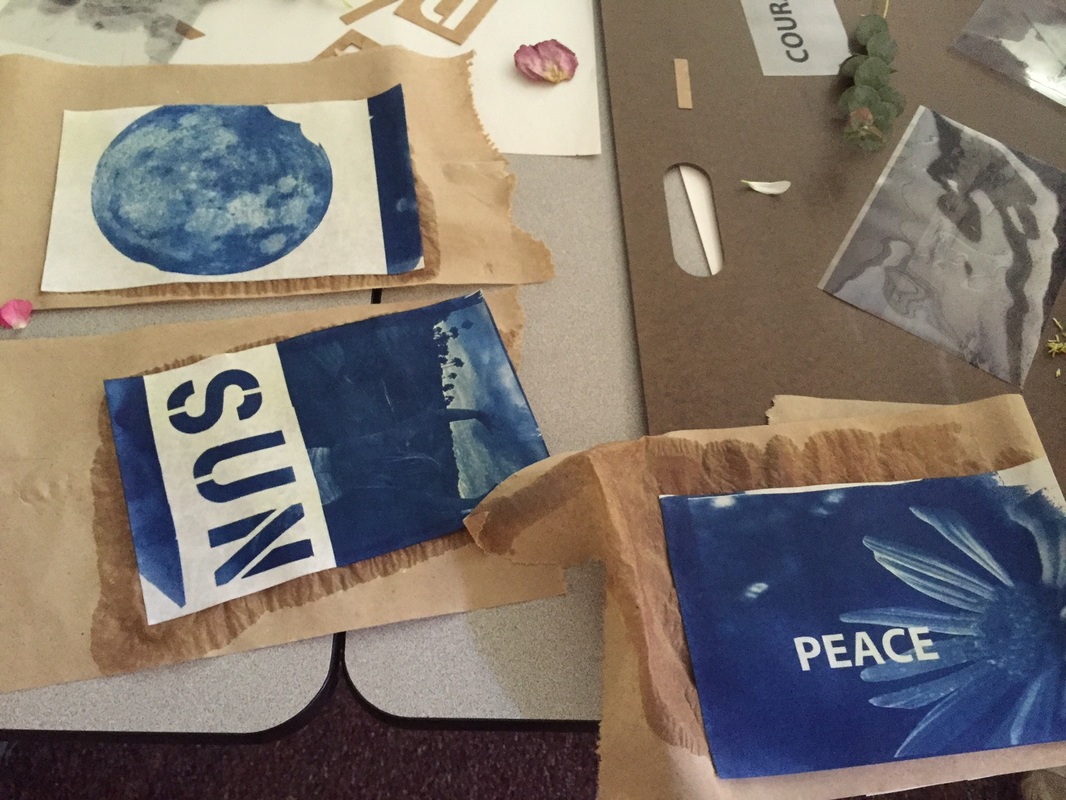
These are just some of mine and my classmates end product of our cyanotypes.
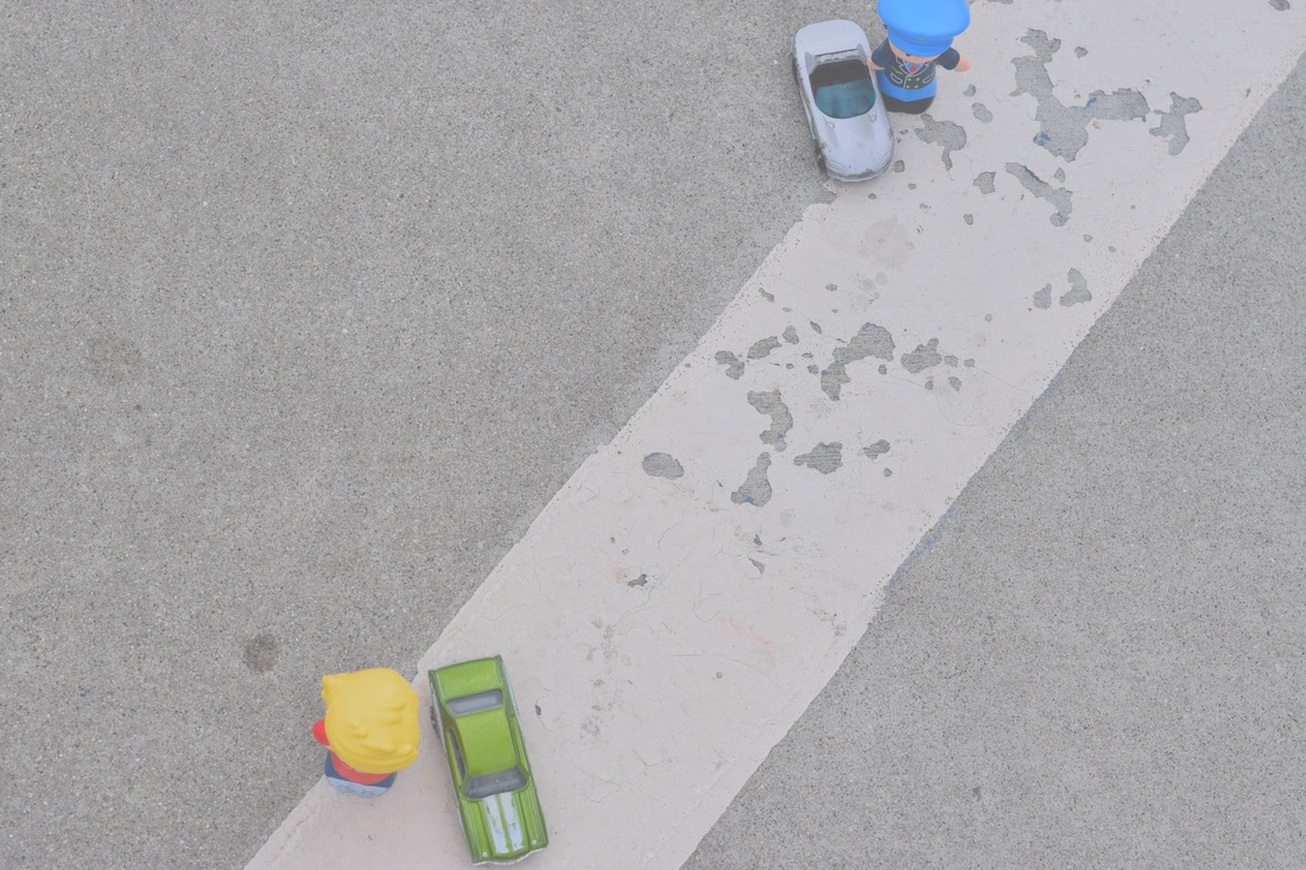
The Lucky Racer
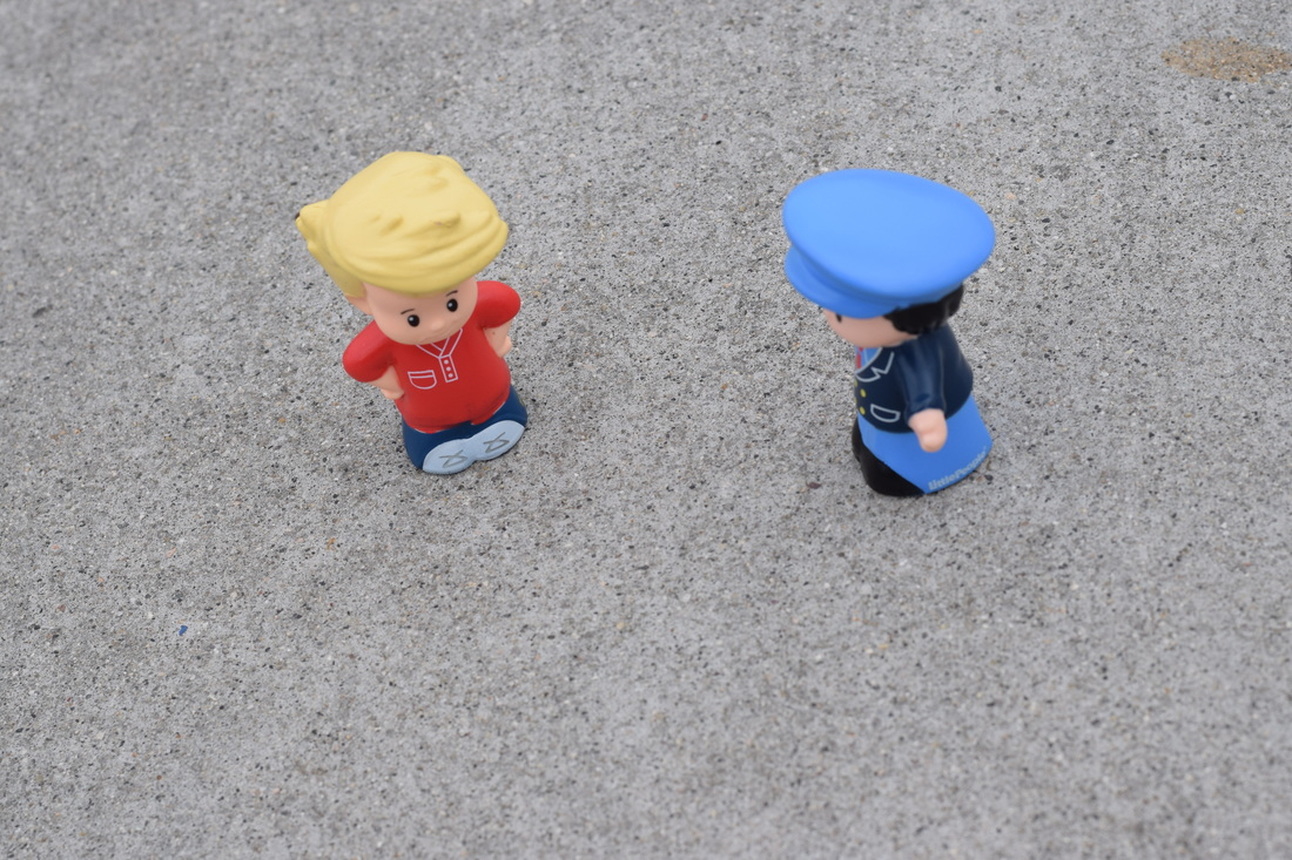
The Meet,
Aperture:f/8, Shutter Speed: 1/1000, ISO:400
It all started with two brothers( Tim and Jim). They both thought they had cool and fast cars. Soo they decided to race to see who actually had the faster car. Jim had a monster truck and Tim had a regular but yet a cool car. Of course Jim thought he was for sure going to win becuase he had the better car. Let's see what happens...
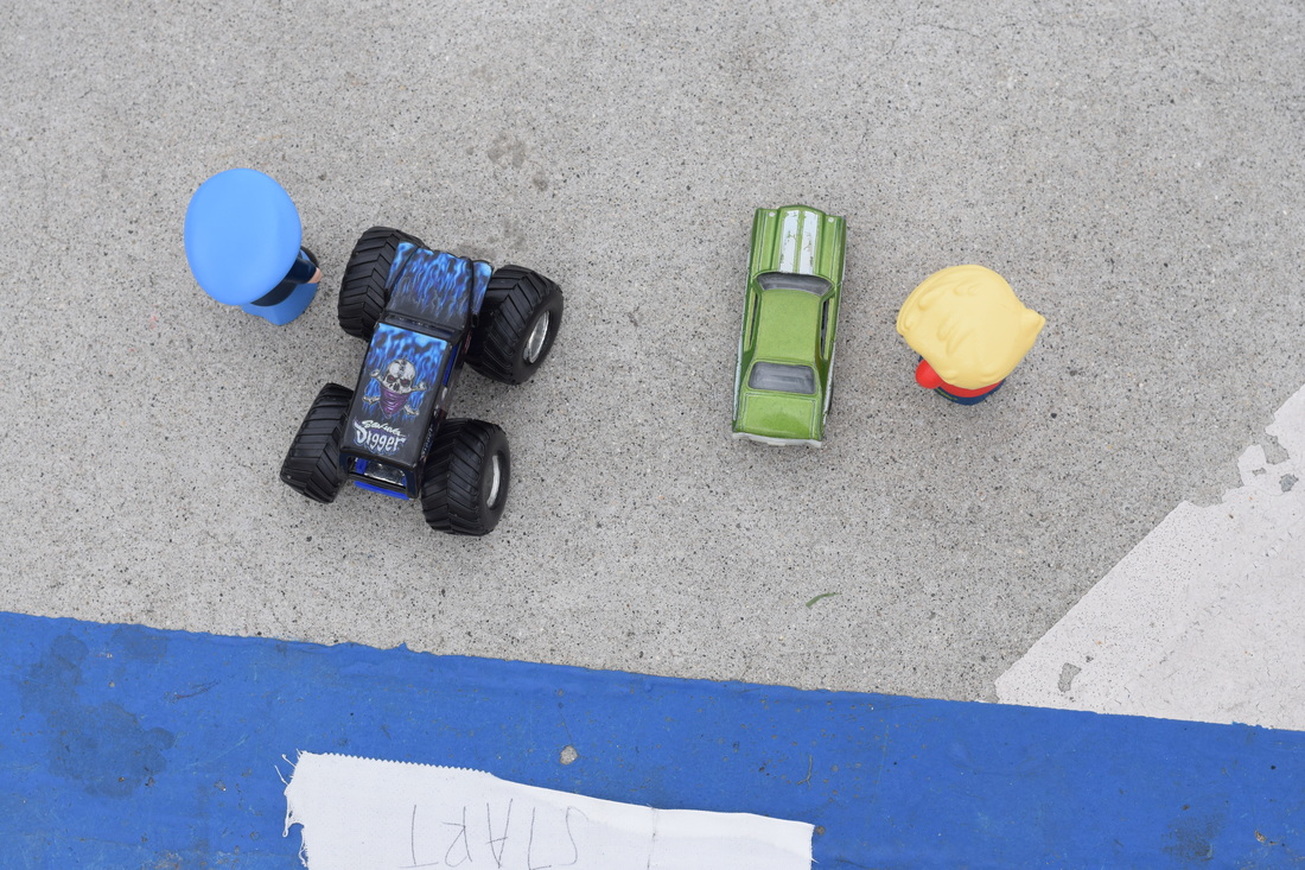
The Start,
Aperture: f/16, Shutter Speed:1/200 , ISO:400
Tim and Jim found a spot to have their race at. They positioned themselves at the start line and then they were off ! In the lead was Jim with his monster truck. Jim was very confident that he was going to win because of how far ahead he was from Tim. But then something happened to Jim.
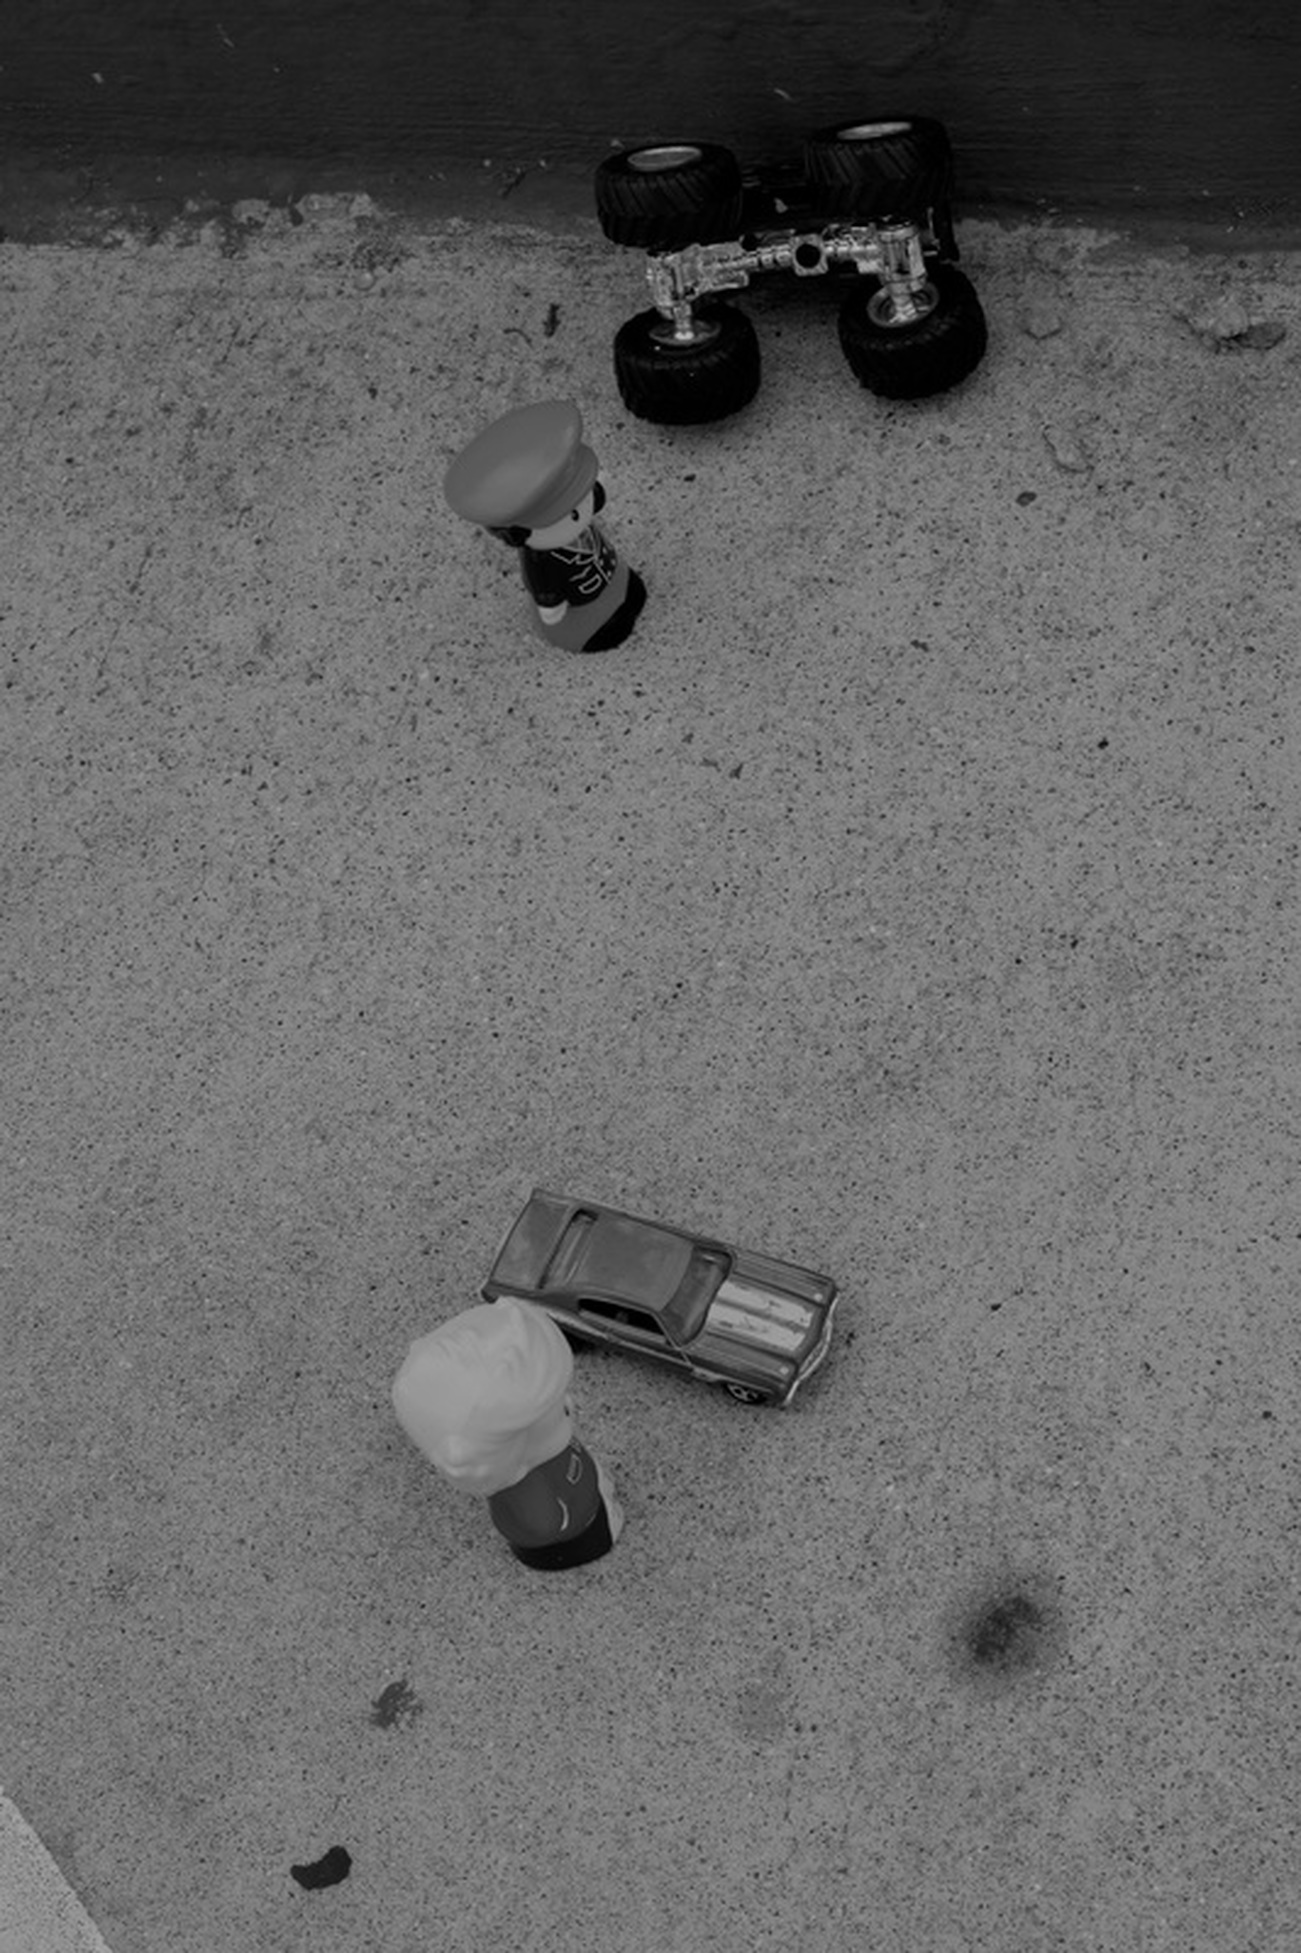
A Dark Hit,
Aperture:f/16 ,Shutter Speed:1/250, ISO:400
Jim was driving very fast that he lost control and he crashed to a wall. Jim was fine but his truck wasn't. He was devastated, he didn't know how he was going to win the race if his truck was destroyed. Soon his brother passed him, without stopping to ask if he needed help. Tim continued racing.
A Lucky Save,
Aperture:f/16 ,Shutter Speed:1/1250, ISO:400
Then out of nowhere a car appeared in front of Jim. He got in the car and drove to catch up to his brother. He kept driving faster and faster until he was next to Tim. Tim was surprised that his brother had caught up with him even after he crashed. The two brothers continued racing and then something else happened..
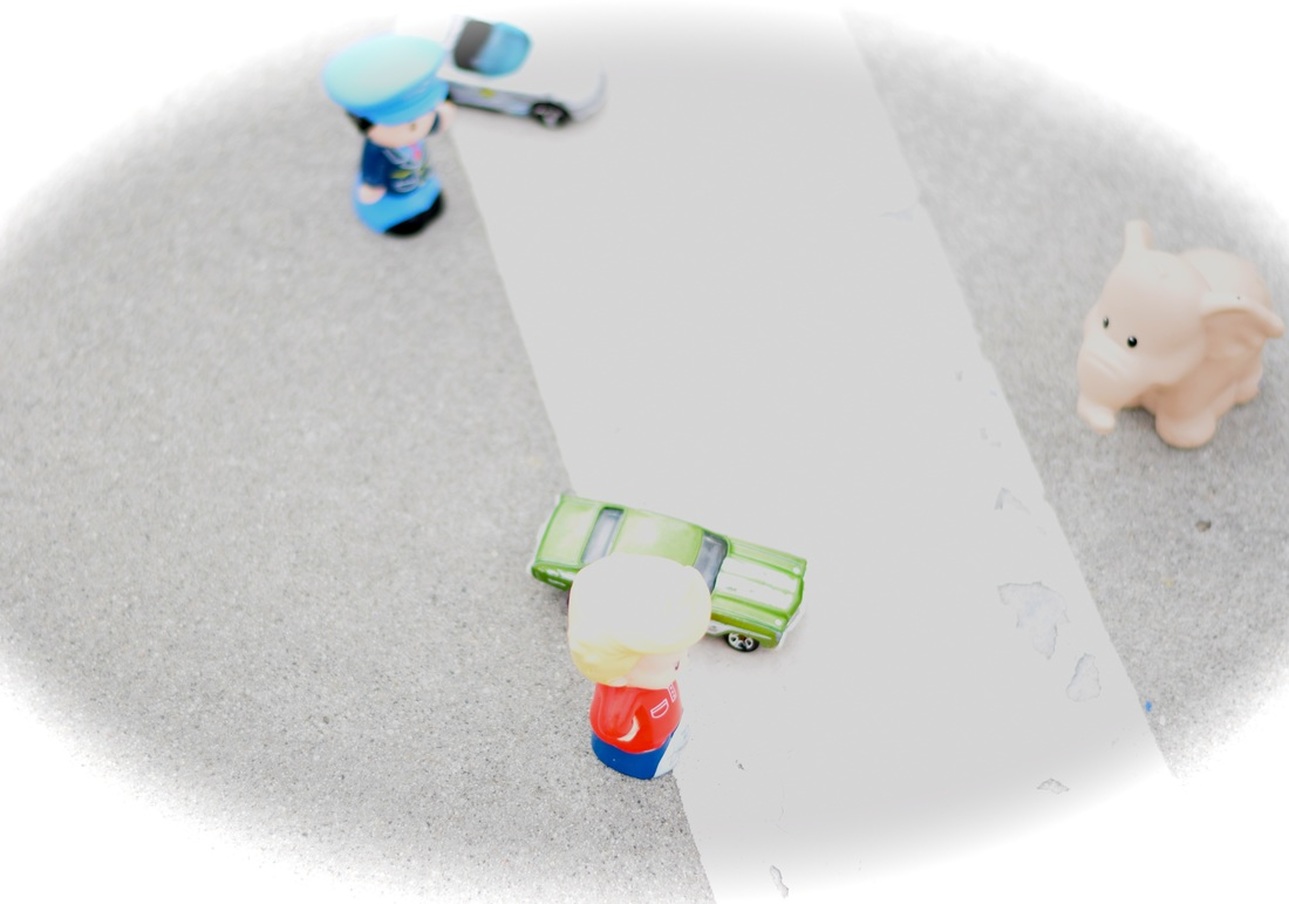
NOO! Another Clash
Aperture:f/1.8 Shutter Speed:1/4000 ISO:400
As they were racing, all of a sudden an elephant walked in the middle of the road and got in their way. They had to slow down and let the elephant pass by. The 2 brothers were surprised to see an elephant just walking across the road. After the elephant passed Tim and Jim wasted no time and got back to racing.
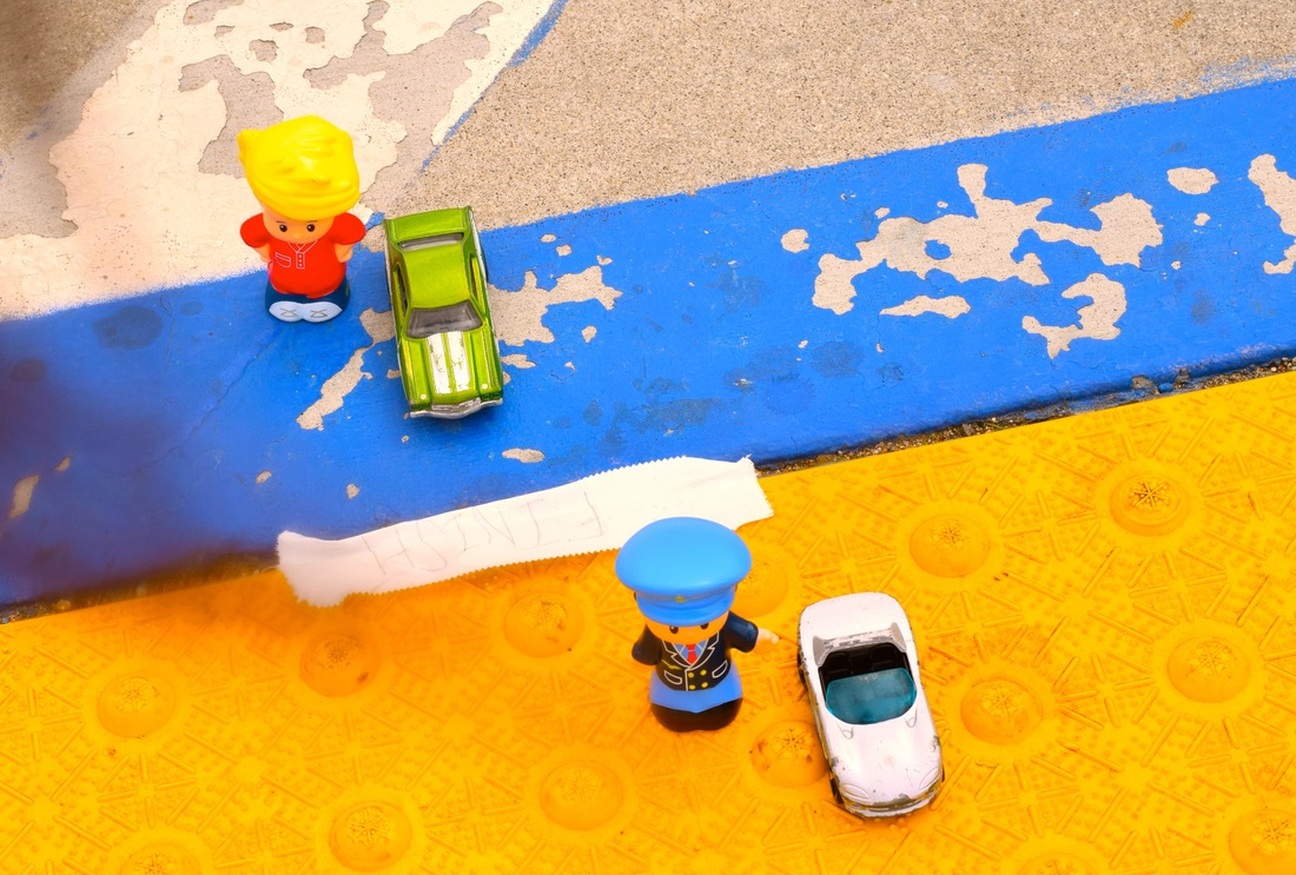
The Lucky Win,
Aperture:f/16 Shutter Speed:1/250 ISO:400
Both brothers were very determined to finish the race. As they kept racing they could see the finish line. Then Jim pressed on the gas very hard that he ended up winning the race! Soon after Tim got to the finish line. Even though Jim didn't have his monster truck he still won the race. Then Jim and Tim decided to go get some pizza. The End.
Aperture
Aperture f/1.8, Shutter Speed 1/2500th of a second, ISO 200
|
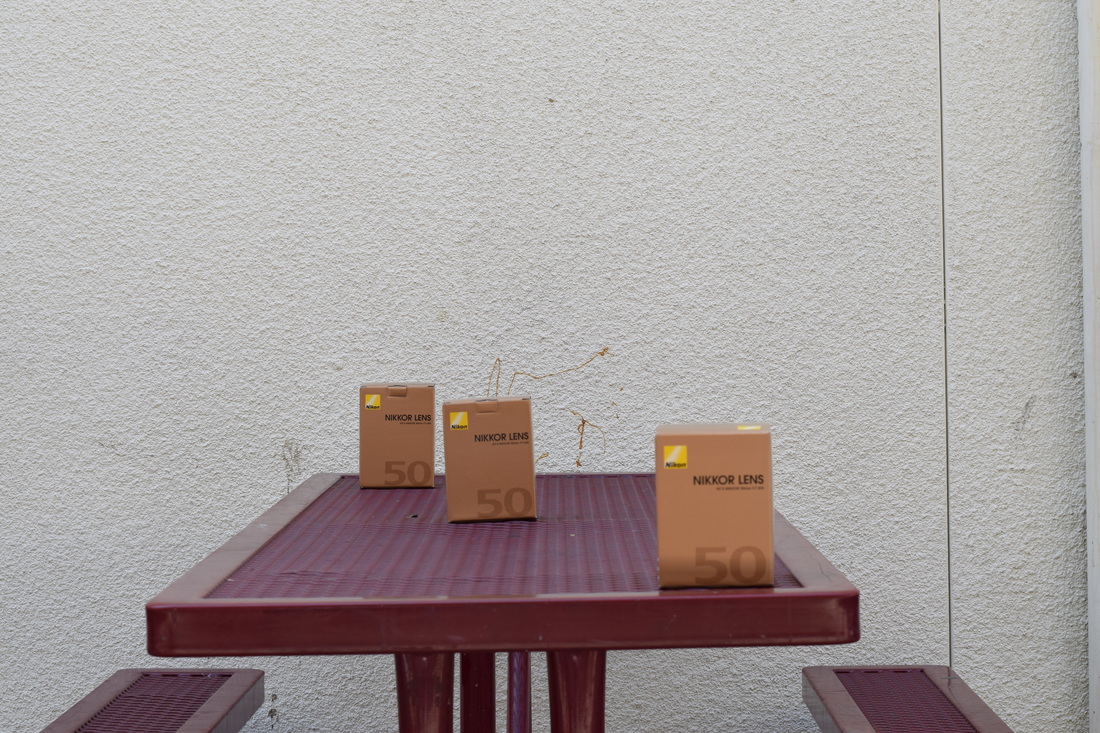
Aperture f/8, Shutter Speed 1/125th of a second, ISO 200
|
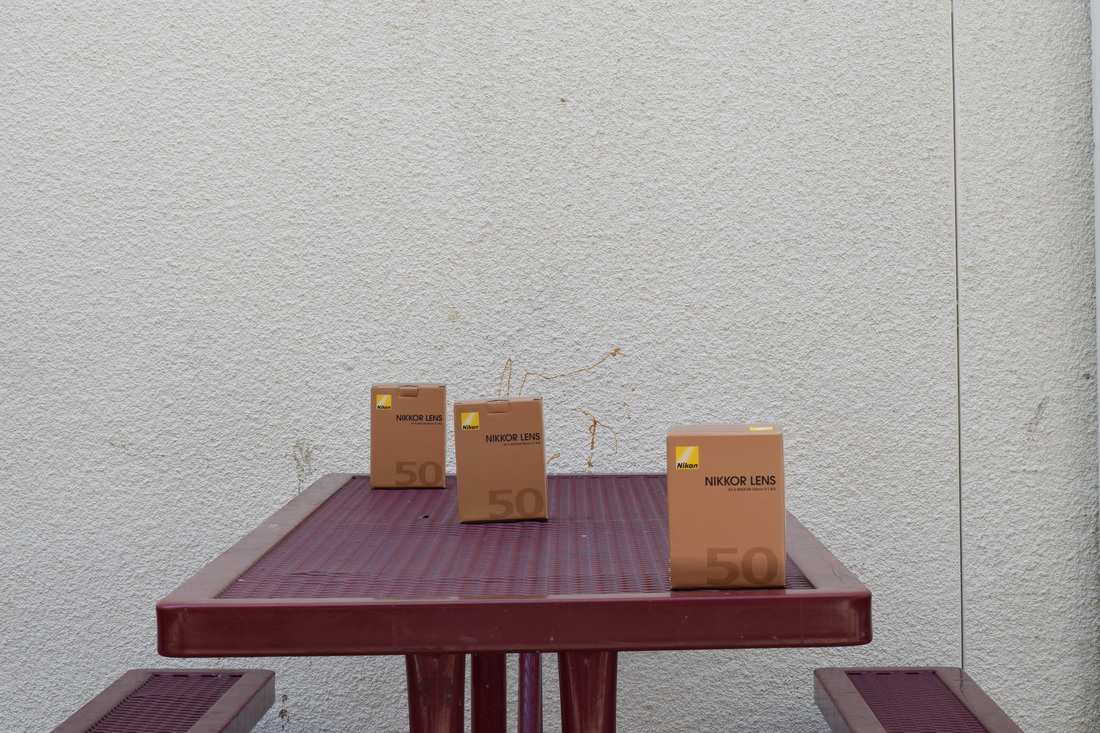
Aperture f/16, Shutter Speed 1/30th of a second, ISO 200
|
In the first picture I saw that the box in the far left was the box that had the most blur to it. The box in the middle was a bit blurry but not as much blurry as the box in the far left . The box that was in the right didn't have any blur to it. In the second image, all three boxes were all equally blurred, the photo was also brighten. In the last image the box in the right was the only box that was brighten. Each photo came out differently in that one image two boxes were very blurry and the second image the boxes were similar and bright and the last image the boxes weren't close as blurry as the other two images. The different apertures made the images all change in their own way.
Digital Camera Basics
DSLR Camera Basics
What DSLR stand For
Stands for Digital Single Lens Reflex.
A DSLR is a digital camera that uses mirrors to direct light from the lens to the viewfinder, which is a hole on the back of the camera that you look through to see what you are taking a picture of.
Exposure
The amount of light collected by the sensor in your camera during a single picture.
If the shot is exposed too long the photograph will be washed out
The 3 primary controls your camera uses for exposure are aperture, shutter speed, and ISO
Before taking a picture consider these three thongs
Aperture
Shutter speed
ISO
Aperture in a camera
Simply put, aperture is a hole within a lens, through which light travels into the camera body
Size of Aperture- large versus Small Aperture
In photography, aperture is expressed in f- numbers.
Small aperture increase the depth of field, bringing both the main subject and background into focus
Large aperture soften background details
Depth of Field (DOF) is the distance to which objects behind and in front of the focal point appear to be in focus
Shutter Speed
Also known as “exposure time”, stands for the length of time a camera shutter is open to exposure light into the camera sensor
If the shutter speed is fast, it can help to freeze action
If the shutter speed is slow, it can create effect called “motion blur” where moving objects appear blurred along the direction of the motion
How shutter speeds are measured
Shutter speeds are typically measured in fractions of a second, when they are under a second
Rule of thumb for shutter speed
The slowest shutter speed for handheld photography is 1/60. Anything lower then that should either be on a tripod or on a straight, solid surface
Any slower handheld shutter speed begins to get motion blur and your photography may be out of focus
ISO
Is the level of sensitivity of your camera to available light
The lower the ISO number, the less sensitive it is to the light, while a higher ISO number increases the sensitivity of your camera
The component within your camera that can change sensitivity is called “image sensor” or simply”sensor”
With increased sensitivity, your camera sensor can capture images in a low=light environment without having to use a flash
General Rule of Thumb
Bright and sunny, 100 iso
Cloudy. 250 iso
Indoors,500 iso
Night time without a flash, 1600 iso
Modes on the DSLR
M-Manual Control over aperture and shutter
A-Aperture Priority
S-Shutter Priority
P-Camera sets shutter speed and aperture
How to hold a DSLR
Have the camera strap around your neck at all times and hold the camera by the lens and hand grip of possible- treat with care!
Camera Obscura
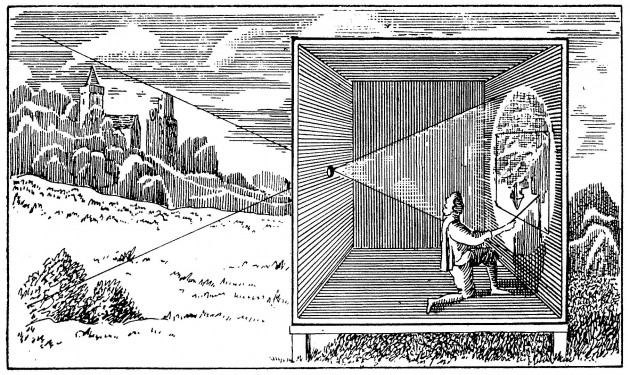
|
|
|
Camera Obscura is when light travels in a straight line and when some of the rays are reflected from a bright subject through a small hole.
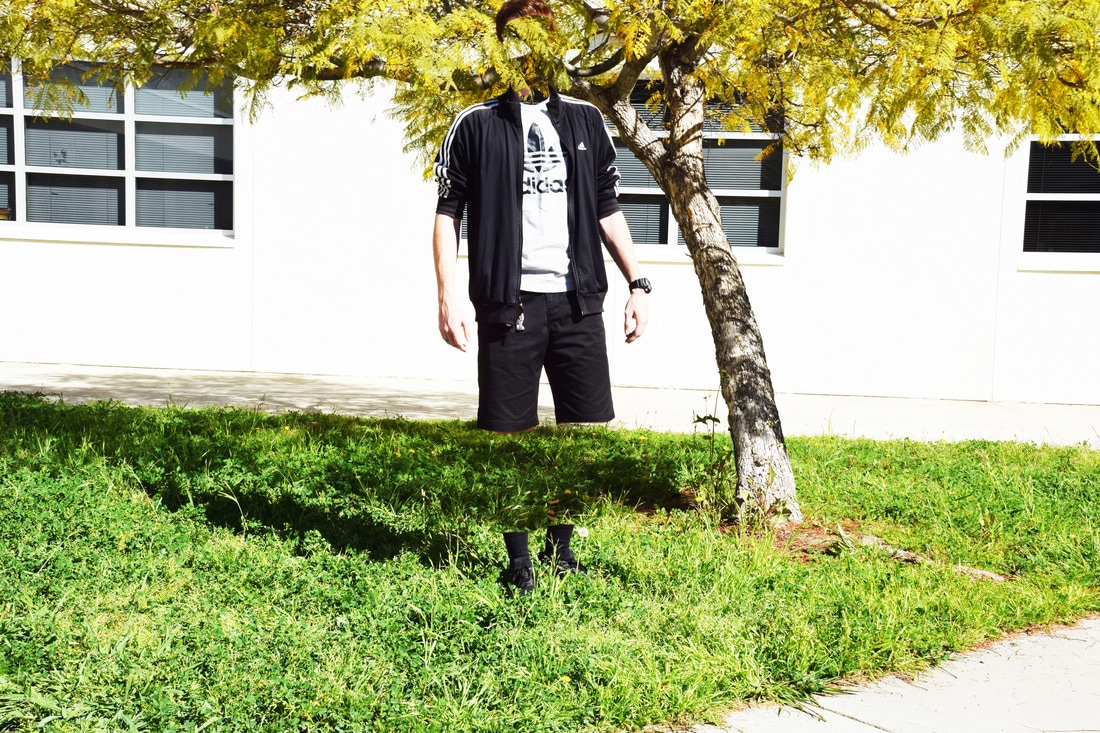
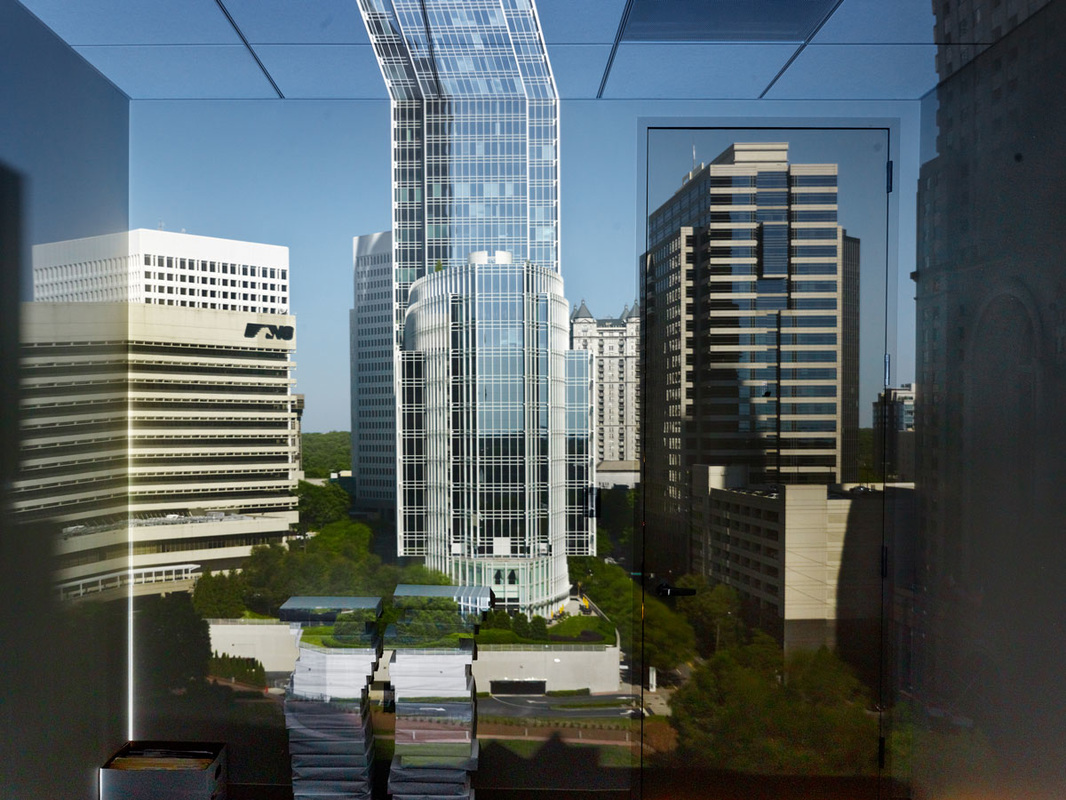
Surrealistic Selfie |
|
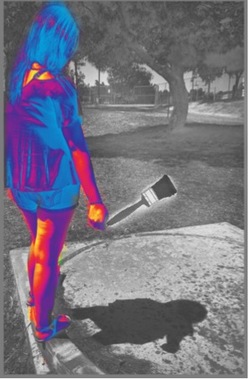
For my surreal selfie I took a picture of myself showing my shadow. It started off really simple. I completely changed the colors of the whole picture. For the background I changed it to all black and for myself I changed it to rainbow colors. I also added a paint brush, because of the idea I had behind this photo. I took my photo at my school. I decided that was a good place to take it because i liked the background with all the open space. This image relates to me because I’m a very laid back person and that’s the feeling I get when i look at the background. It’s simple, but yet not too simple.
The apps I used to create this image was Snapseed,Pixlr and Photoshop Express. They were very useful when creating this image.
The apps I used to create this image was Snapseed,Pixlr and Photoshop Express. They were very useful when creating this image.
